TRAVERSE Global v11.1
Mobile Warehouse Sample Workflows
You use Mobile Warehouse functions in the same manner you use desktop TRAVERSE functions. The advantage of using Mobile Warehouse is using mobile devices such as tablets, Zebra devices, or cell phones to perform the functions at locations where a desktop computer may not be available, as long as the mobile device has a current browser (recommended: Chrome or Edge) and a(n) (Internet) connection to the Mobile Warehouse Portal.
Reminder: To save the entry:
- If you are using a warehouse-type device such as a Zebra device or a phone, press the 'Go' button on the on-screen keyboard.
- If you are using a browser on the desktop, the entry is saved when you tab out of the field.
In TRAVERSE (desktop):
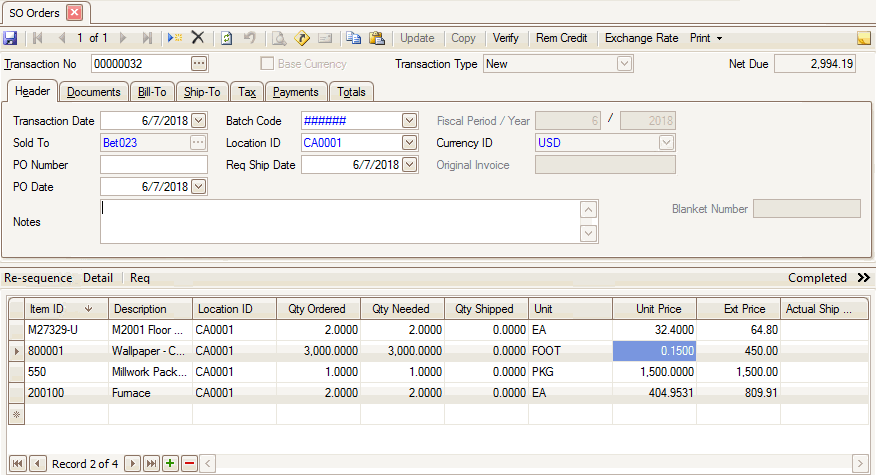
- Enter a new Sales Order transaction.
DESKTOP SCREENSHOT
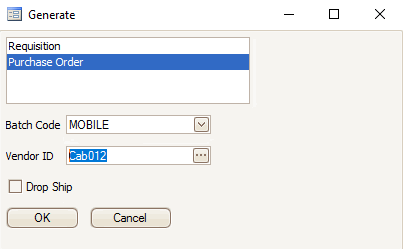
- Generate purchase orders as needed using the Req button on the menubar, OR use the PO Transactions function.
DESKTOP SCREENSHOT
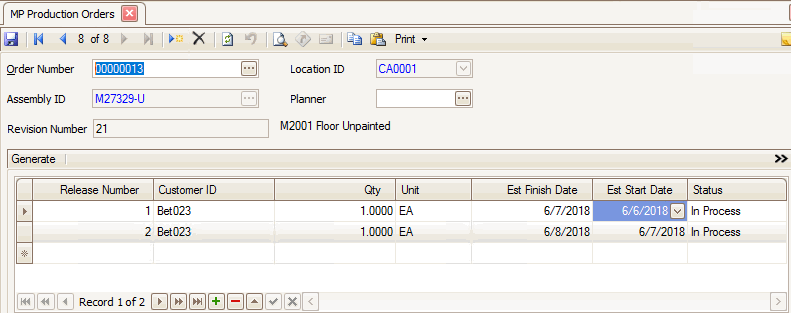
- Create a production order if necessary and release it. The Status should be ‘In Process’ in order for the Mobile Warehouse to access it.
DESKTOP SCREENSHOT
- Create a picking list for use with Mobile Warehouse by using WM Release Orders.
In Mobile Warehouse (Device):
Log in to the Mobile Warehouse application:
For the User ID and Password, enter the user name and password that was created in TRAVERSE for the Mobile Warehouse user.
DEVICE SCREENSHOT

**Remember to press ‘Go’ (onscreen keyboard) or Tab (Enter) key (desktop keyboard) to save the field data and move to the next field.**
Receive items from purchase orders using the Receiving-->Purchase Orders option (On Device)
- Enter the Purchase Order number to receive against in the Document No field. Press ‘Go’ (onscreen keyboard) or tab (desktop keyboard). The Items tab should display.
DEVICE SCREENSHOT
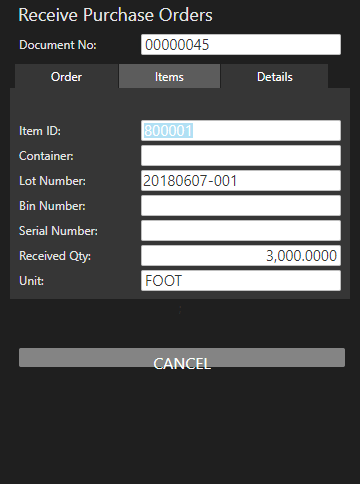
- Scan or enter the Item ID you are receiving.
- If applicable, scan or enter the Container and/or Bin Number into which the item will be placed.
- If the item is lotted, scan or enter the Lot Number. If the item is serialized, scan or enter the Serial Number. If the item is lotted and serialized, scan or enter that information in the appropriate fields.
- Enter the quantity of the item you are receiving in the Received Qty field. The Unit should display the base unit of measure for the item.
- To verify the item has been received, go to the Details tab. A list of received items will display. If necessary, to view more information, click/touch the ellipsis to expand the details for the line.
DEVICE SCREENSHOT
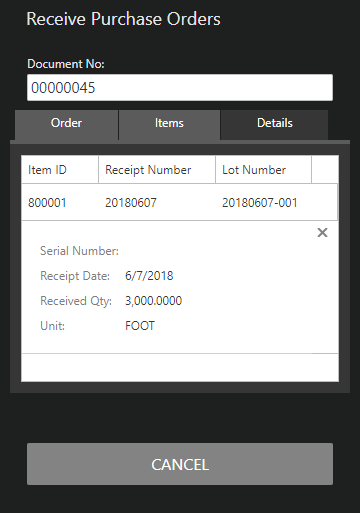
- Repeat steps 2 through 5 for each item you are receiving on the purchase order. To enter a different purchase order, press/click the CANCEL button to clear the Document No. field, then enter or scan the next purchase order number to receive.
- To return to the menu, use the CANCEL button when all the fields are blank.
Issue items to production order using the Issue-->Raw Materials option (On Device)
- Scan or enter the Pick ID from the WM picking list.
- Scan or enter the production order number to which you are issuing the item in the Order No. field.
- Scan or enter the Release Number.
- Scan or enter the Item ID of the item you are issuing to the production order.
- Scan or enter the Container and/or Bin Number, as applicable.
- Scan or enter the Lot Number and/or Serial Number, as applicable.
- Enter the quantity you are issuing to the production order in the Picked Qty field.
- The Remaining Qty and the Unit fields are read-only fields.
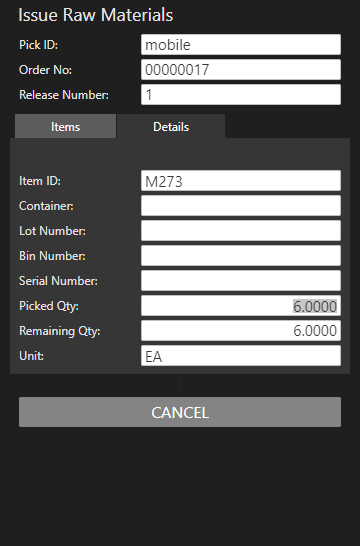
- Repeat steps 4 through 7 for each item you are issuing to the production order. Before you clear the screen, you can view the items you have issued on the Details tab.
- To issue raw materials for a different production order, press/click the CANCEL button to clear the fields.
- To return to the menu, use the CANCEL button when all the fields are blank.
Receive by-products to a production order using the Receiving-->By-Products option (On Device).
- Scan or enter the production order to which you are receiving the by-product in the Order No field.
- Scan or enter the Release No.
- Scan or enter the Item ID for the by-product you are receiving.
- Scan or enter the Container and/or Bin Number, as applicable.
- Scan or enter the Lot Number and/or Serial Number, as applicable.
- Enter the quantity you are receiving to the production order in the Received Qty field.
- The Unit field displays the by-product unit of measure.
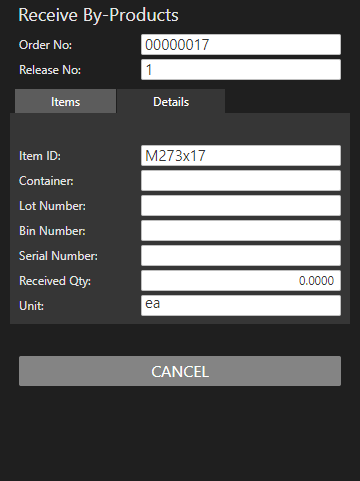
- Repeat steps 3 through 6 for each by-product you are receiving to the production order. Before you clear the screen, you can view the items you have received on the Details tab.
- To receive to a different order, press/click the CANCEL button to clear the fields.
- To return to the menu, use the CANCEL button when all the fields are blank.
Receive finished goods into inventory using the Receiving-->Finished Goods option (On Device)
- Scan or enter the production order from which you are receiving the finished product in the Order No field.
- Scan or enter the Release No.
- Scan or enter the Container and/or Bin Number, as applicable.
- Scan or enter the Lot Number and/or Serial Number, as applicable.
- Enter the quantity you are receiving into inventory in the Received Qty field.
- The Unit field displays the finished good unit of measure.
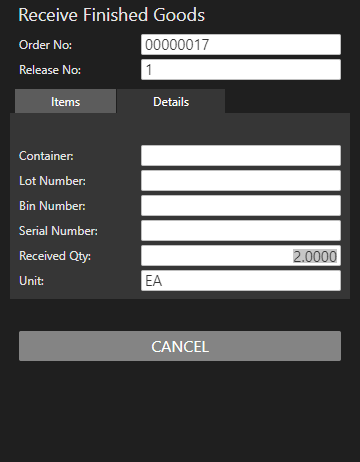
- Repeat steps 3 through 5 for each finished good you are receiving into inventory. Before you clear the screen, you can view the items you have received on the Details tab.
- To receive from a different production order, press/click the CANCEL button to clear the fields.
- To return to the menu, use the CANCEL button when all the fields are blank.
Issue items to a sales order using the Issue-->Orders option (On Device)
NOTE: Use WM Release Orders (desktop) to allow Mobile Warehouse access to issue to the SO.
- Scan or enter the Pick ID from the WM picking list.
- Scan or enter the sales order number to which you are issuing the item in the Order No. field.
- Scan or enter the Item ID of the item you are issuing to the sales order.
- Scan or enter the Container and/or Bin Number as applicable.
- Scan or enter the Lot Number and/or Serial Number, as applicable.
- Enter the quantity you are issuing to the sales order in the Picked Qty field.
- The Remaining Qty and the Unit fields are read-only fields.
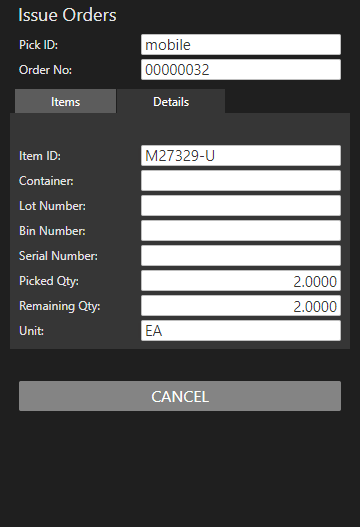
- Repeat steps 3 through 6 for each item you are issuing to the sales order. Before you clear the screen, you can view the items you have issued on the Details tab.
- To issue to a different sales order, press/click the CANCEL button to clear the fields.
- To return to the menu, use the CANCEL button when all the fields are blank.
Complete the Sales Order shipping process through TRAVERSE (desktop).
In Mobile Warehouse (Device):
Use the Lookup-->Inventory option (On Device).
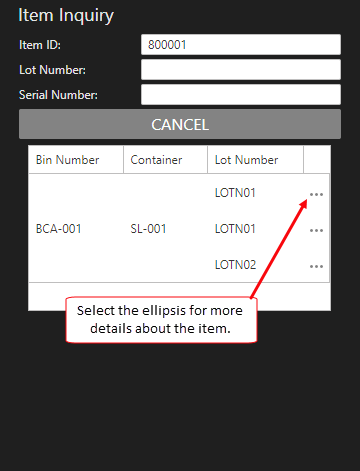
- Scan or enter an Item ID to look up.
- Scan or enter a Lot Number and/or Serial Number, if desired. Leave these fields blank to return results for all lots/serial numbers.
- The results of the inquiry will display.
 MMMMMMMMM
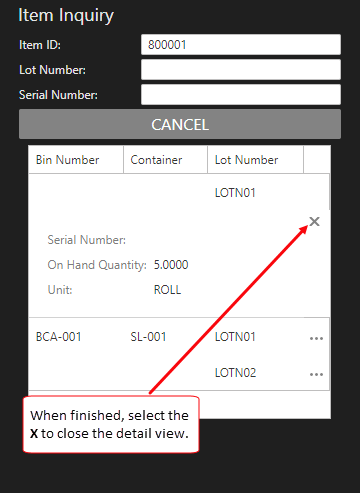
- To enter a different item, press/click the CANCEL button to clear the fields.
- To return to the menu, use the CANCEL button when all the fields are blank.
In TRAVERSE (Desktop):
- Create a new batch in the IN Freeze Quantities function.
NOTE: Add To/From item(s) in the Item ID section to limit the number of items you freeze in the selected location(s), otherwise the Freeze function will affect all items in the selected location(s).
DESKTOP SCREENSHOT
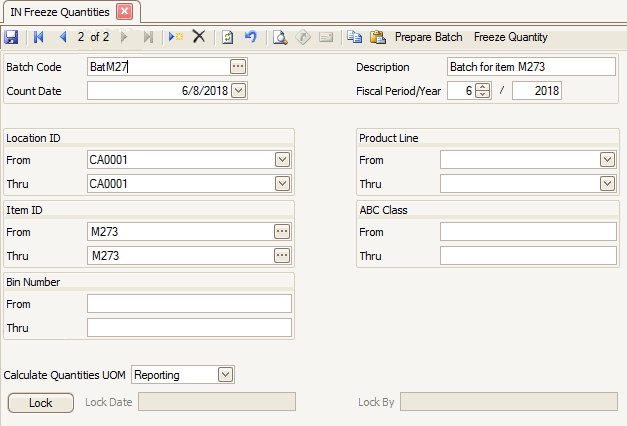
- Prepare the batch and freeze the inventory quantities.
In Mobile Warehouse (Device):
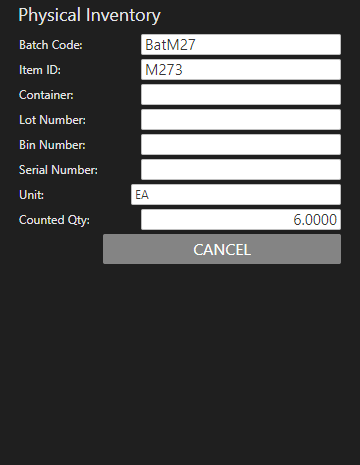
Use the Inventory Adjustments-->Physical Inventory option (On Device).
- Scan or enter the frozen quantity Batch Code.
- Scan or enter an Item ID to count.
- Scan or enter the Container and/or Bin Number, as applicable.
- Scan or enter a Lot Number and/or Serial Number, as applicable.
- The Unit of measure will display. Accept or edit the unit.
- Enter the quantity of the item you counted in the Counted Qty field.
- Repeat steps 2 through 6 as necessary to enter counts for the entire batch.
- To enter a different batch, press/click the CANCEL button to clear the fields.
- To return to the menu, use the CANCEL button when all the fields are blank.
