
Traverse Administrator Guide
Install Traverse Server Manager
Tips:
- Traverse v11 Server Manager, License Manager, and Client installations are distributed in an ISO file. Before you start the installation, you must either burn the ISO file to a CD or DVD or mount the ISO as a virtual drive on the server.
- When available during the installation process, you can click Cancel to exit the procedure or Back to return to the previous window.
-
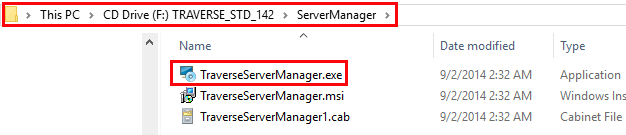
To start the installation process, go to the ServerManager directory in the ISO file and run the TraverseServerManager.exe file.
- Click Install Server.
- Click Next to install Traverse Server Manager on your machine.
- Enter the Server Hostname, Port Number, and default SYS Database for the Traverse Server Manager, or leave the defaults. Click Next to continue.
- Review the license agreement and click I accept... to accept the terms, or I do not accept... to exit setup.
- Click Next to use the default path for the Server Manager. To use a different path, enter a new path for the Server Manager, or click Browse... to search for and select a new folder. Click Next to continue.
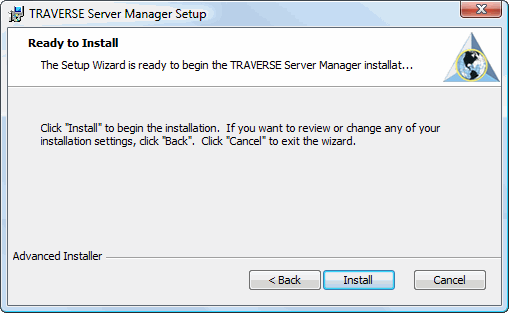
- Review the information. If necessary, click Back to go back and make any changes. When you finish, click Install.
- When the installation completes, click Finish to exit the wizard.
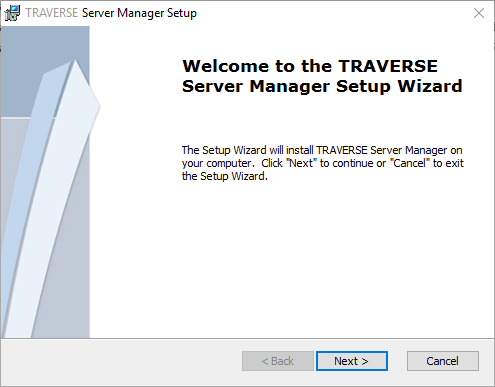
The installation wizard appears.
The Configure Server Manager window appears.

The License Agreement window appears.

The Destination Location window appears.

The Ready to Install window appears.
Note: After you install Traverse Server Manager, use the rest of the chapters in this guide to set it up and configure it. Then, install the Traverse Client on workstations that connect to the Traverse server.