
Traverse Administrator Guide
Check for Updates - Traverse Server Manager
Updates for the Traverse client must be first detected and downloaded by the Traverse Server Manager to a client-accessible folder. The Traverse client can then take the updates from the server and install them (see Check for Updates - Traverse Client for more information).
Follow these steps to check for Traverse Client Updates.
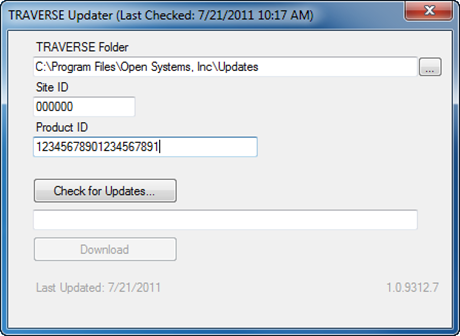
- Click Check for Updates… in the Traverse Server Manager Help menu. The Traverse Updater dialog box appears.
-
Enter the file location of the networked folder with which you will share the updates with the Traverse client computers in the Traverse Folder field (this folder will need to have proper Windows sharing permissions).
-
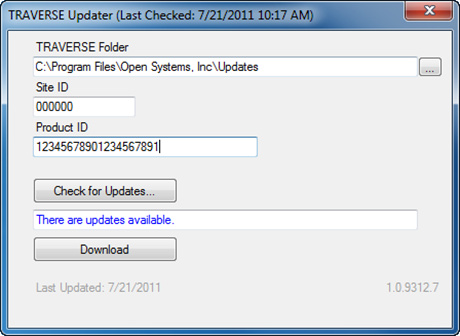
Click Check for Updates…. A message will appear if updates are available.
-
Click Download. The updated files will be downloaded to the selected Traverse folder.
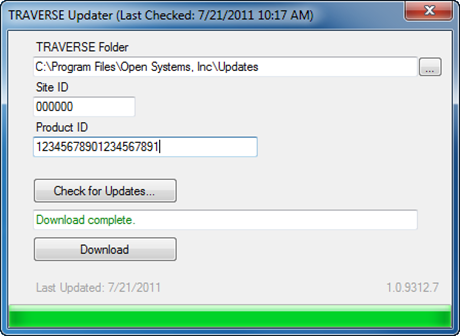
- When the Download complete message is displayed, close the Traverse Updater dialog box. Updates are now available for download by Traverse clients.