Traverse v11.2 Administrator Guide
System and Security Database Setup
After you install the Traverse Global Server Manager, you must set up the System (SYS) and Security databases. The SYS database contains information about Traverse companies, security, menus, user settings, currency, exchange rates, and language. The system database name can be allowed from 3 to 50 characters in length. The Security database contains information about companies, users, groups, and the associated security settings and permissions for the Traverse system.
Note: You may be required to enter a valid Product ID when you log in to Traverse Global Server Manager for the first time.
To set up the SYS database, follow these steps:
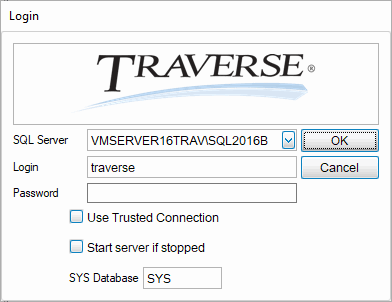
- Open Traverse Global Server Manager. The Login dialog box appears.
- In the SQL Server field, enter the SQL or SQL Express server where you want to load the Traverse database or select the server from the list.
-
Enter a Login name. It is good practice to use a login name with administrator rights as you will be doing database operations such as setting up users and creating databases, which require an administrator level login.
Note: If you use a trusted connection for your login and password, both the Login and Password fields are disabled. If you do not use a trusted connection, you must enter a login name. If a password is set up on the server for the login you entered, you must enter the password.
- Select Use Trusted Connection if you plan to use your Windows login and password for access to Traverse Global Server Manager.
- Select Start server if stopped if the Microsoft SQL Server has been stopped for some reason. NOTE: You must run the Traverse Global Server Manager as "admin" to be able to start SQL Server.
-
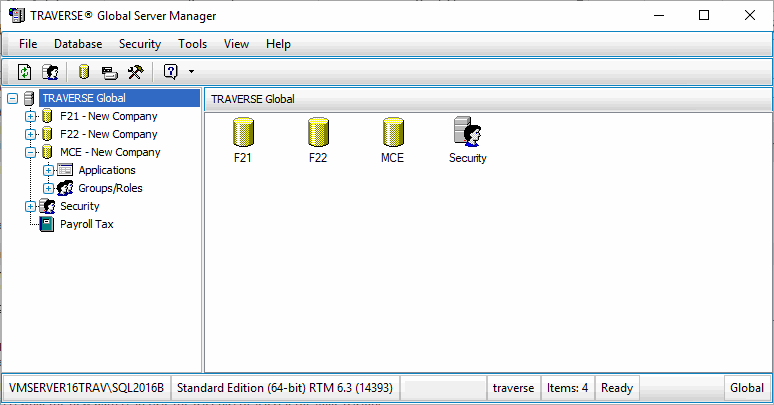
Click OK to log in. The Traverse Global Server Manager main window appears.
Note: If you click Cancel, the Traverse Global Server Manager main window appears with blank panels. If you are already logged into a Microsoft SQL Server, the Server Manager main window displays information for the Microsoft SQL Server you are currently logged into.
-
Expand TRAVERSE Global in the left column. If the SYS database is not yet installed, the Install System Database dialog box appears.
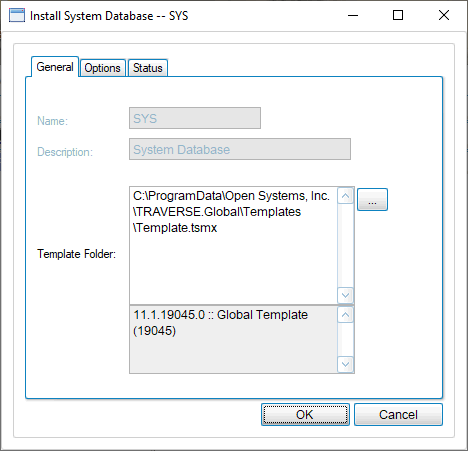
The Name and Description fields are unavailable.
The Template Folder field displays the default path where the Traverse Global Server Manager template file is installed. Should you need to locate the Template.tsmx file, use the browse button to search for it.
Click on the Options tab.
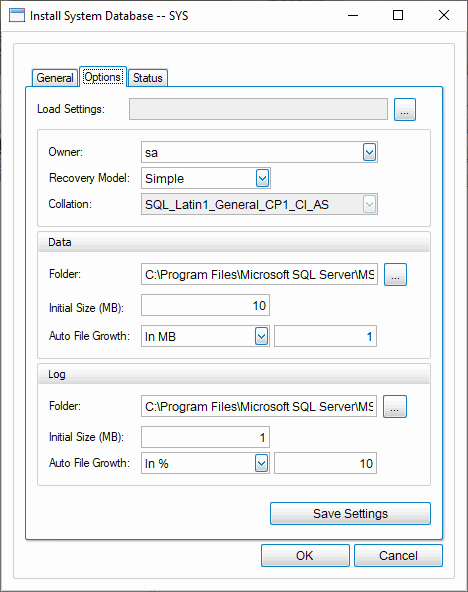
When you create the SYS database, accept the default of 10 MB in most cases. If the initial size that appears in the Initial Size field is not large enough for what your database requires, change the number. Once created, the database size automatically grows as you add information. To change how the database grows (whether by megabytes or by percentages), use Microsoft SQL Server Management Studio, which is installed with Microsoft SQL Server.
Other settings are recommended defaults. Change the values only if necessary. Click the Save Settings button if you have changed any of the default values.
- Click OK. The Status tab shows Traverse Global Server Manager’s progress as it creates tables, views (queries for tables), and stored procedures for the SYS database.
- If you have not created a Master Login, the Create Master Login dialog box appears.
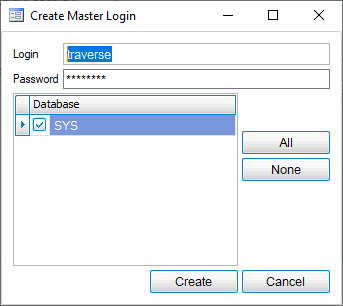
Enter a login and password for the SYS database. Click Create. A Login Successfully Created message appears. Click OK. NOTE: The master login must be the same between the Global Server Manager and the Global License Server Manager in order for Traverse to work.
- When you finish with the System database setup, the message TRAVERSE System Database Created appears. Click OK to close the notification, and click Close to continue to the security database installation.
- The Install Security Database dialog box appears.
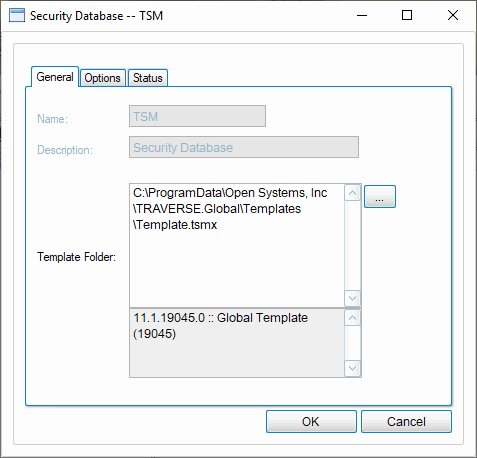
The Name and Description fields are unavailable.
The Template Folder field displays the default path where the Traverse Global Server Manager template file is installed. Should you need to locate the Template.tsmx file, use the browse button to search for it.
Click on the Options tab.
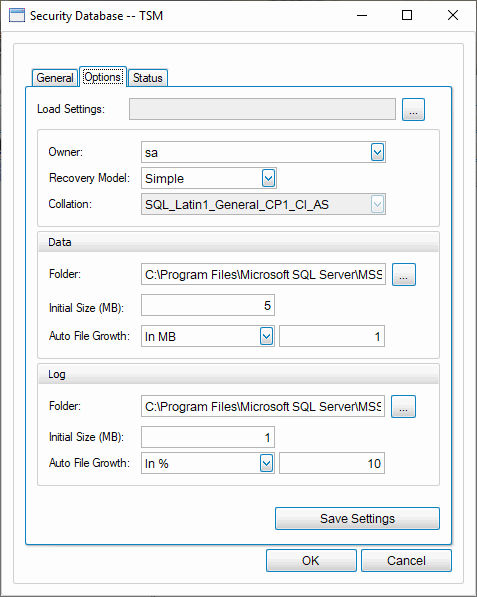
When you create the Security database, in most cases you can accept the default of 5 MB. If the initial size that appears in the Initial Size field is not large enough for what your database requires, change the number. Once created, the database size automatically grows as you add information. To change how the database grows (whether by megabytes or by percentages), use the Microsoft SQL Server Management Studio, which is installed with Microsoft SQL Server.
Other settings are recommended defaults. Change the values only if necessary. Click the Save Settings button if you have changed any of the default values.
Click OK. The Status tab shows Traverse Global Server Manager’s progress as it creates tables, views (queries for tables), and stored procedures for the SYS database.
- When finished with Security database setup, you will see a TRAVERSE Security Database Created message. Click OK. Click Close to complete the Security database creation.
Viewing System Database Properties
- Right-click on the Traverse Global database in the left column of the Traverse Global Server Manager left pane.
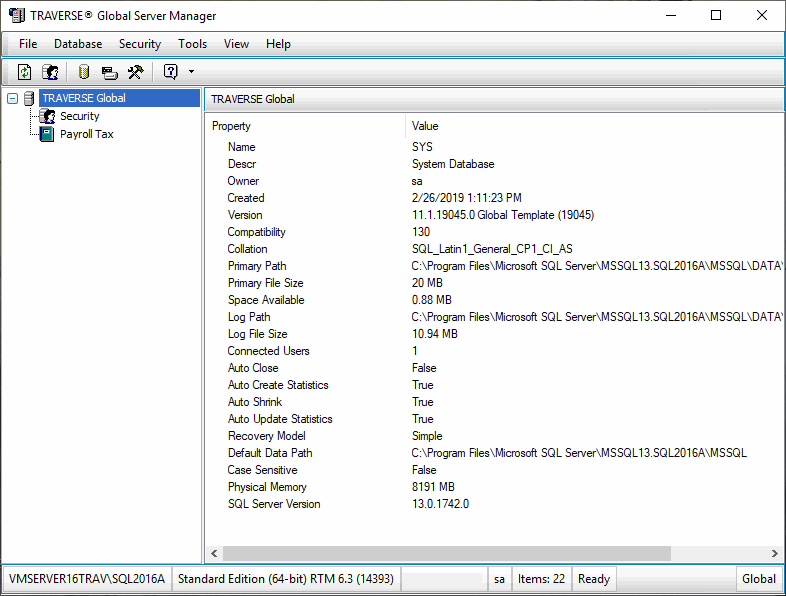
- Select System Properties to view information about the system database.
