Traverse v11.2 Administrator Guide
Lookup Table
The Lookup Table function allows you to customize lookups. Because all lookups are stored in the SYS database in the tblSysLookup table, lookups are applicable system-wide; lookups can cross all companies, or you can create company-specific customized lookups.
The core lookup definition can be customized by creating a copy of the base definition and using the ReplaceID column to override it. This method is reserved for replacing core definitions by vertical applications, however, do not edit base definitions directly since those are refreshed with every build update. The replacement lookup definitions are stored in the company database table tblSysCustomLookups. This allows vertical-defined replacements as well.
You can also copy company-specific definitions from one company to another by using the Copy From/To functions.
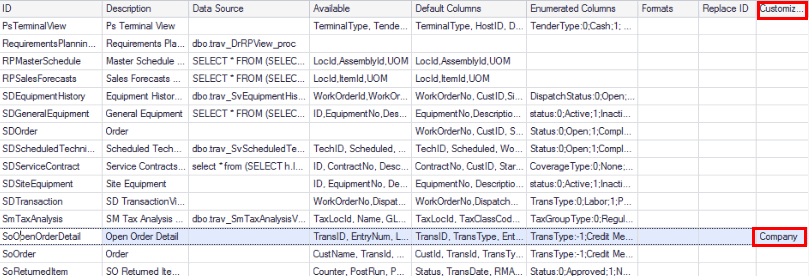
A customized column indicates whether the lookup definition has been replaced in the system/company.
NOTE: Do not modify these fields unless you have knowledge of database design and administration. If you have any questions about data structures in Traverse, please contact your Traverse software provider for assistance.
Lookup Table
Use the Lookup Table function to view or modify the metadata used by Traverse lookups. You also have the option of creating additional lookups.
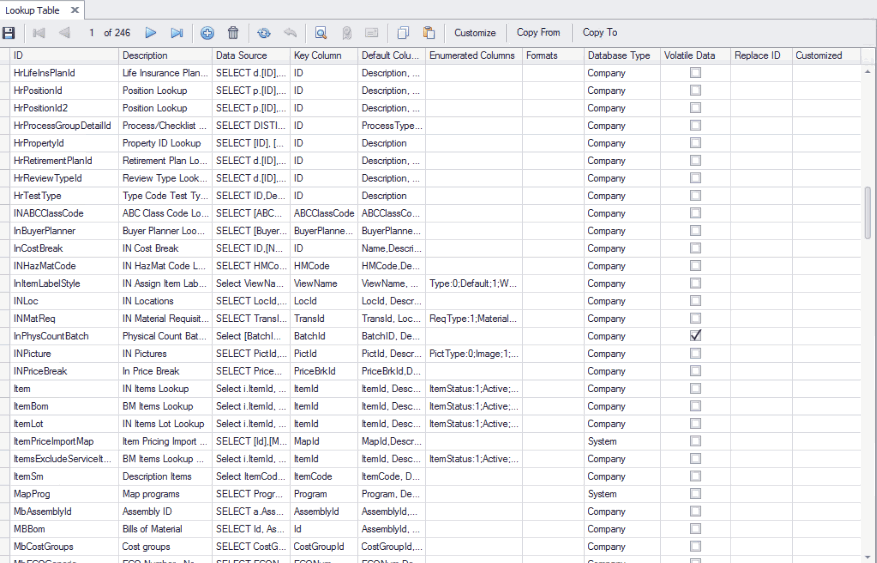
The column definitions are:
| Column Name | Definition |
|---|---|
| ID | The number assigned to the field within that lookup ID. |
| Description | The actual column heading name in the results section of the Search screen appears in the Description. |
| Data Source | The SQL query that the system uses to retrieve the data for this lookup ID. |
| Available | A list of fields available for the lookup. |
| Default | Names of the columns that you want displayed by default, independent of user input or changes. |
| Enumerated | Provides an alternative description of the numeric values stored in a table. For example, Traverse stores the inventory item status as 1, 2, 3 or 4. You may want to view these values as Active, Discontinued, Superseded, and Obsolete. |
| Formats | Use to format information that appears in the results section of the Search screen. For example, the social security format is &&&-&&&-&&&&. |
| Volatile Data |
Temporary, or transient data. Volatile data is put into the table, then removed. |
| Replace ID |
The ID of the lookup to be replaced. |
| Customized | Indicates the definition has been replaced in the system or company. |
The Customize function allows you to create a custom lookup that is added to the company database; it does not cross all companies, which can be helpful in the case of a custom field that exists in one database but not in another. Another consideration is when you want to use a Replace ID that has already been used for another lookup, in which case you would want to tie the Replace ID to a company database. If there is a primary lookup with a replace ID and a company lookup, the company lookup would supercede the other lookup.
Modify Lookups for a specific company
In the Manage function of the Custom Fields menu, add a custom field. In our example, we will add a custom memo field called Customer Notes.

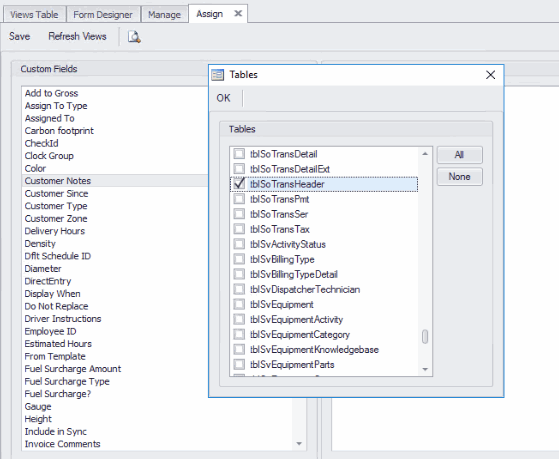
Assign it to the tblSoTransHeader table using the Assign function on the Custom Fields menu.
Select an ID from the Lookup Table screen. Click Customize. The Custom Lookup Editor opens.

Click the Browse button by the Data Source field to open the Query Builder. Make the normal edit to the query to reference the view.
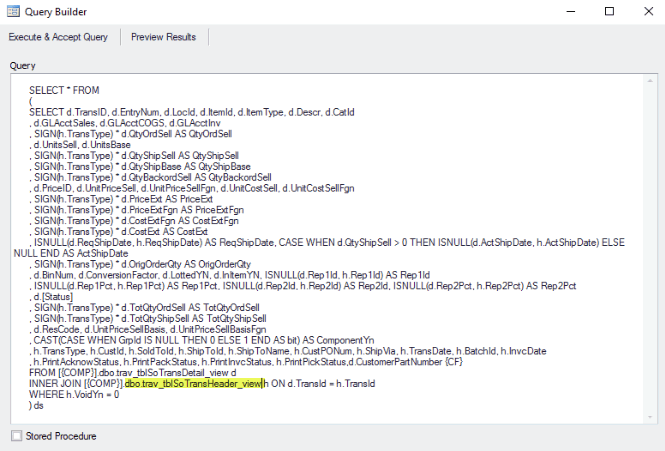
Add a reference to the custom field you just created.

Now you can preview the results without leaving the Query Builder by using the Preview Results button. Scroll over to see the custom field.
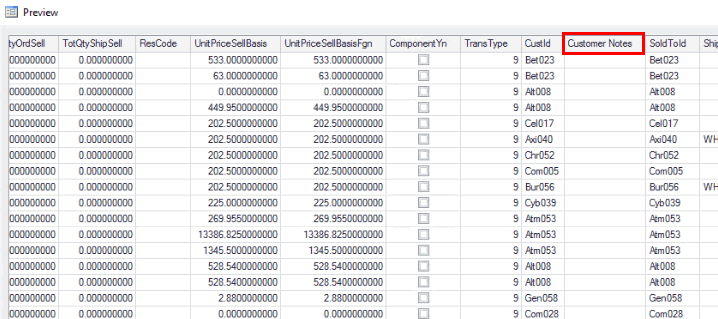
Use the Execute & Accept Query button on the Query Builder to make sure you have a valid entry before you actually leave Design Studio.
In the Custom Lookup Editor screen, add the custom field to the Available fields.
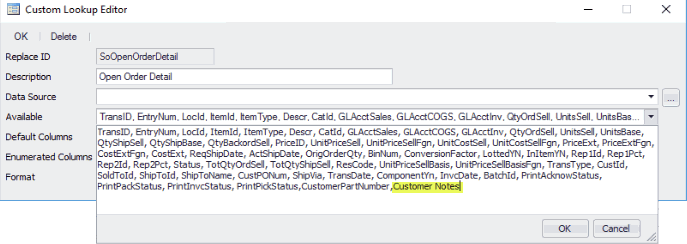
Save the record.
On the Lookup Tables screen, the Customized column shows that the query has been edited for the company with which you are working.
Copy a custom lookup from a specific company
Use the Copy From button on the toolbar of the Lookup Tables screen to open the Copy Custom Lookup dialog. Select a Company from the drop-down list. Select one or more of the custom lookupss from that company to copy from. Use the Select All or the Unselect All buttons to mark or clear all check boxes. To replace lookups, mark the Replace check box. Click OK to complete the process.

Copy a custom lookup to a specific company
You can use the Copy To button on the toolbar of the Lookup Tables screen to copy one or more company-specific custom lookups to one or more companies. When you click the Copy To button to open the Copy Custom Lookup dialog, the Views section will list all company-specific custom lookups available in your current company.
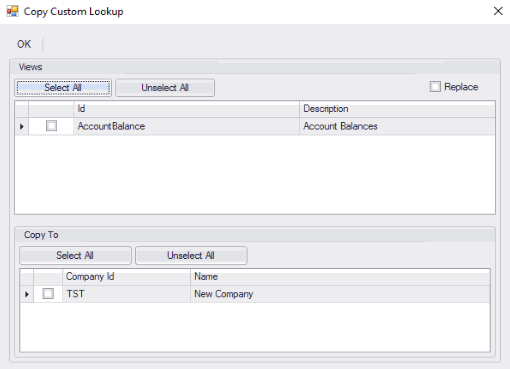
Select the lookups you want to copy by marking the check box(es) in the Views section. Use the Select All or Unselect All buttons to mark or clear all check boxes. Mark the Replace check box if you want to replace lookups.
In the Copy To section, select each company to which you want to copy the selected custom lookup(s). Use the Select All or Unselect All buttons to mark or clear all check boxes.
Click OK to finish the process.
