
Traverse v11.2 Administrator Guide
No-Code Approach to Printing Custom Fields on Reports (Advanced Users Only)
Custom fields can be defined and assigned to entities in Traverse, then those fields are automatically displayed in data-entry screens and interactive views by the framework. Traverse Report Designer in Design Studio also supports adding the fields to reports, but the values do not render in reports without some coding.
Traverse Global framework attempts to eliminate that last hurdle of no-code approach for reports. Of course, it has some limitations depending on how the report is defined. Reports that display summary data are not a good fit since it is difficult to ascertain how to group or summarize the custom field data.
Framework, as magical as it seems, cannot show custom fields in reports without some legwork. Here are the requirements when creating base/vertical or custom reports.
Data-source Schema:
When defining the data-source schema for a report, specify additional Primary key fields. In addition to specifying the Primary table for each table source, click on the ellipses button to verify that the primary key is available in the schema generated for the report. If the Primary key field is checked then the report is ready. (See the image below for Sales Order Invoice)
What if the check box is not checked? In that case, there’s some work to be done. (See image below)
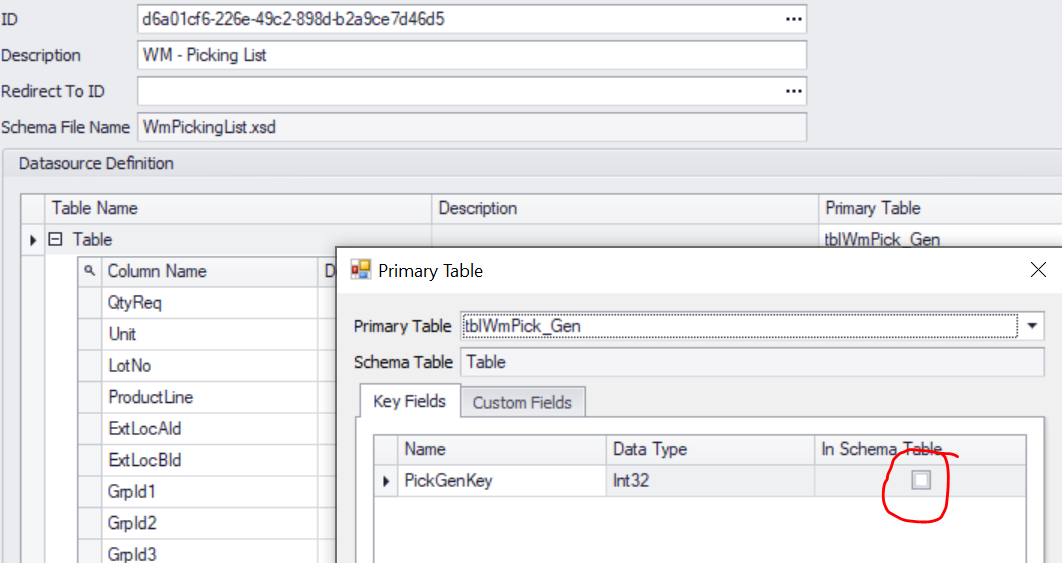
First, update the schema file (xsd) that is used for the report to include the Primary key. If schema includes detail levels, specify primary keys for those as well if possible. Note that this might not always be possible depending upon how the data is generated, especially when it is summarized or accumulated from multiple sources.
Second, make sure that the data generator includes the required primary key value. This could involve updating stored-procedures or SQL statements.
After that import the updated schema using the Design Studio to replace the existing definition. Now, the primary field should appear checked in Data-source schema definition.
To verify that the framework can display the custom field on report, do the following:
- Assign a custom field to the primary table
- Open the Report Designer
- Expand the Field List which should show the assigned custom field with the “cf_” prefix
- Drag the field to the report
- Save the report layout as default
- Start Traverse, open the report to see that the custom field shows up
Use SO – Print Invoice as a working model to see how the system works.
Base Reports:
Most of the base reports that are included in the Report Designer are being worked on to make the custom fields appear without coding the data generator. There are limitations to this approach as previously specified. So, if you want to add custom field to AP/PA Checks, for instance, you would still have to brush up on your coding skills.