
TRAVERSE Global v11.1
Contacts
Use the Contacts function to set up contact records. Contacts form the basis of the CRM system: after you set up contact records, you can track all activity for a specific contact, send out communications, and follow up on sales opportunities. Each contact record represents a single company or business. You add the individuals you work with at that company, and then select them as members of the company contact record.
You can copy information form the vendor, customer, and employee information already stored in Accounts Payable, Accounts Receivable, and Payroll to quickly create contact records. If you interface CRM with these applications, you can copy any changes you make to the contact information here back to the appropriate records in those applications. You can also synchronize contact information between CRM and other interfaced applications if you have made several changes in both places and didn't copy those changes over as you made them.
- To create a new contact, click the New button on the toolbar.
- To edit an existing contact, select the contact from the Contact drop-down list.
- Click the Save button to save your changes. If you selected the Prompt to Update Linked Information option in the Business Rules function, and you made any changes to contact information, a message appears asking whether to update linked records.
Use the command buttons on the toolbar:
| Select | To |
|---|---|
| Opportunity | Open the Opportunities function to record contact prospects. |
| Task | Open the Tasks function to view tasks and responses by status (Pending, Completed, or Expired) or by user type (Assigned To, Completed By, or Entered By). |
| Activity | Open the Activities function to record all actions relating to a contact, allowing you to capture a historical record of the things your company has done for a specific contact. |
| Import | Import contacts into the Contacts function. |
| Sync | Open the Synchronize Contacts function to copy the changes you have made to contact information in CRM to the linked record in Accounts Payable, Accounts Receivable, and Payroll applications, and vice versa. |
| Label | Open the Contact Labels function to print mailing labels for your communications and campaigns. |
| Copy From | Copy information from a previously entered contact, customer, or vendor if entering a new contact. See additional information here. |
| Access | Open the Contact Access screen and select Sales Reps who have access to the contact's information. Mark the check box(es) for the sales reps you want to have access to the customer's information. Use the Select All button to mark all the check boxes. Use the Unselect All button to clear all the check boxes. Click the OK button to save the settings. The Access button will only be activated when Manual is selected for the Contact Access business rule. |
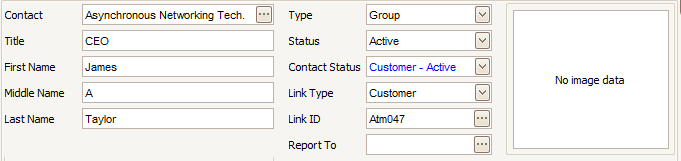
- Enter a Title for the contact.
- Enter a First Name, Middle Name, and Last Name for the contact, as applicable.
- Select whether you are entering an Individual contact or a Group contact in the Type field.
- Use this field to select your contacts status of Activeor Inactive.
- Select a Contact Status description for your contact. You can set up status descriptions for your contacts in the Contact Status function.
- In the Link Type field, you can either view the link that exists between the vendor, customer, or employee record from which you copied information, or manually select the type of link that exists between a vendor, customer, or an employee record. The selections here will be determined by the business rules for linking to the functions in the list. When Vendor, Customer or Employee are selected, the Link ID field will be activated.
- In the Link ID field, you can either view the linked ID of the vendor, customer, or employee record from which you copied information, or manually select the linked ID of the vendor, customer, or employee record.
- You can use the Report To field to set up a hierarchy, if applicable, between contacts who work in the same group or area in the same company.
- If there is no image, you can right-click on the Image field and select Load to browse for an image. The image will be embedded into the database or linked, depending on the option you selected in the CRM business rule for Image Storage Type.
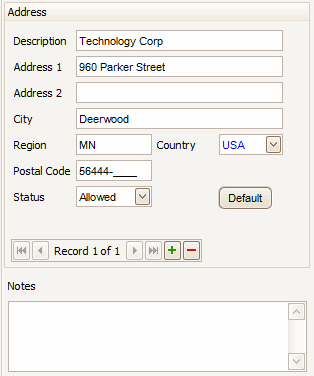
- If the contact has multiple addresses, enter a Description of the address.
- Enter the address for the contact in the appropriate fields.
- Use the Default button to make the adjacent contact the default member to contact.
- Select a Status for the contact. This status determines whether the address is used when printing contact labels or not. Select Allowed to include the address in contact label printing; otherwise select Not Allowed. You might want to use the Not Allowed option for those contacts set up as individual people working for a company. You have no need to print the address for these individuals in a bulk communication.
- Use the Add Record button (
 ) to add additional addresses for the contact.
If you want to remove an address, use the Delete Record (
 ) button.
 - Enter any Notes for the contact.
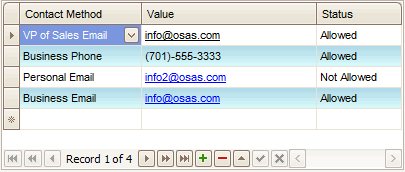
- Select the customer's preferred forms of contact from the Contact Method drop-down list.
- Enter a Value for the contact method. The allowed information for the value will be determined by the type of contact method.
- Select whether your company can use the selected contact method information in the Status column. The Allowed status will include the information from this contact method in Bulk Communications set up to use this contact method. The Not Allowed status will exclude the information from this contact method in Bulk Communications set up to use this contact method.
- Use the Add Record button () to add additional contact methods.
If you want to remove a contact method, use the Delete Record (
) button.
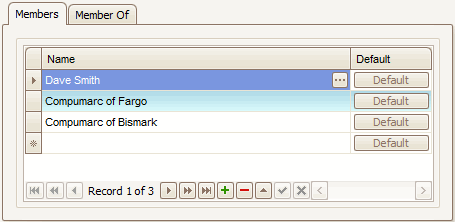
On the Members tab:
- Use this field, if you selected Group from the Type field, to select contacts who are members of the contact group.
- Use the Add Record button () to add additional members of the contact group.
If you want to remove a member from the contact group, use the Delete Record (
) button. - Use the Default button to select one of the members as the default contact member.
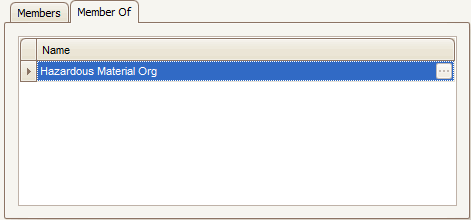
The Member Of tab is used to display the company individuals are a member of. Once an individual person has been added to the company contact record using the Members tab, you will see the company the person is a member of on the Member Of tab.
To print a contact list to view the contact information you entered, see the Contact List function.
The Tasks tab on the right side of the Contacts screen opens the Contacts Tasks Pane. The Tasks Pane serves as a quick way to view information such as activity and opportunities open for the contact, as well as customer inquiries and reports. Use the links to view the contact's orders, open invoices, projects, work orders, and other information pertaining to the contact.
There are three sections to the Contact Task Pane:
- The Opportunity area shows the number of opportunities you have entered for this contact and the total value of these opportunities. There is also a link to click on that will display the Opportunities screen with the contact filtered to view the opportunities entered for this contact.
- The Activity area shows a list of activities entered for this contact with the description, date and time entered. There is also a link to click on that will display the Activities screen with the contact filtered to view the activities entered for this contact.
- The contact information area displays the contact name, address and phone and fax numbers from the linked record. There is a link to click on that will open the Customer or Vendor Information view in detail to display detailed information from the customer or vendor setup. There are links to view orders, open invoices and history.
The Order View, Open Invoice View, Detail History View, Project View and Work Order View links on the task pane have different functions depending on whether the contact you’re viewing is a customer, a vendor, or an employee. Each of these links opens an interactive view with information specific to the contact you are viewing.
- If you are viewing the contact information for a customer, click Order View to open the Sales Order, Order View, Open Invoice View to open the Accounts Receivable, Open Invoice View, Detail History View to open the Accounts Receivable, Detail History View, the Project View to open the Project Costing, Project View or Work Order Viewto open the Service Director, Work Order View.
- If you are viewing the contact information for a vendor, click Order View to open the Purchase Order, Order View, Open Invoice View to open the Accounts Payable, Open Invoice View, or Detail History View to open the Accounts Payable, Detail History View. The Project View and Work Order View links are not active for vendors.
- If you are viewing the contact information for an employee, the only active areas are the Opportunities and Activities links.
You can pin and unpin the task pane to the side of the TRAVERSE window by clicking the pushpin icon. When the pushpin icon points down,  , you can always access the task pane. When the pushpin icon points to the left,
  , you must hover your cursor over the Tasks tab on the right-hand side of the TRAVERSE window to use the task pane.
Note: You can select True from the ShowTaskPanel field in the View > Preferences... screen to default task panes across the entire system to automatically expand when opening applicable functions. Selecting False in the ShowTaskPanel field defaults task panes to stay closed when opening applicable functions. Even when set to False, you can always use the pushpin icon to pin and unpin the task pane to the right-hand side of the TRAVERSE window.