TRAVERSE Global v11.1
Purchase Order Deposits (TRAVERSE Standard)
The Purchase Order Deposits functionality allows you to enter a deposit or prepayment before receiving an invoice using the Deposit button on the toolbar in Purchase Order Transactions. You are able to post these payments to a general ledger account that has been added to Accounts Payable Distribution Codes. You can also print an online check for PO Deposits.
Note: Additional reporting enhancements will be added at a later date.
Before using the PO Deposits functionality, you must go into AP Setup and Maintenance and define a Deposit General Ledger account in the Distribution Codes function.
Note: This account should be an Asset account (i.e., a Prepaid Expense account). Otherwise, the P&L will not be accurate until the goods are received and invoiced (or just received in the case of IN Accruals).
Note: The currency of the deposit account must be either the base currency or the transaction currency.

Workflow Examples
- In Purchase Order Transactions, use the New button on the toolbar to create a new Purchase Order.
- Select a Vendor.
- Add two line Item IDs.
- Enter an Ord Qty of 5.
- Enter an Ord Unit Cost of $13.75 and $379.44, for an Ord Ext Cost of $1965.95.
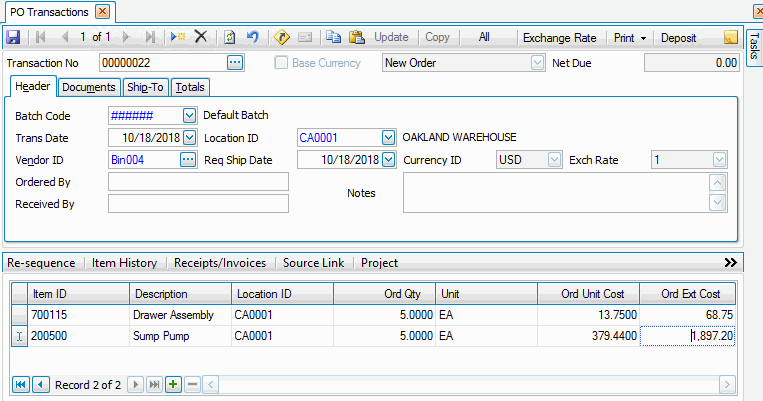
- Enter a Deposit for the full amount of $1965.95:
- Click the Deposit button on the toolbar. The Deposits screen appears.

- Enter the Date of the transaction.
- Enter an Amount of $1965.95 for the deposit.
- Select a Bank Account ID for the deposit. Hint: You may have to add the Bank Account ID field using the Column Chooser.
- Enter any Notes, as applicable.
- Save the record by clicking on the End Edit button (
 ).
). - Print a check for the deposit using the Print button, then select to print a Check.
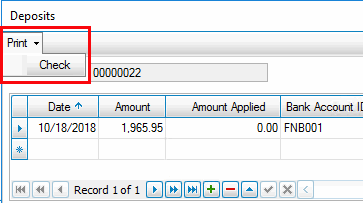
- Close the screen using the X in the upper right
- Click the Deposit button on the toolbar. The Deposits screen appears.
- Save the PO Transaction by clicking the Save button on the toolbar.
- Post Transactions.
- Prepare payments using the AP Prepare Payments screen. Filter for just the vendor with the deposit.

- Post Payments.
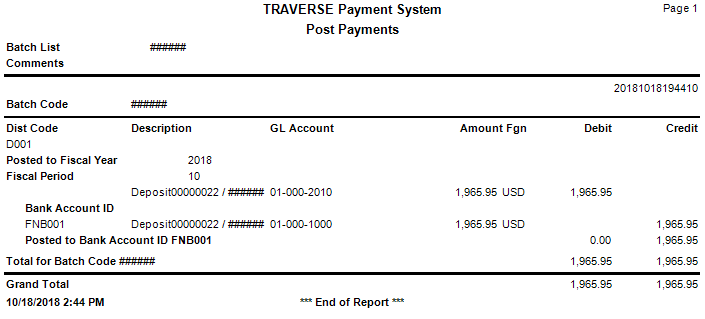
Once you post payments, when you bring up the PO Transaction and select the Deposit button on the toolbar, you can see the check box in the Posted column is marked indicating it has been posted.

- Receive half the order.
- Enter an invoice for the half of the order that you received.
- Post Transactions.
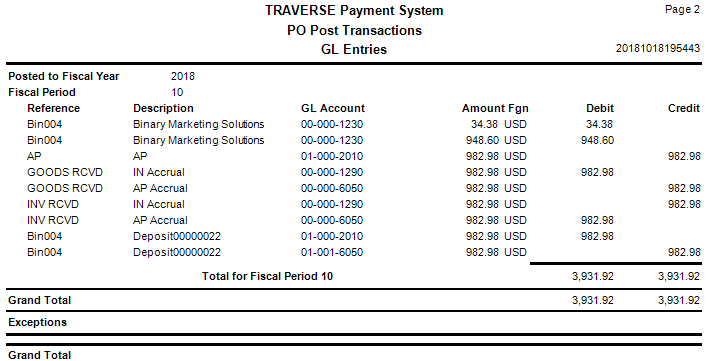
After you post the transaction, open that transaction in the PO Transactions function. Click the Deposit button to view the deposit information. Half of the deposit has been applied to the order.

-
Enter a receipt for the remaining quantity and enter a corresponding invoice. After you post the transaction, you will see two invoice and two deposit records in the Hold/Release Invoices screen.
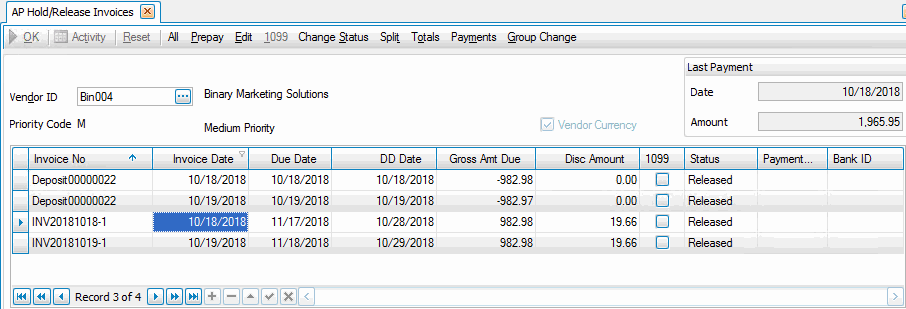
The next time you run the Prepare Payments and Post Payments functions, the invoice and deposit records will clear out with the correct GL entries made to balance all accounts.

In Purchase Order Transactions, enter a vendor, line items, and select the Deposit button on the toolbar. Enter an amount for half the PO:
- In Purchase Order Transactions, use the New button on the toolbar to create a new Purchase Order.
- Select a Vendor.
- Add two line Item IDs.
- Enter an Ord Qty of 5.
- Enter an Ord Unit Cost of $50.00 and $125.00, for an Ord Ext Cost of $875.00.
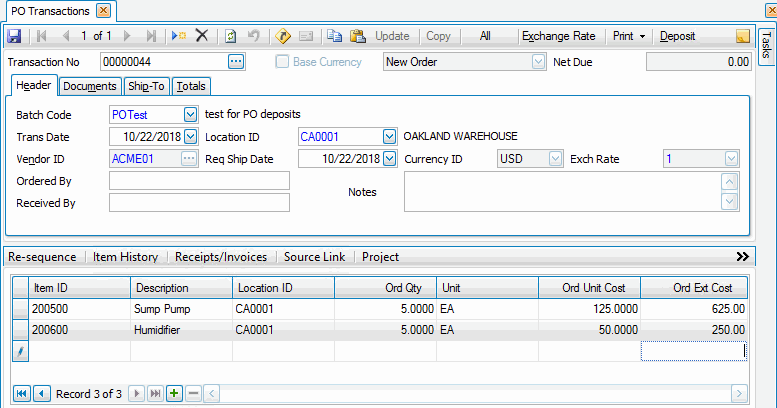
- Enter a deposit for half of the amount of the PO:
- Click the Deposit button on the toolbar. The Deposits screen appears.

- Enter the Date of the transaction.
- Enter an Amount for half the cost of the purchase order. In our example, we enter $437.50 for the deposit.
- Select a Bank Account ID for the deposit. Hint: You may have to add the Bank Account ID column using the Column Chooser.
- Enter any Notes, as applicable.
- Save the record by clicking on the End Edit button (
 ).
). - Print a check for the deposit using the Print button, then select to print a Check.
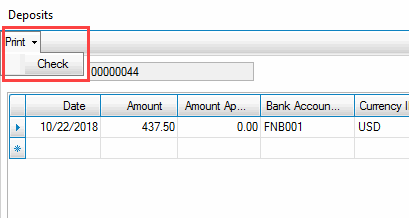
- Close the screen using the X in the upper right
- Click the Deposit button on the toolbar. The Deposits screen appears.
- Save the PO Transaction by clicking the Save button on the toolbar.
- Post Transactions.
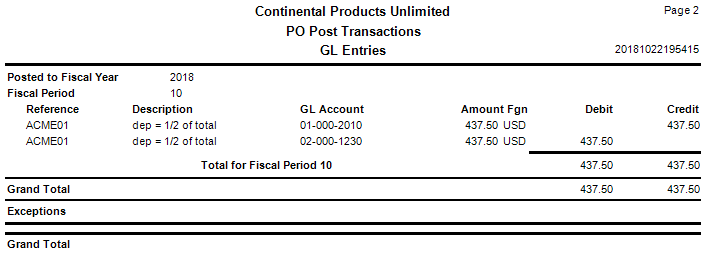
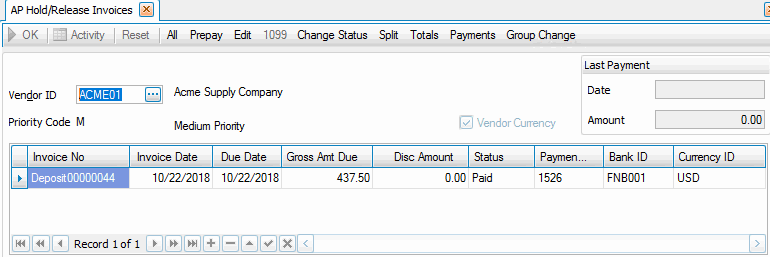
- In the AP Hold/Release Invoices screen, you will see an invoice number for the deposit transaction that you just entered.
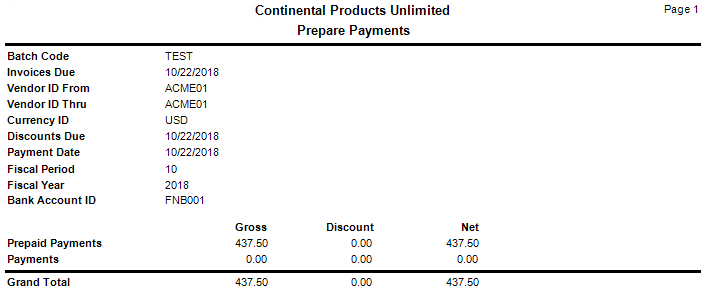
- Prepare payments using the AP Prepare Payments screen. Filter for just the vendor with the deposit.
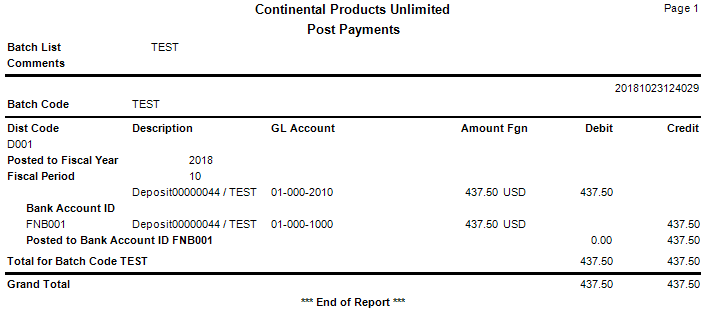
- Post Payments.
-
In PO Transactions, select the transaction number you entered and to which you applied the deposit. Receive the order.
- Enter an invoice for the order that you received.
- Post Transactions.
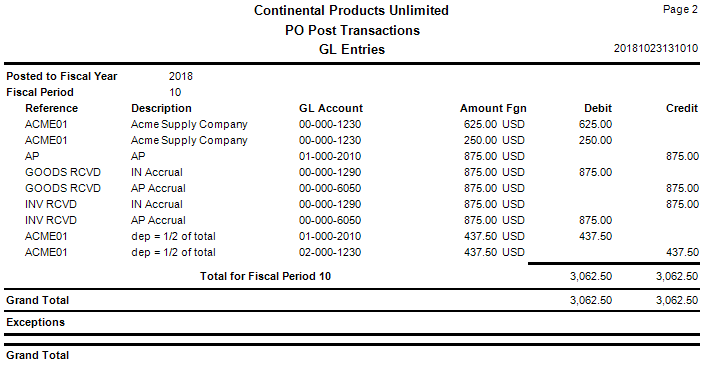
- In the AP Hold/Release Invoices screen, you will now see the invoice and deposit invoices listed for the vendor.
- In Accounts Payable, prepare payments for the vendor for which you entered the deposit and received/invoiced the PO. Hint: Pay attention to the Due Date listed on the Hold/Release Invoices screen. Make sure to use the correct date in the Prepare Payments screen.
- Print checks using the AP Print Checks function.
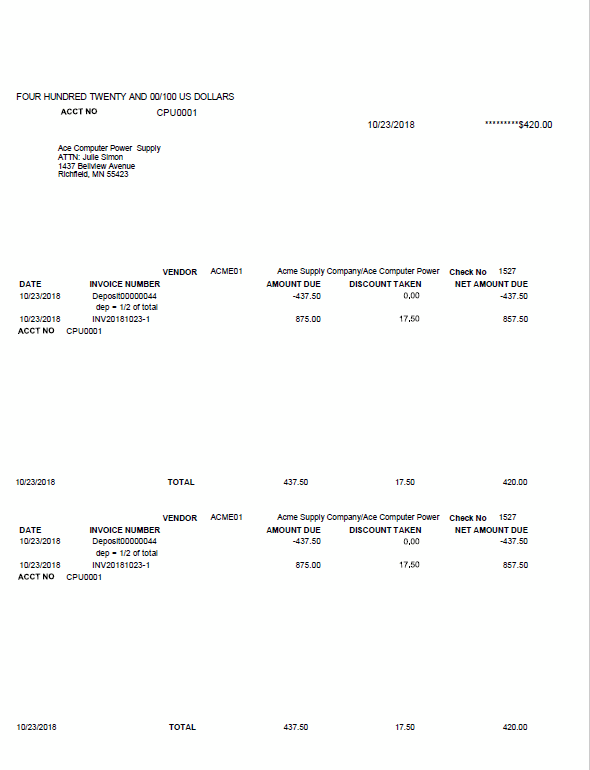
- Post Payments.
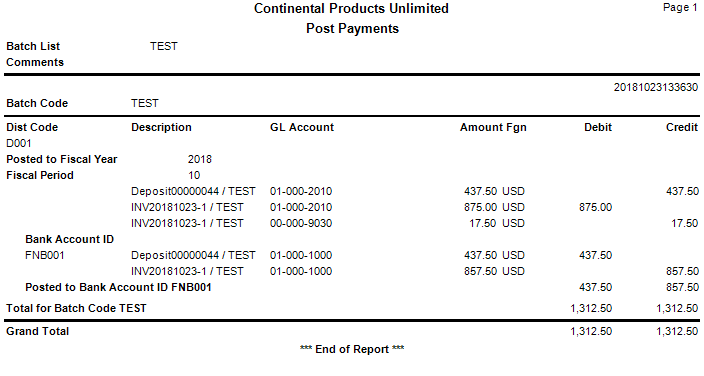
You will see the deposit amount has been taken away from the invoice amount paid and posted.
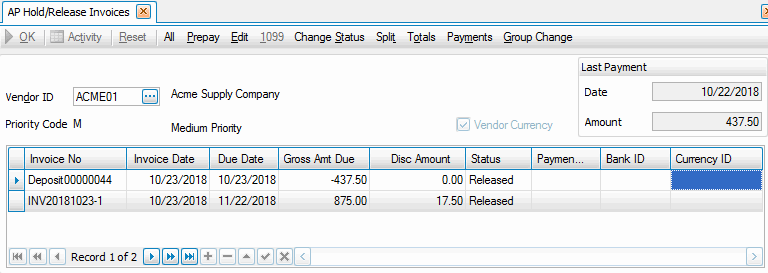
Prepayments differ from deposits based on the fact the transaction status must be 'Invoiced' in order to enter a prepayment. Prepayments can be entered using the Invoice Totals button on the PO Transactions Totals tab.
You can also use the Deposit button on the toolbar to enter a prepayment for any transaction status. In order to enter a prepayment using the Deposit button, you must use the column chooser to move the Bank Account ID and the Payment Number fields onto the grid to allow you to enter values. Once a prepayment is entered, you can print an online check.
When the Deposit button is used, the deposits GL account is used to store the prepayment amount. This means your GL/AP will not be in balance until the PO is invoiced and the deposit account is cleared; the AP side will be out of balance with the amount sitting in the PO deposits account. Once the payment is posted, the amount will automatically be moved from the deposit GL account to the bank GL account.
NOTE: When the Invoice Totals button is used for prepayments, the amount will go into the bank GL account when posted and the deposits account is not used.
If the PO transaction status is 'Invoice Received', you can click the Invoice Totals button to open the Invoice Totals screen.
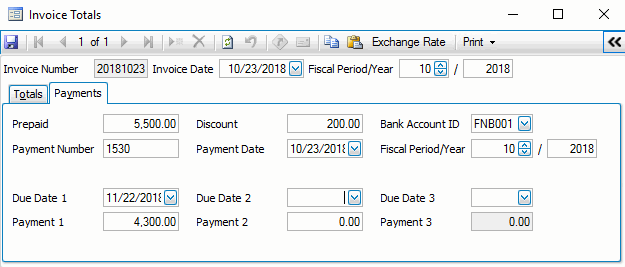
Toggle ( ) on the Invoice Totals screen to show the detail view. Select the Payments tab.
Enter the amount you want to prepay in the Prepaid field. Click the Save button to save your changes and display the remaining payment amount.
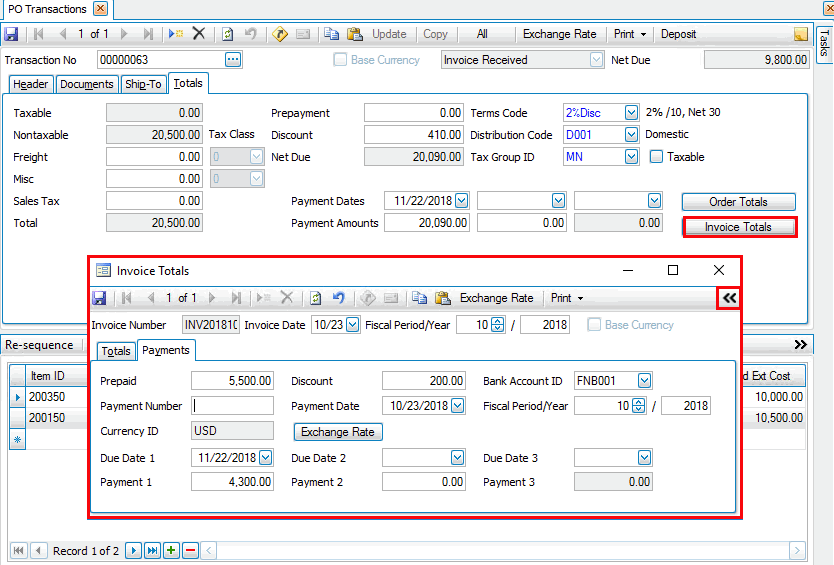
Print an online check for the prepayment using the Print button on the toolbar.
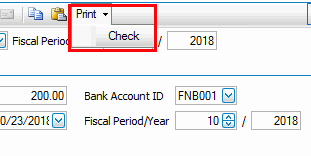
Once you print the check, the Payment Number field will display the check number.
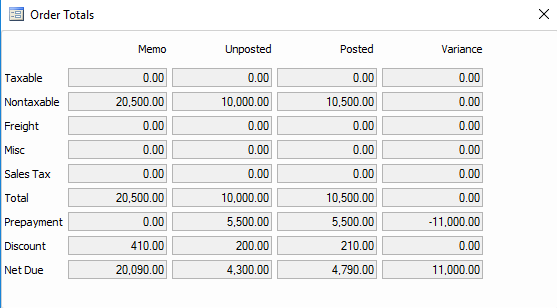
On the PO transactions screen Totals tab, click the Order Totals button to see the unposted prepayment listed.
GL Entries after posting the PO transaction
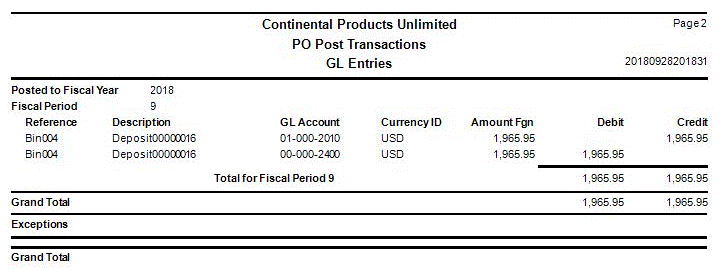
GL Entries after posting the Deposit payment in AP
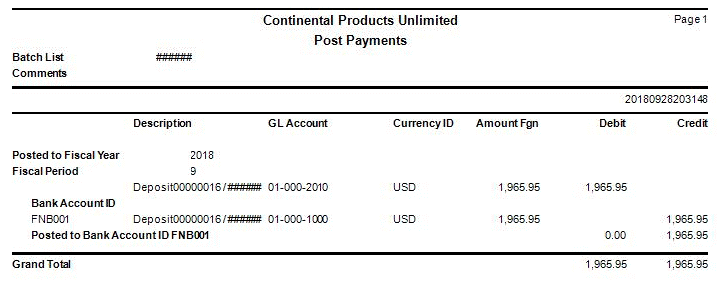
GL Entries after the PO transaction is invoiced and posted
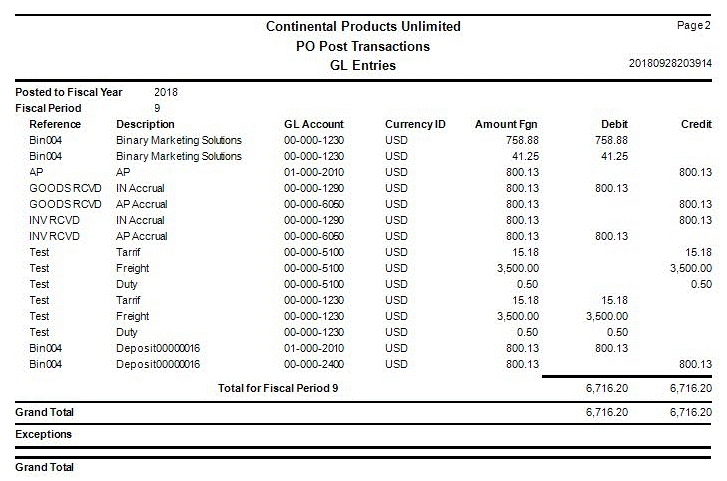
GL Entries after AP checks are posted with Deposit applied
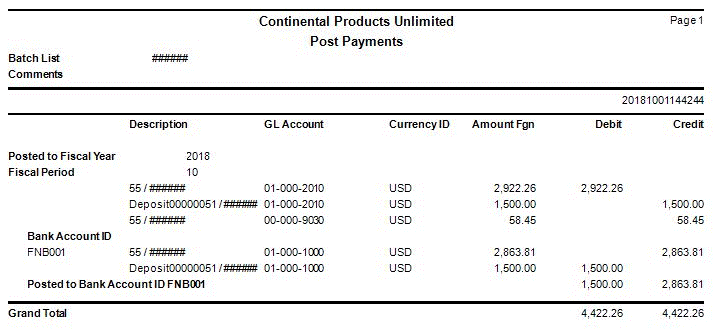
When you enter a PO transaction with a deposit and post the transaction and payment, a credit will be created for the vendor. The deposit and/or prepayment will remain on the vendor account as a credit to be used at a later date. If the check has been printed, sent, and cashed by the vendor, all entries stay as-is. If the vendor does not cash the check, you can then void the check.
If the purchase order is no longer needed, it can be deleted even when there is a posted deposit. The system will display a prompt letting you know a deposit exists along with asking if you want to delete that transaction.
