
TRAVERSE Global v11.1
Configured Sales Order Entry
Once you have set up the configuration, you can add configured items to your sales order.
To add a configured line item to sales order, you must first fill out the tabs (Header, Documents, Bill-To, Ship-To, Tax, Payments, and Totals) as necessary on the SO Orders screen. See SO Transactions for instructions on entering a new transaction.
To configure a new sales order:
- Open the Orders function for Sales Orders.
- Click the New button on the toolbar to open a blank sales order record.
- Accept or edit the Transaction Date.
- Select a Sold To customer from the drop-down list.
- Enter a PO Number and PO Date, if applicable.
- Accept or edit the Batch Code.
- Accept or edit the Location ID.
- Enter a Req Ship Date.
- Accept or edit the Fiscal Period/Year.
- Accept or edit the Currency ID.
- Enter any Notes.
The configuration pane is part of the Tasks pane on the right side of the Sales Order screen.
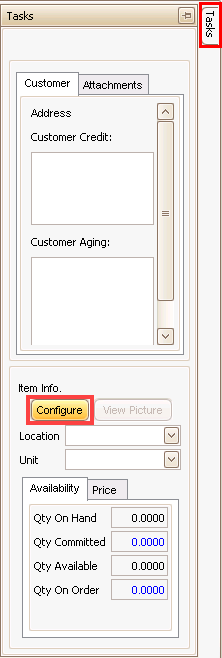
To add a configured item to a sales order transaction:
- To select a configuration, click the Configure button.
- The Select Configuration window appears listing all available configurations. Use the Data Filter to refine the number of configurations shown. See Using Reports for more information.
Hint: If you created a configuration, and it does not appear in the Select Configuration window, return to the Configuration Maintenance screen and validate the configuration.
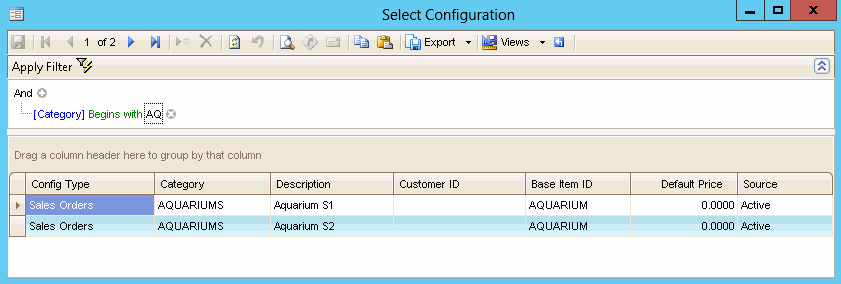
- Select the configuration (where Config Type = Sales Orders) you want to work with by double-clicking the configuration record. The Configurator Entry screen will appear.
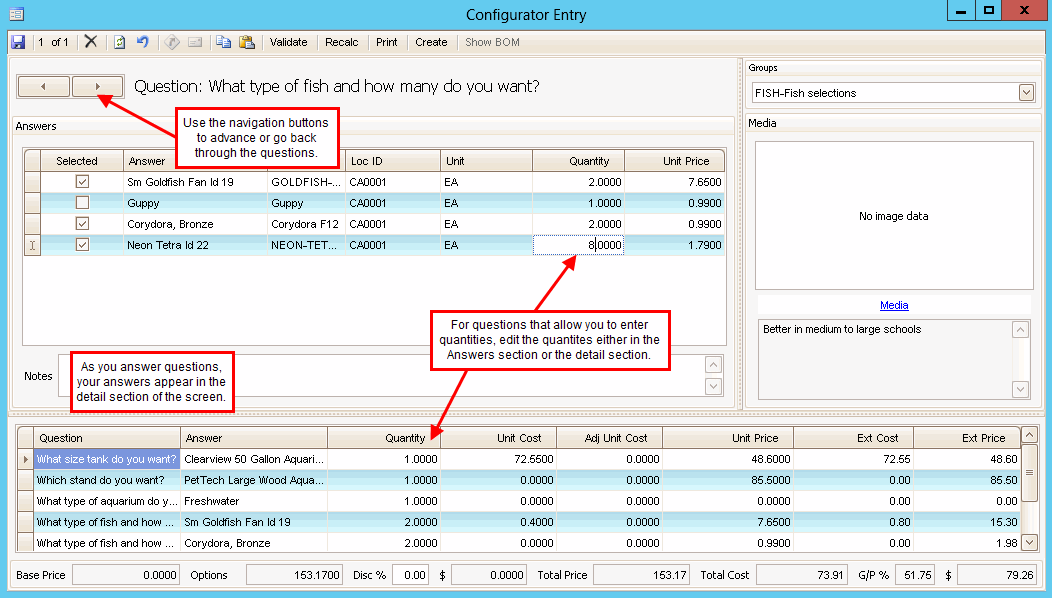
- Answer each question as it is presented. Navigate through the questions using the navigation buttons.
- As you answer the questions, your answers appear in the detail grid of the screen.
- You can add any Notes as you go through the configuration.
- If you change a quantity, use the Recalc button on the toolbar to recalculate the totals.
- Use the Validate button on the toolbar to check the configuration for validity.
- Once you have finished setting up your configuration, you can print a configuration list or a price estimate by using the Print button on the toolbar.
- The Configuration List is a list of items included in the configuration, as well as the costs and prices for the items.
- The Price Estimate lists the items in the configuration along with the estimated price of the configuration.
- Click the Save button to save your configuration.
- To create the transaction, click the Create button on the toolbar. The Create Transaction(s) screen will appear.
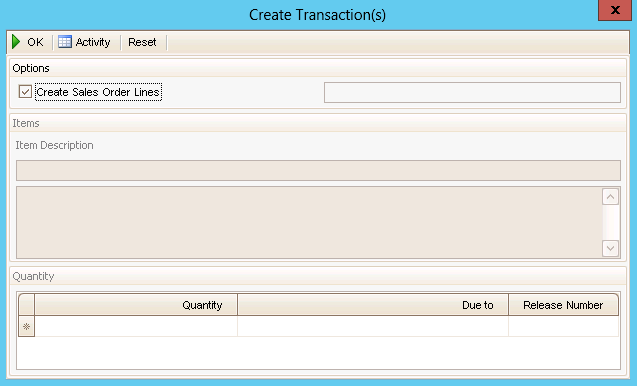
- To create sales order lines for the components in the configuration, mark the Create Sales Order Lines check box.
- Click OK to create the transaction.
Each component of the configured item will be listed in the line item grid. You can add another configured item or inventory item by clicking in an empty record or using the Append button.
When you are finished adding items to the Sales Order, proceed as usual. See the SO Orders topic for additional information.