TRAVERSE Global v11.1
Receive Purchase Orders
Use the Mobile Warehouse Receive Purchase Orders screen to record the inventory items you receive for purchase orders. This function is equivalent to the TRAVERSE WM Receive Goods or PO Transactions -- Receiving functions.
As each line is entered or scanned, Warehouse Management updates item on hand quantities, updates the order with the receipt information, and changes the status to 'Goods Received' for the orders you select.
There must be a PO Transaction entered for the item(s) you want to receive.

To receive a purchase order:
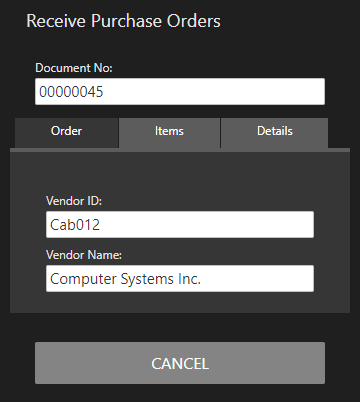
- Scan or enter the PO number into the Document No field. When you press ‘Go’ (onscreen keyboard) or tab (desktop keyboard), the Items tab will display (see Step 3).
- On the Order tab, the Vendor ID and Vendor Name will appear.
-
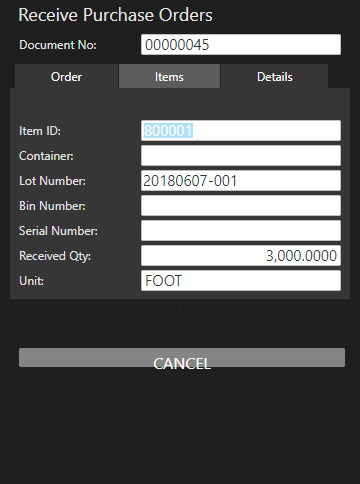
 On the Items tab

- Scan or enter the Item ID you are receiving.
- Scan or enter the Container into which you are placing the item, as applicable.
- Scan or enter the Lot Number of the item you are receiving, as applicable. If the item is lotted, and the Lot Number field is blank, you will receive an error message.
- Scan or enter the Bin Number into which you are placing the item, as applicable.
- Scan or enter the Serial Number of the item you are receiving, as applicable. Serialized items will require a separate entry for each serial number with a Received Quantity of 1. If the Serial Number field is blank, you will receive an error message.
- Enter the Received Qty. The base Unit of measure is displayed.
- To save the entry:
- If you are using a warehouse-type device such as a Zebra device or a phone, press the 'Go' button on the on-screen keyboard.
- If you are using a browser on the desktop, the entry is saved when you tab out of the field.
- Repeat the previous steps for each item received on the purchase order.
-
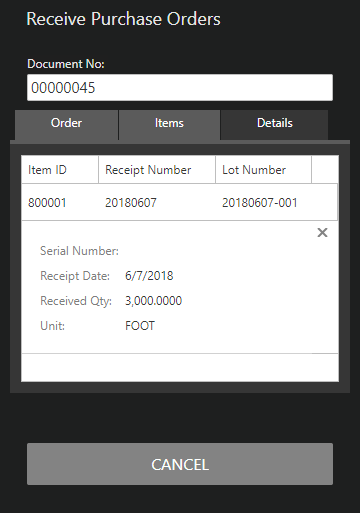
 On the Details tab
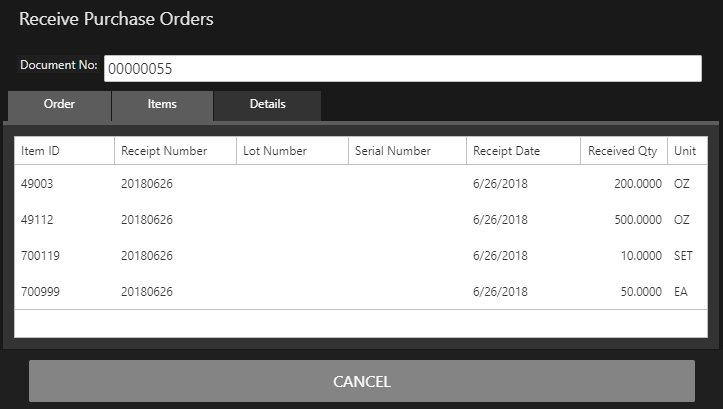
The Details tab is a read-only inquiry of the items on the purchase order that have been received. The Receipt Number will be auto-generated with the <YearMonthDate> as the Receipt Number. The date will be the current workstation date. If necessary to view more information, click/touch the ellipsis to expand the details for the line.
DEVICE SCREEN PORTRAIT VIEW

DEVICE SCREEN LANDSCAPE VIEW

Select the Order tab and use the Cancel button to clear all fields and proceed to the next purchase order to receive.
When finished receiving purchase orders, select Cancel when all the fields are blank to return to the menu.