Traverse Standard v11.0
Document Delivery Overview
The Document Delivery functions offer you the flexibility to queue up documents (email or fax) to send them on demand instead of being sent automatically as they are printed or processed, allowing you to review them before delivery. You can also configure unique delivery settings for each form.
Document Delivery gives you the ability to:
- configure email server settings per document type (in addition to the default SMTP email settings in the System Manager business rules)
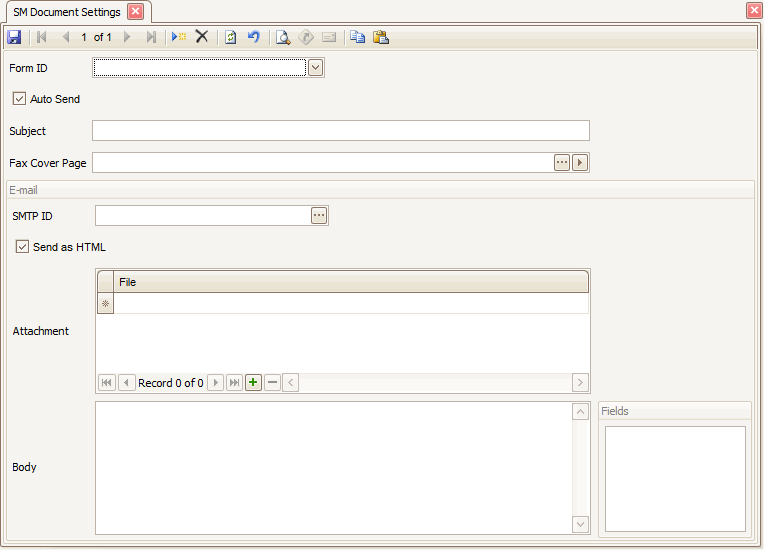
- configure a document type's subject, SMTP settings, static attachments, and sending with or without user interaction (auto-send)
- review the document types and settings associated with various contact types
- search the queue for documents that have not been sent, or that have been sent in prior print runs
- purge sent item history
- mark unsent documents as sent
NOTE: Basic document delivery will continue to function normally unless you set up the enhanced delivery options in the Document Settings function. This means existing users can continue using document delivery as they always have if they choose not to implement the enhanced functionality.
Setup Information
You must first check your permissions in Traverse Server Manager to display the menu item for Document Delivery. Upon saving you will notice that Manage Document Delivery (previously in Company Setup) will now be displayed within the menu item labeled Document Delivery.
Before using the enhanced Document Delivery functionality, you must first configure your SMTP Settings and Document Settings.
To configure your SMTP Settings, go into SM | Document Delivery | SMTP Settings. Here you can setup your SMTP information as desired. By default, the system will use the email settings configured in SM | Company Setup | Business Rules | Applications |SM-System Manager.
Within Document Delivery, you can configure unique settings for each document type, including the subject line, message sender, and the body text to be included with the document. You can configure the settings for each document in SM | Document Delivery | Document Settings.

You have the flexibility to queue up documents (email or fax), and send them on demand rather than automatically sending them as they are printed or processed. Files and any static attachments will be stored and available via the Document Queue, where you can select the documents when they are ready to send. You can also use the Search Queue function, available from any pick screen, where all the documents will be displayed for sending or resending.

Workflow
Once you have Document Delivery configured for each form, you can print the document, which will also email, fax, or queue up your document provided the customer or vendor document delivery information is configured.
For example, if you have a Form ID configured for the AR Invoice, when you print the invoice, the system will either immediately email the invoice (if you selected auto-send) or place the document in the queue.
- From the AR Transaction, click ‘Print > Invoice’
- Upon selecting ‘Print’, a pop-up ‘Print Status’ dialog box will appear indicating the Status (Sent or Queued)
If you cleared the Auto Send check box, the invoice will go into the Document Delivery Queue. From within the Print window, you have the option to access the queue via Search Document Queue. Alternatively, you can access the queue via SM | Document Delivery | Manage Queue.
Once you are in the queue, you can decide to edit a particular email by selecting the Edit function and modifying the Subject, Deliver To, or Display Name. When you are ready to send the document(s), simply select the desired documents and use the Send button. You also have the ability to Select All/Unselect All.

Mark As Sent: Allows the user to mark a document as sent if they decide they do not want to send the document.
Purge: Purges the documents from the queue. Only documents that have been sent or marked as sent can be purged.
Hide Sent: Filters the list to only show unsent documents.