Traverse Global v11.2 - Service Repair
Constraints
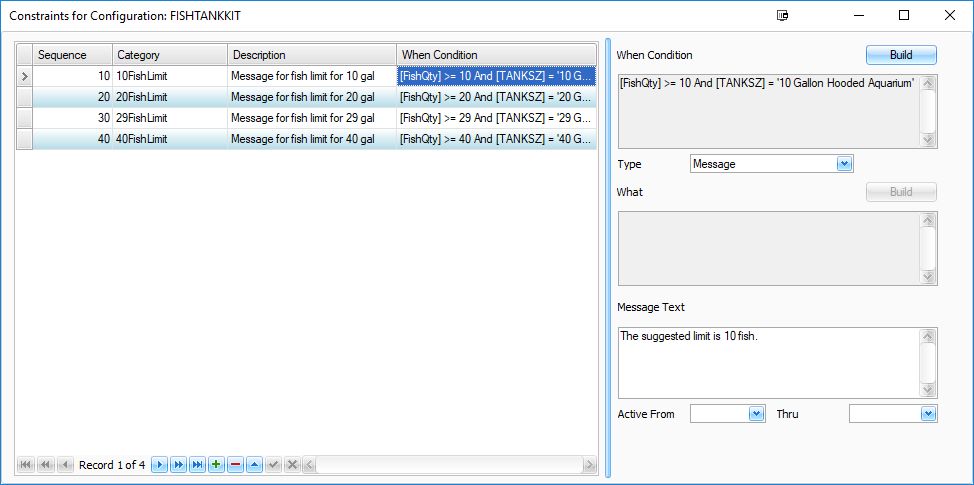
Constraints prevent the user from creating a configuration that is not available, or ensure that if the user creates a configuration, requirements are met, such as limiting the number of fish in a tank depending on the size of the tank, forcing a certain shipping method if the configured product is beyond a particular weight or size. You can also use constraints to change information based on situations that indicate something is awry.
NOTE: Do not confuse these constraints with the "rules" defined in the configuration.

To create a constraint:
- Click the Append button (
 ) to create a blank record.
 - The Sequence number is generated by the system, and determines the order in which constraints are applied. You can change the sequence number to change the order.
- Enter a Category for the constraint. This is a free-form text entry, and not related to the configuration categories.
- Enter a Description for the constraint.
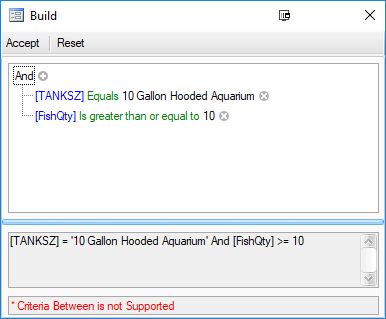
- Build a When Condition by clicking the Build button to open a dialog box where you can build or edit the logic statement. The dialog box allows you to build a logic statement in the same manner as the Data Filter in Interactive Views.
Create a condition to test against. This condition determines whether the value the user enters is allowed or not.

- Select the Type of constraint you want to build:
- Message: Presents a warning message to the user, but not force any action.
- Required: Will not let the user continue with existing selections unless the requirement is met. Will force the requirement of another field.
- Remove: Will remove a question from the configuration based on criteria.
- Use the Build button for the What field to create an action for the constraint to take when the condition is affected.
- Enter Message Text to display to user when the constraint is affected.
- If applicable, select the date range during which the constraint will be active in the Active From and Thru fields.
- Close the Constraints window to save the constraints and return to the configuration maintenance screen.