Traverse Global v11.2 - Service Repair
Manage Tasks
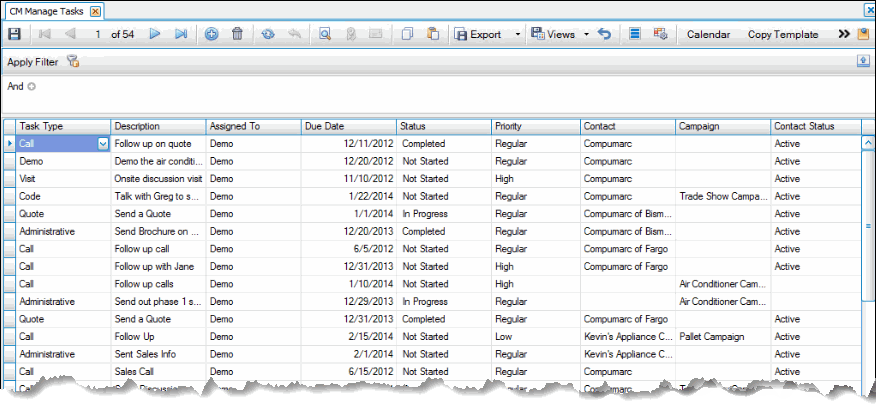
Use the Manage Tasks function to view, add, and/or edit tasks and responses by task type, the person the task is assigned to, status, contact, and/or priority.
Tasks record the things that you or your employees need to do to in order to further communication with a contact. Instead of being associated with a contact, tasks are associated with your employees, the users of CRM. Tasks are assigned to employees for completion and can carry expiration or due dates.
If there are values in the Contact or Campaign, or Opportunity columns of a task record, you can drill down to view the details of those activities.
Use the Column Chooser to add or remove columns from the Manage Tasks screen.
To aid in ease of use, you have the same options available on the Manage Tasks screen as you do with Interactive Views, namely the abilities to filter opportunities, customize the view and save it, and export the data.
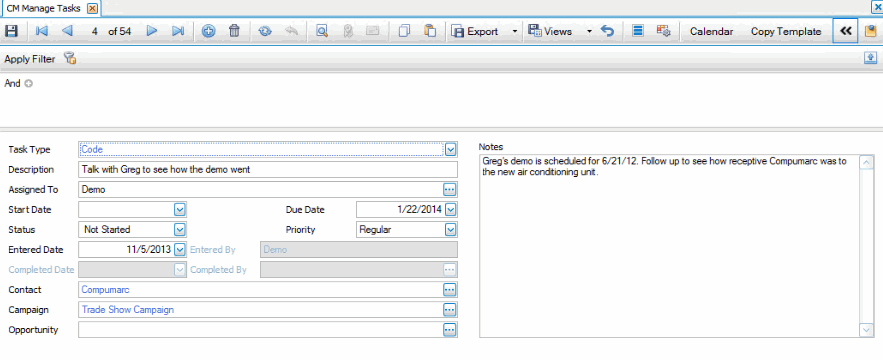
Use the Toggle button ( ) to switch between grid view and field view.
Creating a Task Record
- Click the New button, on the toolbar, to open a blank task record.
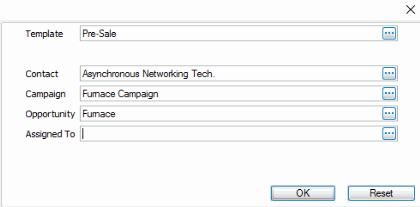
- Select or edit the type of task in the Task Type field. ALTERNATELY, click Copy Template to open the template selection window.

- Select a Template to copy into the tasks list
- Select a Contact for the template.
- Select a Campaign, as applicable.
- Select an Opportunity, as applicable.
- Select a user in the Assigned To field, as necessary.
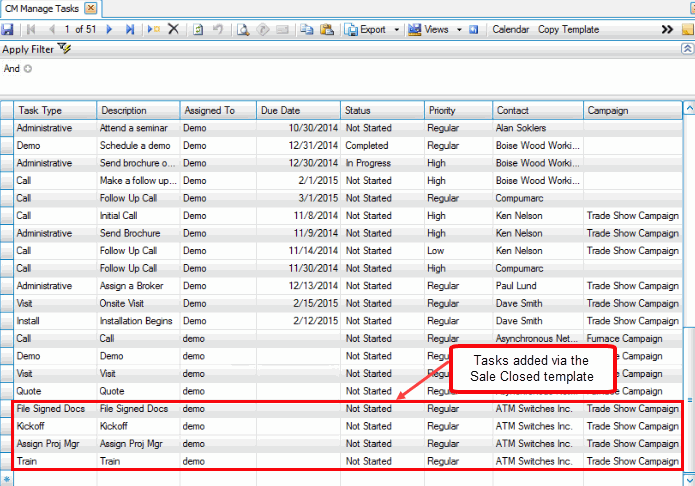
- Click OK. This will add the individual tasks from the template (with the associated contact, campaign, opportunity, and assigned to values) into the Tasks screen.
- Select the type of task from the Task Type field.
- Enter a description of the task in the Description field.
- Select the user to which to assign the task from the Assigned To field.
- If available, select the date for which the task should start from the Start Date field.
- Select the date by which the task is due from the Due Date field.
- Select the status of the task from the Status field.
- Select the priority of the task from the Priority field.
- Enter or select the contact for the task in the Contact field.
- Select a campaign for the task from the Campaign field.
- Use the Calendar button, on the toolbar, to open a calendar view.
- Click the Save button, on the toolbar, to save the new task record.
Editing a Task Record
- Apply the filter as necessary to sort task records.
- Select a task record to edit.
- Edit the fields as necessary.
- Click the Save button, on the toolbar, to save the edited task record.
Deleting a Task Record
- Apply the filter as necessary to sort task records.
- Select a task record to delete.
- Click the Delete button, on the toolbar, to delete the selected task record.
- Click Yes at the "Are you sure you want to delete selected record(s)?" prompt.


