Traverse Global v11.2 - Service Repair
Job Folder Attachments
Service Repair transactions may include documents, images, or other files associated with the job. When you add files to a job transaction, the files are stored in a folder with the job transaction number created in the default Job Folder. You can designate the default job folder through the Service Repair business rules. Files can be added to the job transaction folder by dragging and dropping them onto the job transaction screen, or by adding the files to the folder using the File Explorer.
NOTE: Be aware that this portal Attachments function is NOT the same as the general Attachments function found in Traverse.
If you have the Portal application installed, and TP (Traverse Portals) is selected in Server Manager, a Portal folder will be created inside the job transaction folder when a new job transaction is entered. To make document, image, or other files available via the portal, you must add files to the Portal folder for the job transaction, then perform a synchronization process in order to upload the files to the Service Repair Customer Portal.
To include files in the Attachment feature of the Service Repair Customer Portal Job Information function:
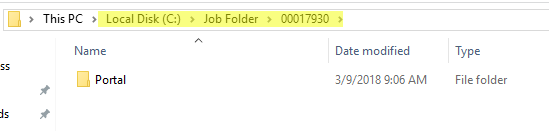
- Ensure a default job folder is designated in the Service Repair business rules. In this example, the default job folder is: C:/Job Folder.
- Create a new job transaction. This process will generate a Portal folder within a job transaction folder in the default job folder.
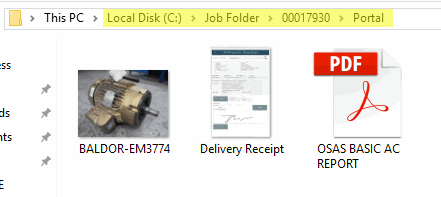
- Use Windows Explorer to move or copy the files you want to be available to the Service Repair Portal into the Portal folder.
- Once the files are in the Portal folder for the job transaction, you must synchronize the folder with the Service Repair Customer Portal. There are two ways to run the synchronization process:
- Use a Windows Scheduled Task to automatically synchronize the attachments to the Portal. Talk to your network or IT specialist to set up this scheduled task.
- Manually run the PortalAttachmentsSync.exe file. This executable file and the PortalAttachmentsSync.exe.config file must be within a Traverse Service Repair client folder that is installed on the server.
- A Portal Attachments Sync process Results.log file will be generated when the synchronization process is complete. This file will be appended each time the synchronization process is executed.
You can define the format of this sync results log as 'Detail' or 'Summary' within the PortalAttachmentsSync.exe.config file, in the <userSettings> area of the file. Edit the option between the <value> keys: False = Summary, True = Detail. Save the file.
<setting name="DetailedFileChangesLog" seralizeAs="String">
<value>False</value>
</setting>
Example of the Portal Attachments Sync process Results.log file with both detailed and summary information:
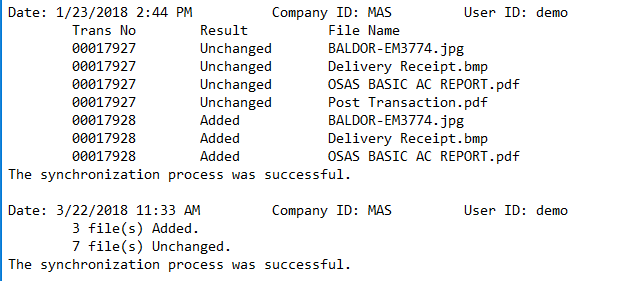
NOTE: if the Portal Attachments Sync process Results.log file is deleted, it will automatically be created again during the next synchronization.
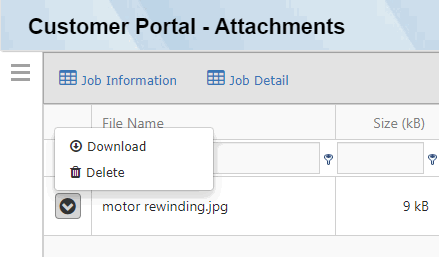
- Once the Portal folder is synchronized, its files will be accessible using the Service Repair Customer Portal Job Information-->Job Details-->Attachments button.
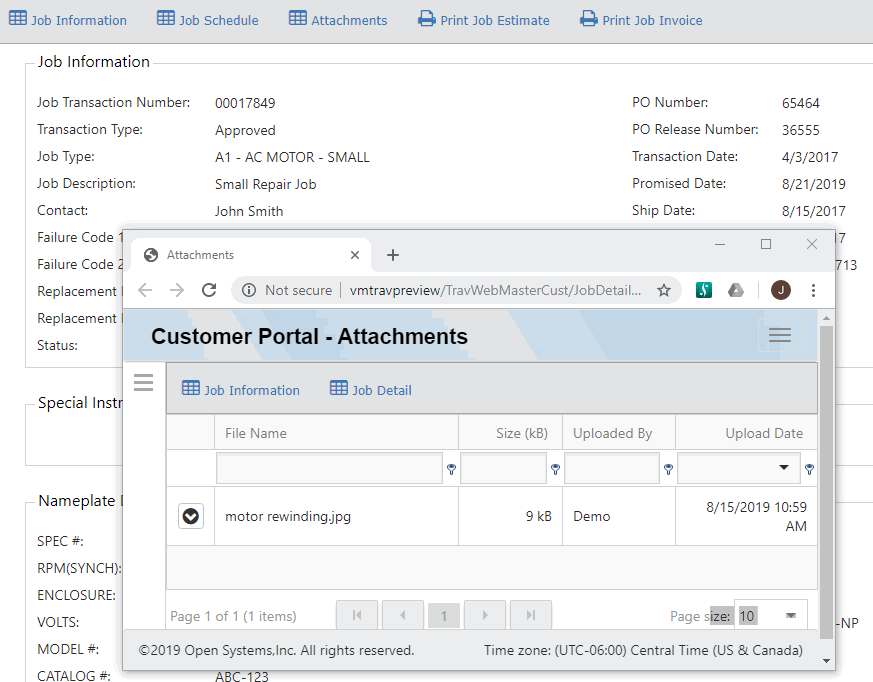
Use the Action icon if you want to download or delete the attachment.