Traverse Global v11.2 - Service Repair
Estimates
Use the Estimates function to enter cost and income estimates for projects, phases, and tasks. The Estimates screen lists both current and revised estimate amounts to help minimize data entry errors.
You can make your estimates into transactions to cut down on the manual entry of both estimates and transactions. You also can copy estimates that have been previously entered to duplicate past estimate records.
Estimates can be entered to the project level, project and task level, and project, task, and phase level. Time estimates do not require an employee ID to be entered for more general estimating of time projected for a Project/Phase/Task.
- To create a new estimate record, use the New Estimate button on the toolbar.
- Use the Copy Estimates button on the toolbar to load the Copy Estimates dialog window and select the estimates to copy.
 Copy Estimates window
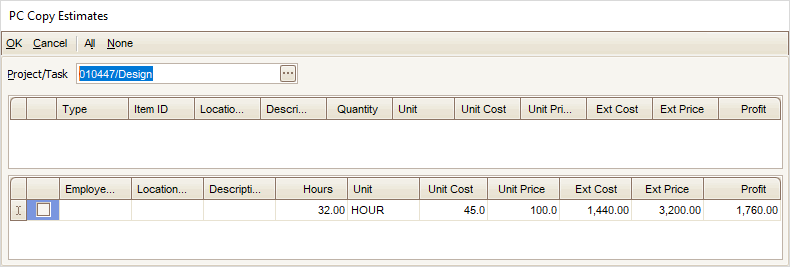
- Select a Project/Task from which to copy in the drop-down list.
- Select the lines to copy by marking the appropriate check box. Use the All button to mark all lines, or use the None button to clear all check boxes.
- Click the OK button to copy the selected lines, or click the Cancel button to abort the process and return to the Estimates screen.
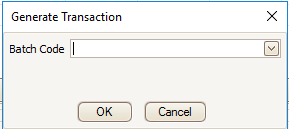
- Use the Generate Transaction button to load the Generate Transaction dialog window and select a batch to use to generate the transactions. You can only use this button if you select a material type estimate.
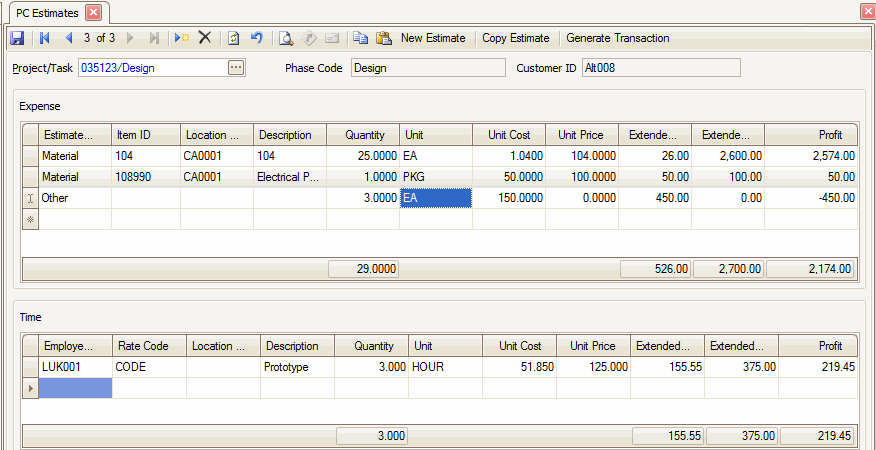
To create a new project cost estimate:
- Select a Project/Task to which you want to add expense and time estimates.
- Use the New button on the toolbar to add a blank Expense record.
- Select the Estimate Type for the expense item line.
- If you selected Material as your Estimate Type, select an Item ID.
Note: The items shown appear from Inventory if you interface with Inventory. If you do not interface with Inventory, the items show appear from the System Manager Description Items.If you selected Expense or Other as your Estimate Type, enter in the Expense or Other type in the Item ID field.
- If you selected Material as your Estimate Type, select a location associated with the item from the Location ID field.
If you selected Expense or Other as your Estimate Type, use the Location ID field to enter a location for the Expense or Other type.
- Enter a Description for the estimate line.
- Enter the Quantity of expense items for the selected Estimate Type.
- Select a Unit of measure for the line item, as applicable.
- The Unit Cost is a read-only field.
- Enter a Unit Price for the line item.
- The Extended Cost, Extended Price, and Profit fields are read-only.
- Select an Employee ID to associate with the estimate, as applicable. You can leave this field blank if you are entering general time to be used for the estimate that is not tied to an employee. You will use Time Ticket Entry to record the actual time spent on the project.
- Select a Rate Code for the employee, as applicable.
- Enter a Location ID for the project estimate, as applicable. This field is not linked to Inventory locations.
- Enter any information pertaining to the time estimate in the Description field.
- Enter the Quantity of units to associate with the estimate.
- The Unit field is read-only.
- Enter the Unit Cost and the Unit Price to use for the estimate.
- The Extended Cost, Extended Price, and Profit fields are read-only.
- Use the New Estimate button on the toolbar to add another estimate record to the project/task.
- Save your changes.