Traverse Global v11.2 - Service Repair
Configured Manufacturing Order Entry
To create a manufacturing order for a configured line item, fill out the tabs (Header, Documents, Bill-To, Ship-To, Tax, Payments, and Totals) as necessary on the SO Orders screen. See SO Transactions for additional information on entering a new transaction.
To configure a new manufacturing order:
- Open the Orders function for Sales Orders.
- Click the New button on the toolbar to open a blank transaction record.
- Accept or edit the Transaction Date.
- Select a Sold To customer from the drop-down list.
- Enter a PO Number and PO Date, if applicable.
- Accept or edit the Batch Code.
- Accept or edit the Location ID.
- Enter a Req Ship Date.
- Accept or edit the Fiscal Period/Year.
- Accept or edit the Currency ID.
- Enter any Notes.
The configuration pane is part of the Tasks pane on the right side of the Sales Order screen.
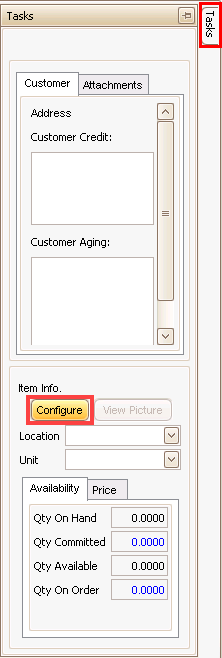
- To select a configuration, click the Configure button.
- The Select Configuration window appears listing all available configurations. Use the Data Filter to refine the number of configurations shown.
Hint: If you created a configuration, and it does not appear in the Select Configuration window, return to the Configuration Maintenance screen and validate the configuration.
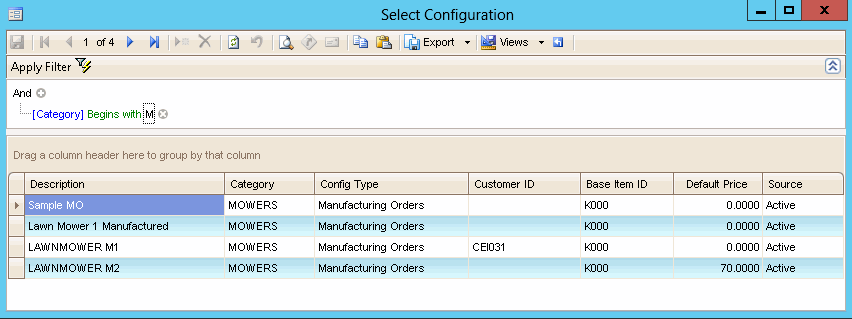
- For a manufacturing order, select a configuration (where Config Type = Manufacturing Orders) that you want to work with by double-clicking the configuration record. The Configurator Entry screen will appear.
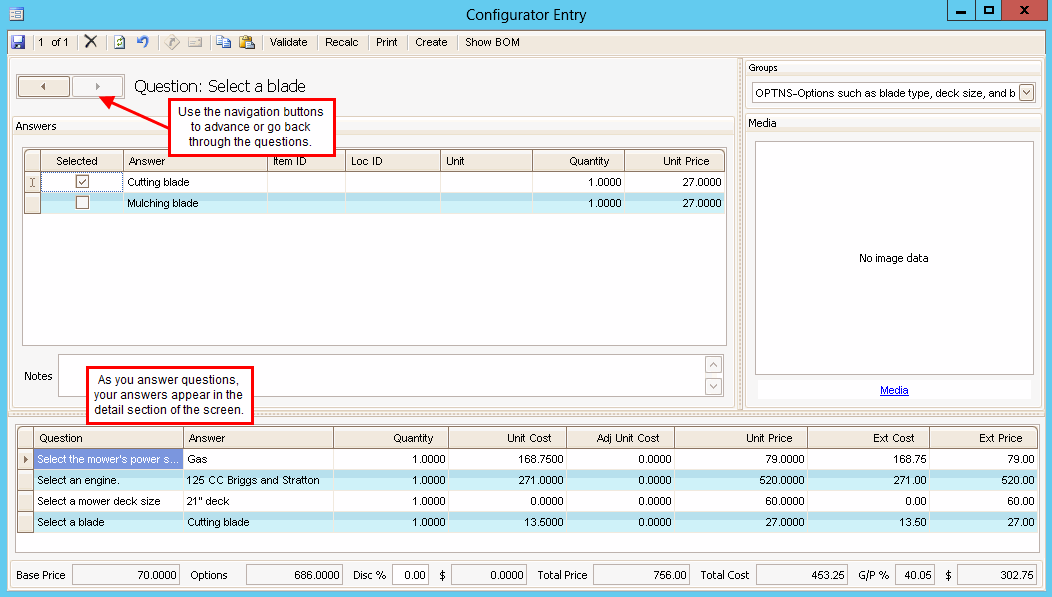
- Answer each question as it is presented. Navigate through the questions using the navigation buttons.
- As you answer the questions, your answers appear in the detail section of the screen.
- You can add any Notes as you go through the configuration.
- If you change a quantity, use the Recalc button on the toolbar to recalculate the totals.
- Use the Validate button on the toolbar to check the configuration for validity.
- Once you have finished setting up your configuration, you can print a configuration list or a price estimate by using the Print button on the toolbar.
- The configuration list is a list of items included in the configuration, as well as the costs and prices for the items. The price estimate lists the items in the configuration along with the estimated price of the configuration.
- Click the Save button to save your configuration.
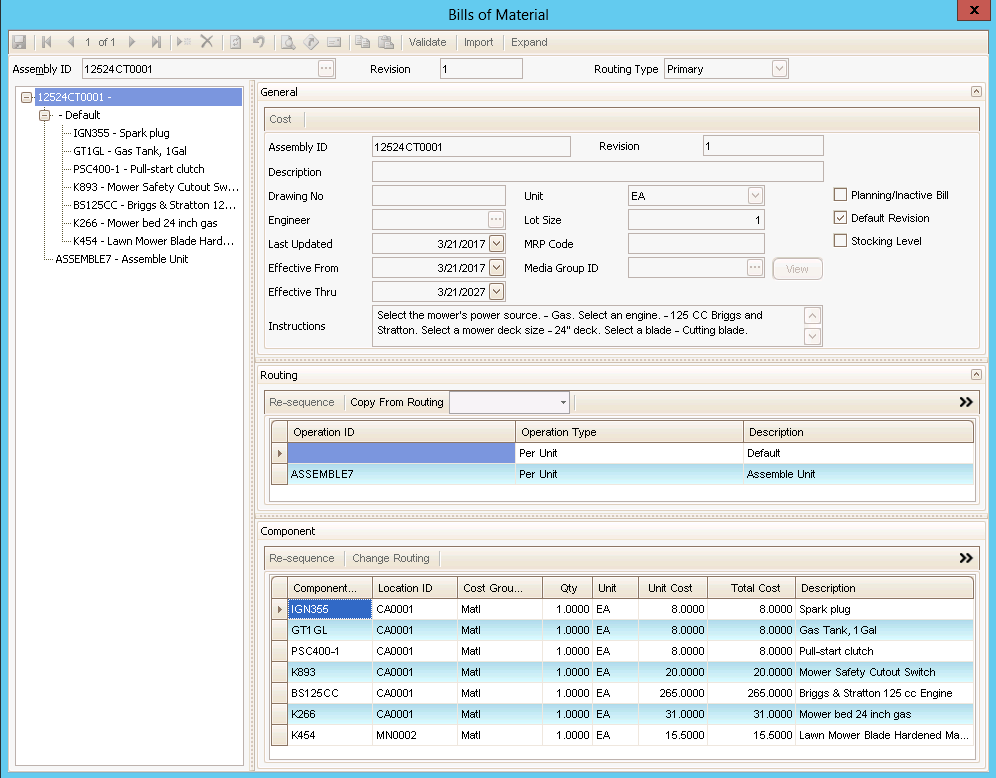
- Click the Show BOM button on the toolbar to view the bill of material for the configured item.
This is view-only; to make changes, close the BOM screen to return to the configuration entry screen.
- To create the transaction, click the Create button on the toolbar. The Create Transactions screen for manufacturing orders will appear.
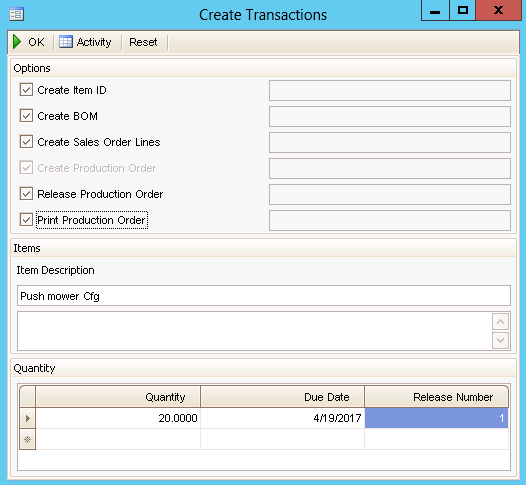
- To create an item ID for the configuration, mark the Create Item ID check box.
- To create a bill of material for the configuration, mark the Create BOM check box.
- To create sales order lines for the components in the configuration, mark the Create Sales Order Lines check box.
- In the Quantity section, enter the number of configured items to build in the Quantity field.
- In the Quantity section, accept or edit the Due Date for the configured items.
- To release the production order for the configuration, mark the Release Production Order check box.
- To print the production order for the configuration, mark the Print Production Order check box.
- Add an additional description in the Additional Description field just below the Item Description field, if necessary.
- To add another release, click in the empty record and enter a quantity and due date.
- Click OK to create the transaction.
The Production Picking List screen will appear.
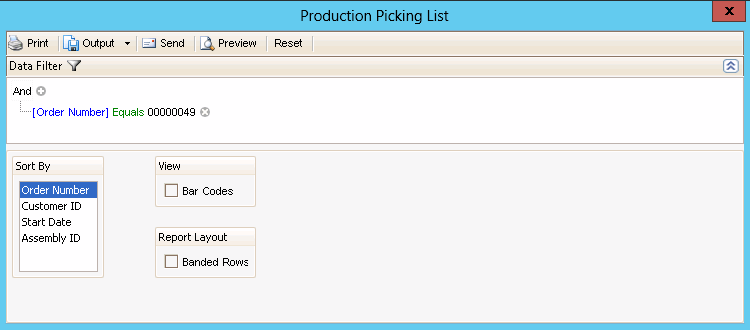
- Select the field by which to sort the list in the Sort By field.
- Mark the Bar Codes check box if you want bar codes to appear on the picking list.
- Select the Banded Rows check box, if applicable, to highlight alternating lines on the report to make the report easier to read.
Note: Use the System Manager Print Preferences function to define the default setting for this check box. You can then override this default when you print the report.
- Click a command button to
Select To Print Print the Production Picking List. Output Output the list as a PDF. Send Save the list as a PDF and attach it to an email using your default mail program. Preview Preview the Production Picking List using the selected criteria. Reset Reset all fields and lists to their default selections.
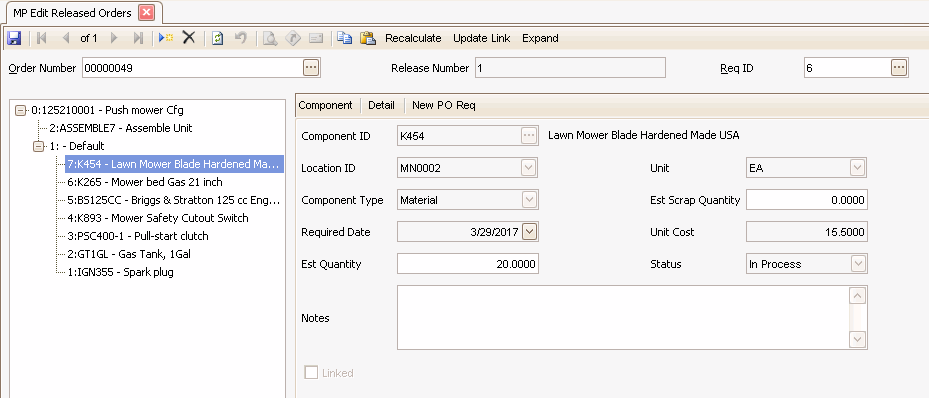
A notification dialog box will appear once the transaction is created. This also creates and releases the production order.
Once the transaction is created, you can use the MFG - Production Edit Released Orders function to edit the production order if necessary.
You can add another configured item or inventory item by clicking in an empty record or using the Append button.
When you are finished adding items to the transaction, proceed as usual. See the Edit Released Orders topic for additional information.