Traverse Global v11.2 - Service Repair
Quick Entry
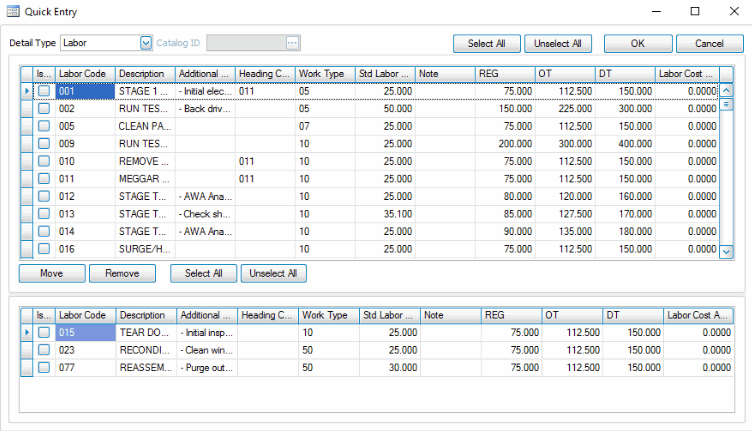
Quick Entry allows you to select multiple records at once to add to a work plan or job transaction. The screen shows two grids. The upper grid displays a list of available line items, such as Labor Codes or Inventory Items, and the lower grid displays the line items selected for the work plan or job transaction. Once items are selected, they are then added to the line items of the work plan or job transaction.
To select line items through the Quick Entry function:
- Click the Quick Entry button to open the Quick Entry window.
- Select the detail type you wish to work with from the Detail Type drop-down list. The upper grid will display the available line items for that detail type.
For the material detail type, if you have catalogs available, select a Catalog ID from the field filter. This will display the items in the selected catalog in the grid.
- Mark the selection check box to select the line items you want to add to the work plan or job transaction; otherwise, clear the check box. Use the Select All button to mark all the check boxes, or use the Unselect All button to clear all the check boxes.
- Use the Move button to move the selected line items to the lower grid.
- If you wish to remove chosen items from the lower grid, mark the selection check box in the lower grid to select those items, then use the Remove button to remove them from the item list. Use the Select All button to mark all the check boxes, or use the Unselect All button to clear all the check boxes.
- When you have made your selections, click the OK button to add the line items in the lower grid to the work plan or job transaction.