Traverse Global v11.2 - Service Repair
Shipping Integration Field Mapping
When you integrate with a carrier's program, such as UPS WorldShip® or FedEx Ship Manager®, you need to set up the correlation between the fields in the carrier's software and the fields in Traverse.
UPS WorldShip®
Open UPS WorldShip® (Note: The following instructions and pictures are for UPS Worldship 2021. Your options and screens may vary. The screens for FedEx Ship Manager® are different but the process is the same.)
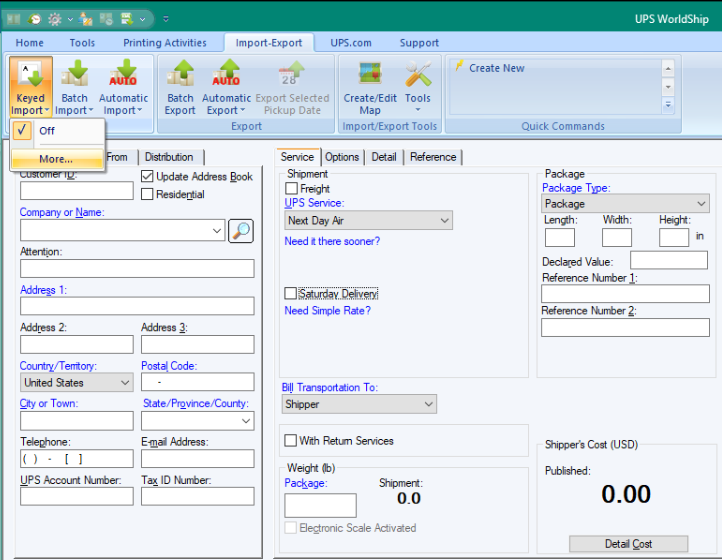
- From the main UPS Worldship screen, select the Import-Export tab to open the Import/Export ribbon. Select Keyed Import-->More ... like in the following screenshot:
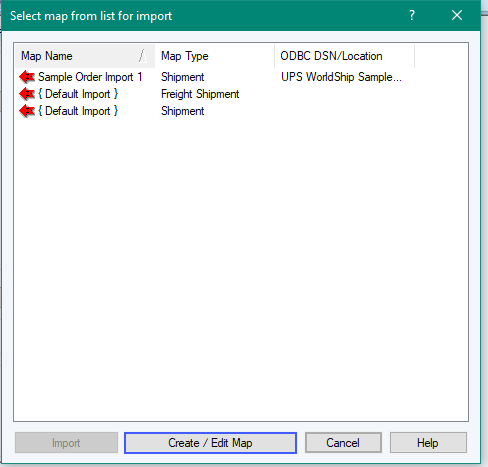
- Once you click More ... the Select map from list for Import screen will appear. Select Create/Edit Map.
- The Create or edit an import or export map screen will appear, with a New Map section at the bottom of the screen.
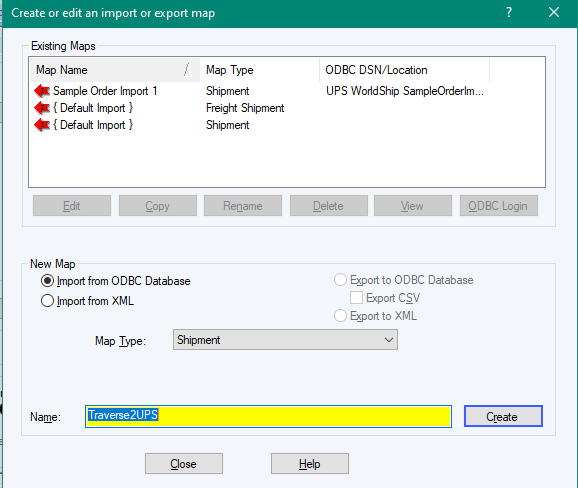
- In the bottom half of the window:
- Select Import from ODBC Database.
- Select 'Shipment' in the Map Type box.
- Since this is the import map, enter 'Traverse2UPS' in the Name field.
- Click Create.
- In the Select an ODBC source pop-up window that opens, select the Traverse2UPS ODBC DSN you created and enter the appropriate user ID and Password for the DSN.
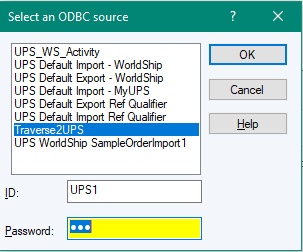
Click OK. This will load the import mapping setup screen.
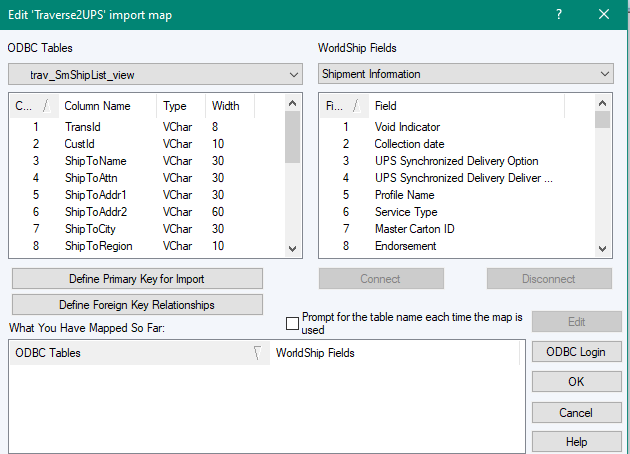
You will begin the process of mapping data from Traverse fields into UPS fields. The ODBC Tables section at the top left contains the Traverse tables, while the WorldShip Fields section at the top right contains the UPS tables.
During this process, the only view in Traverse to select is trav_SmShipList_view, while you must switch between two separate tables in UPS: Shipment Information and Ship To.
Note: Not all fields will be mapped.
- The following fields are mapped together by clicking one entry from each selected table and clicking the Connect button below the UPS table columns:
Traverse view: view_SmShipList_view UPS table: Shipment Information TransId
TransId also needs to be selected and defined as the primary key. When TransId is highlighted, there is a button to click beneath the fields called Define Primary Key for Import. A key icon will be displayed to the left of TransId once this has been done.Reference 3 CustId Reference 4 ShipToName Notification Recipient 1 Contact Name Email Notification Recipient 1 Email ServiceCode Service Type FreightPaidBy Bill Transportation To CustPoNum Reference 5 Traverse view: view_SmShipList_view UPS table: Ship To ShipToName Company or Name ShipToAddr1 Address 1 ShipToAddr2 Address 2 ShipToCity City or Town ShipToRegion State/Province/County ShipToPostalCode Postal Code CountryISO2 Country/Territory ShipToPhone Telephone ShipToFax Fax Number ShipToAttn Attention ShipToEmail Email Address FreightAccountNumber Receiver UPS Account Number ResidentialYn Residential Indicator 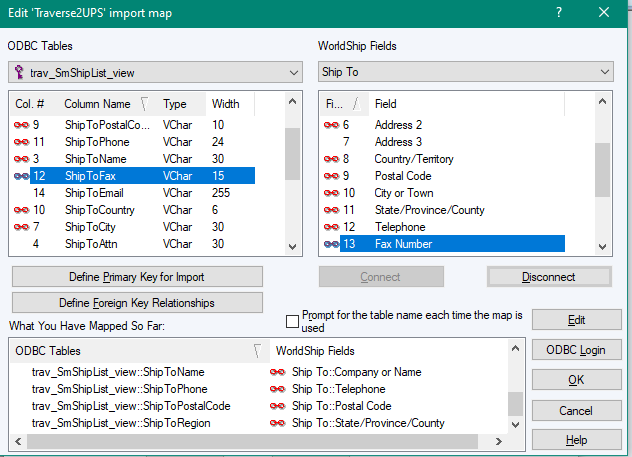
- Click OK when finished. This will return you to the Create or edit an import or export map screen.
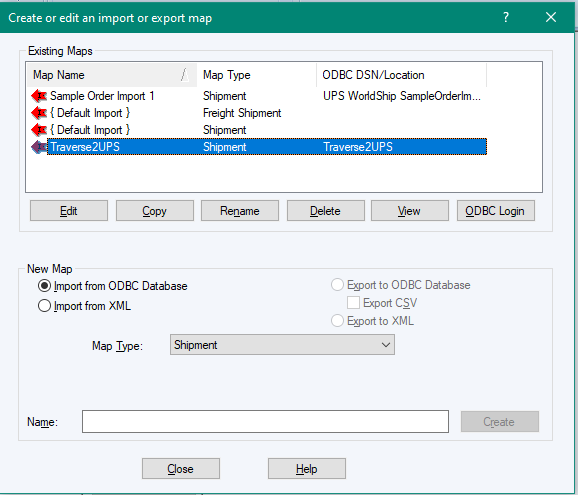
- Click Close to return to the Select a map from list for import screen.
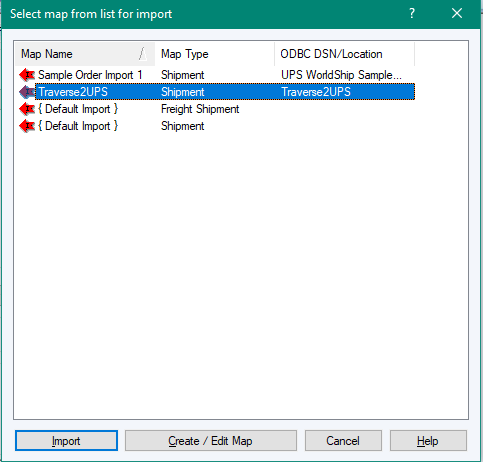
- Select the map you just created, 'Traverse2UPS', and click the Import button at the bottom of the screen. The main form will then appear with an Enter import keys dialog box. This is where you will enter the sales order number when you ship the order.

As long as this dialog is present, you will be able to type in the Sales Order number from Traverse and retrieve the ship-to information into UPS. Another way to verify the mapping is working is to re-visit the Import/Export Data menu and under Keyed Import, 'Traverse2UPS' should have a check mark to the left of it indicating it is selected.
- From the main UPS Worldship screen, select the Import-Export tab to open the Import/Export ribbon. Select Automatic Export After Shipment Processing -->More ... like in the following screenshot:

- Once you click More ... the Select map from list for Export screen will appear.
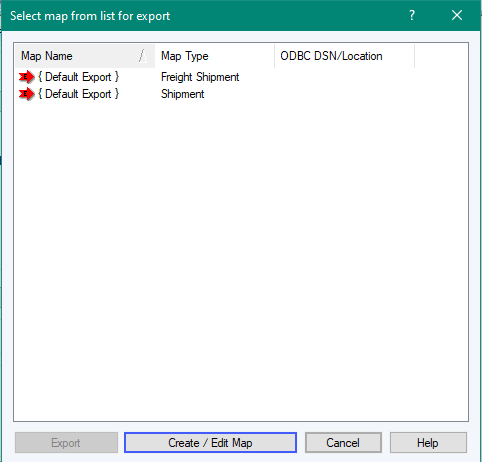
- Select Create/Edit Map. The Create or edit an import or export map screen will appear, with a New Map section at the bottom of the screen.
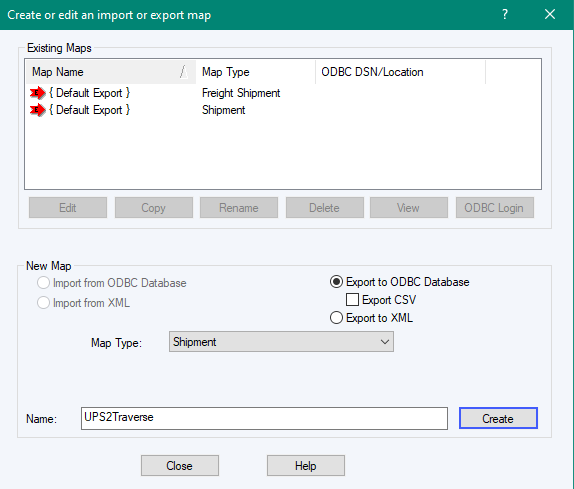
- In the bottom half of the window:
- Select Export to ODBC Database.
- Select 'Shipment' in the Map Type box.
- Since this is the export map, enter 'UPS2Traverse' in the Name field.
- Click Create.
- In the Select an ODBC source pop-up window that opens, select the UPS2Traverse ODBC DSN you created and enter the appropriate user ID and Password for the DSN. Click OK.This will load the export mapping setup screen.
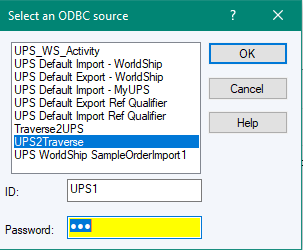
This will load the export mapping setup screen seen below:
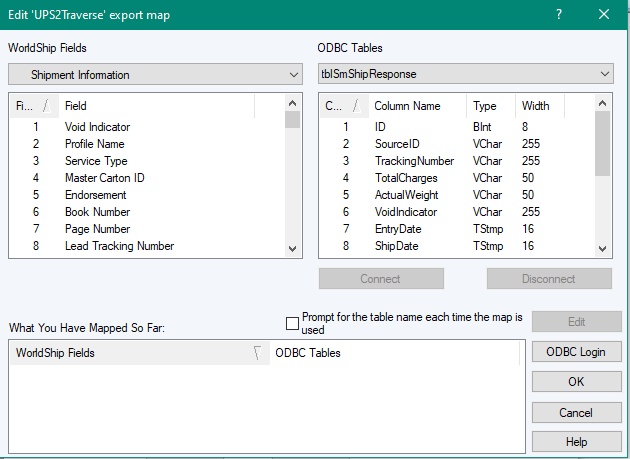
You will begin the process of mapping data from UPS fields into Traverse fields. The WorldShip Fields section at the top left contains the UPS tables, while the ODBC Table section at the top right contains the Traverse tables.
During this process, the only table in Traverse to select is tblSmShipResponse, while you must switch between three separate tables in UPS: Package, Shipment Information, and ShipTo.
Note: Not all fields will be mapped.
- The following fields are mapped together by clicking one entry from each selected table and clicking the Connect button below the UPS table columns:
UPS table: Package Traverse table: tblSmShipResponse Weight ActualWeight Reference 3 SourceID Tracking Number TrackingNumber UPS table: Shipment Information Traverse table: tblSmShipResponse Total Shipment Published Charges TotalCharges Void Indicator VoidIndicator Shipment ID ShipmentID ServiceType ShipVia Number of Packages NumberOfPackage UPS table: Ship To Traverse table: tblSmShipResponse PostalCode ShipZip 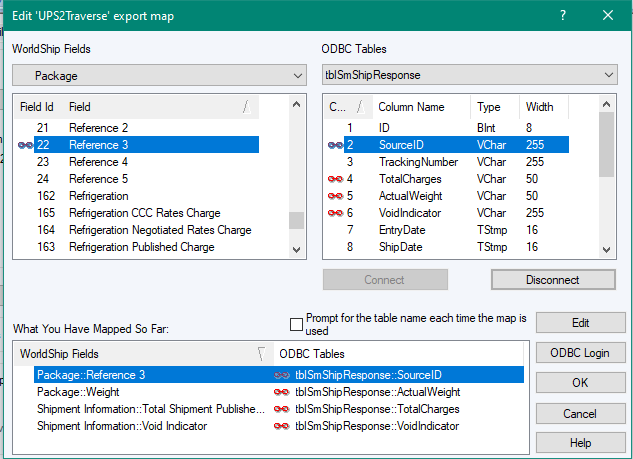
- Click OK when finished. This will return you to the Create or edit an import or export map screen.
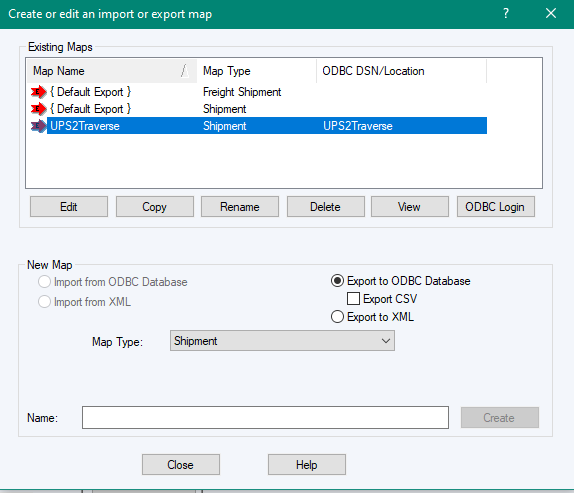
- Click Close when finished to return to the Select map from list for export screen.
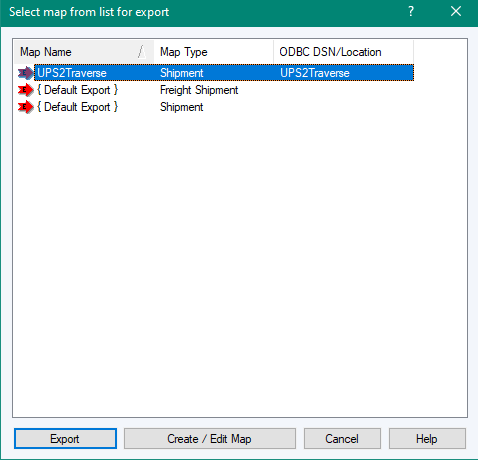
- Select the map you just created, 'UPS2Traverse', and click the Export button at the bottom of the screen.
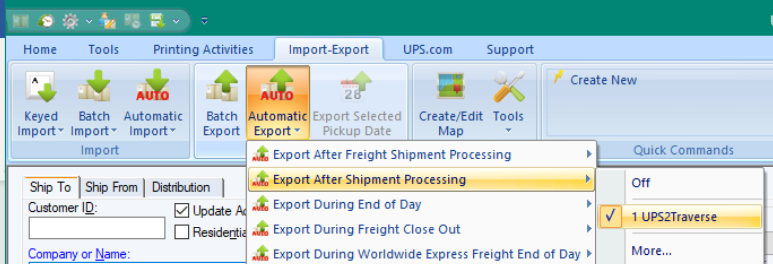
- To verify everything is working, click the Import-Export ribbon and go to Automatic Export After Processing Shipment. In that submenu, UPS2Traverse should be checked:
- From the main UPS Worldship screen, select the Tools tab to open the Tools ribbon. Select Create/Edit Profile like in the following screenshot:


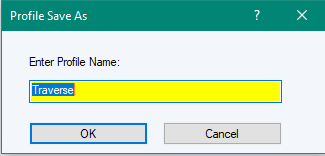
- In the Profile Editor tab, create a new profile name 'Traverse'. Save the profile.
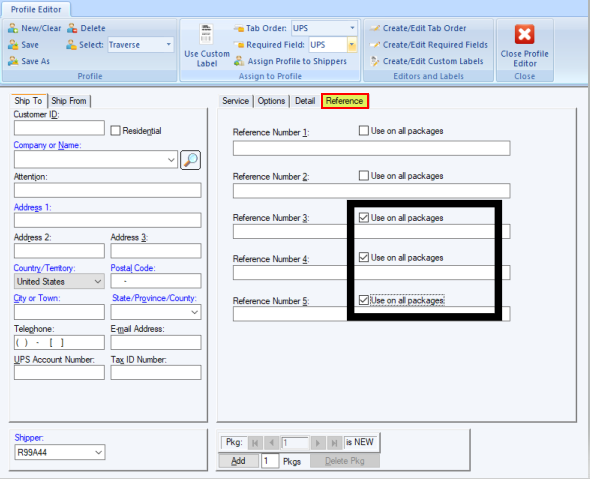
- Select the Reference tab and mark the Use on all packages check boxes for the Reference 3, Reference 4, and Reference 5 fields.
- Set up any other defaults for UPS WorldShip within the profile.
- Click Save in the Profile Editor ribbon to save the profile.
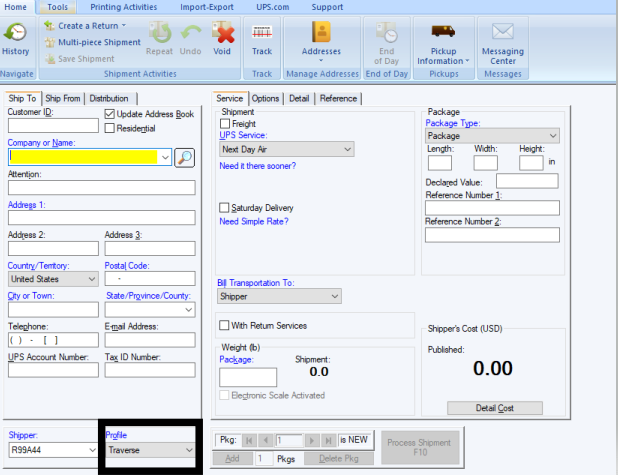
- Close the Profile Editor. Make sure the new profile, Traverse, is selected in the bottom left on the Ship To tab.
FedEx Ship Manager®
Open FedEx Ship Manager®.
- From the main Ship Manager screen, open the Integration menu, then select the FedEx Integration Assistant like in the following screenshot:

If the Integration menu is grayed out, contact your FedEx representative for assistance
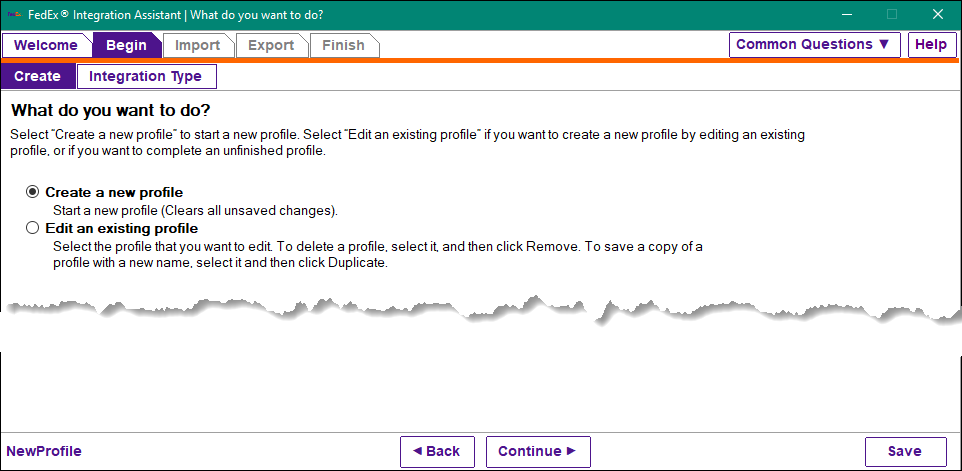
The Integration Assistant will start and you will see the What do you want to do? screen.
- On the What do you want to do? screen, mark the Create a new profile option, then click Continue at the bottom of the screen.
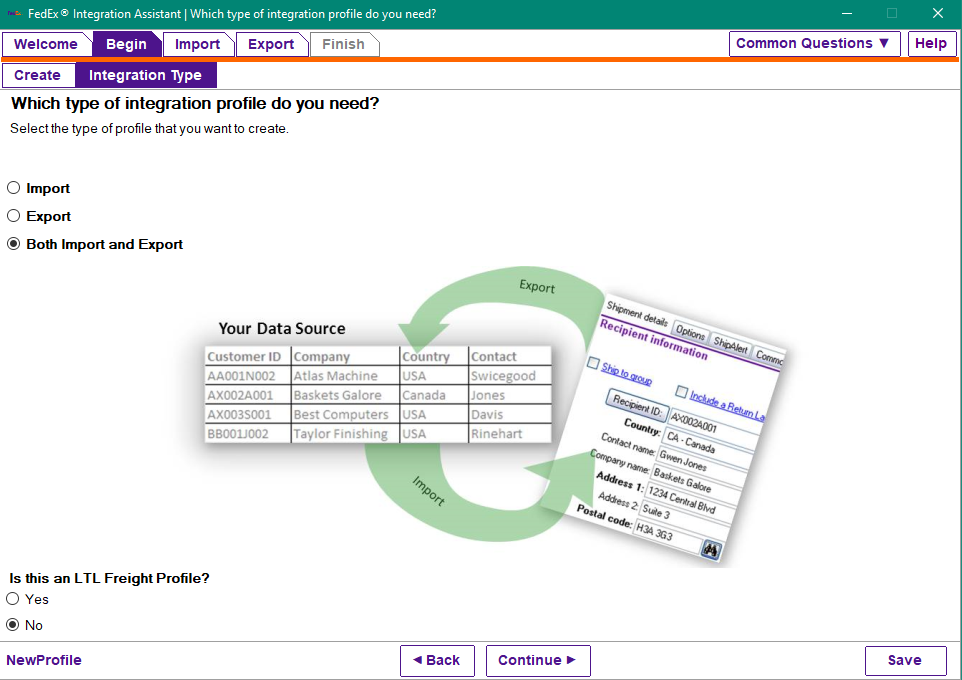
- On the Which type of integration profile do you need? screen, mark the Both Import and Export option, ensure the Is this an LTL Freight Profile? option is set to 'No', then click Continue at the bottom of the screen.
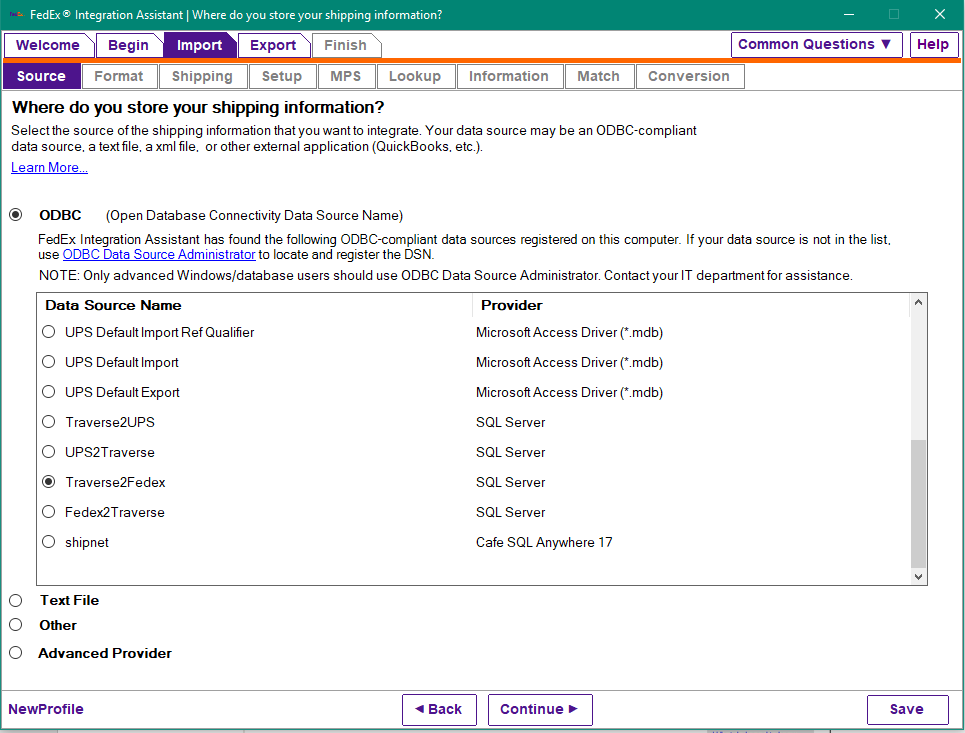
- On the Where do you store your shipping information? screen, mark the ODBC option, and under Data Source Name select 'Traverse2FedEx'. Click Continue at the bottom of the screen.
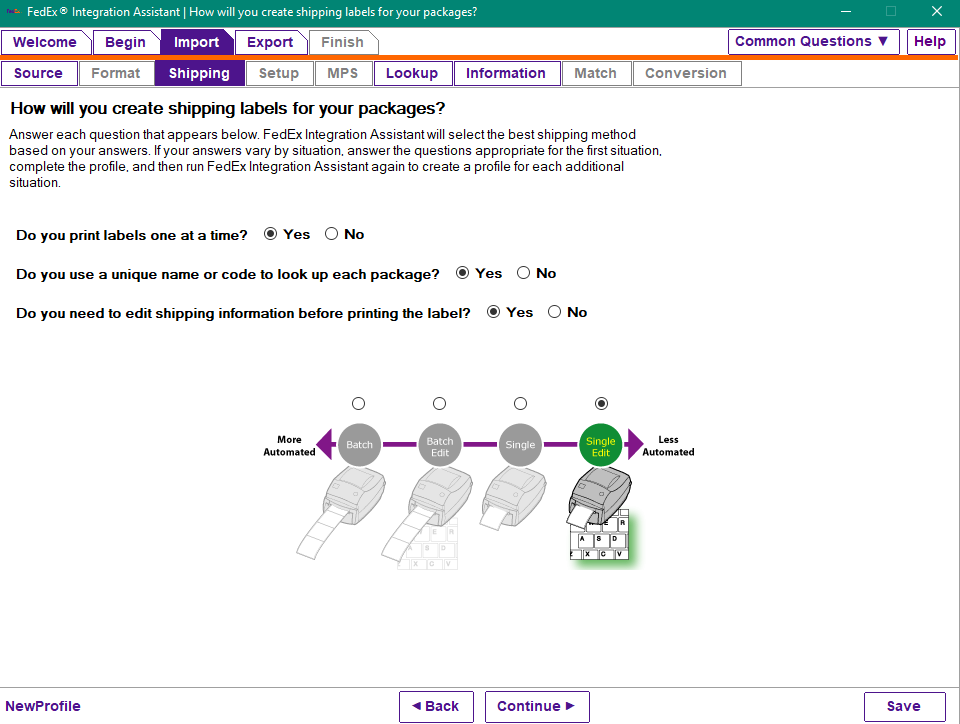
- On the How will you create shipping labels for your packages? screen, ensure all options are marked 'Yes' and the Single Edit option is selected. Click Continue at the bottom of the screen.
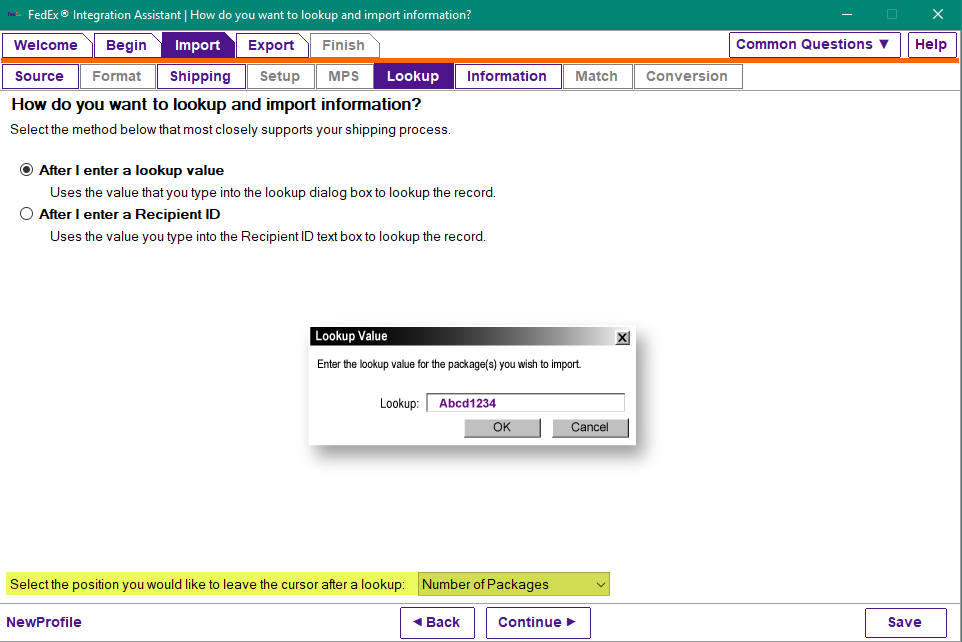
- On the How do you want to lookup and import information? screen, mark the After I enter a lookup value option, and at the bottom of the screen select Number of Packages. Click Continue at the bottom of the screen.
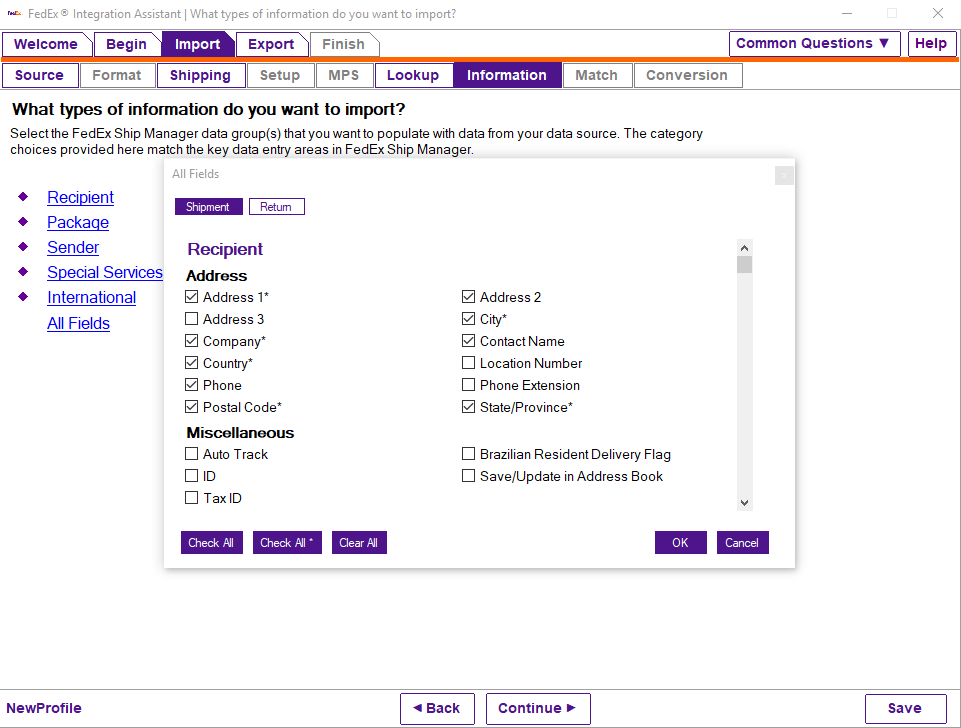
- On the What types of information do you want to import? screen, as you select each type of information, you will see a dialog box with a number of fields related to that information type. Select the following information types, and within the dialog boxes, the fields listed below:
- Recipient
- Address 1
- Address 2
- City
- Company
- Contact Name
- Country
- Phone
- Postal Code
- State/Province
- Payor Account Number
- Package
- Bill Transportation To
- Customer Reference
- P.O. Number
- Residential Delivery Flag
- Service Type
- Weight
- Number of Packages
- Shipment ID
- Ship Date
- Special Services: If you want email shipping notifications, select Recipient Email and the proper options for Delivery, Exception, or Shipment notifications.
Save your options and click Continue at the bottom of the screen.
Below is an example of the dialogs you will see during this process.
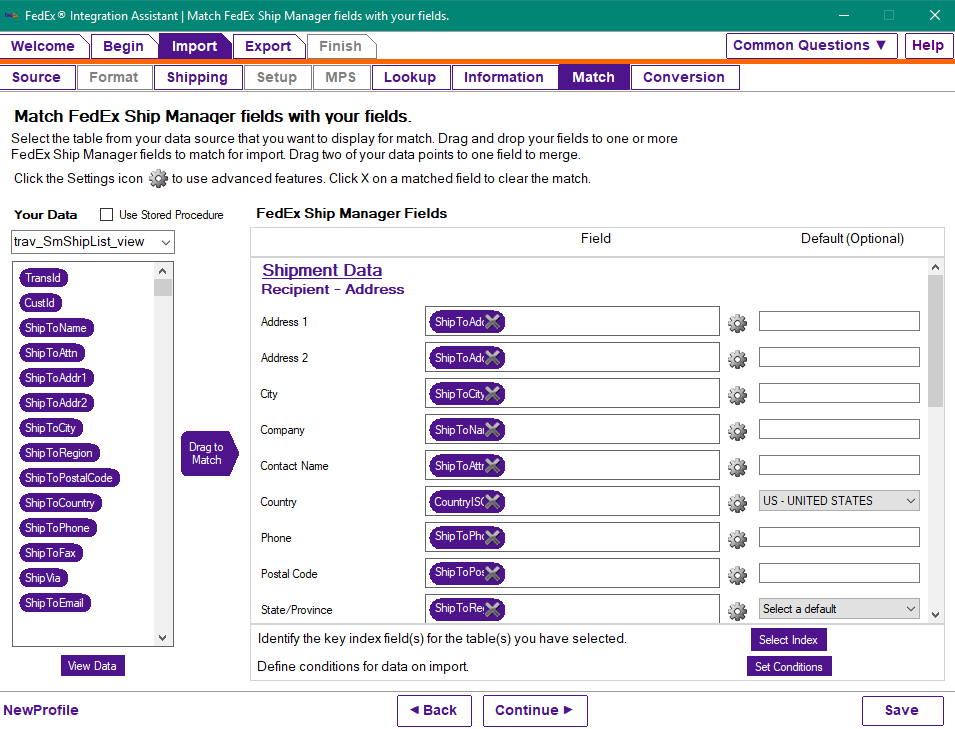
- On the Match FedEx Ship manager fields with your fields screen, you will map data from Traverse fields into the FedEx fields. The ODBC Tables section at the top left contains the Traverse tables, and the FedEx Ship Manager fields section is on the right.
In the Your Data section, select 'trav_SmShipList_view'. This will fill the list box below it with the columns in the Traverse view. Click and drag the fields from the left column into the matching fields on the right.
Note: Not all fields will be mapped.
- The fields are mapped together by dragging the fields from the left column to the matching fields on the right:
Traverse table: trav_SmShipList_view FedEx Field TransId
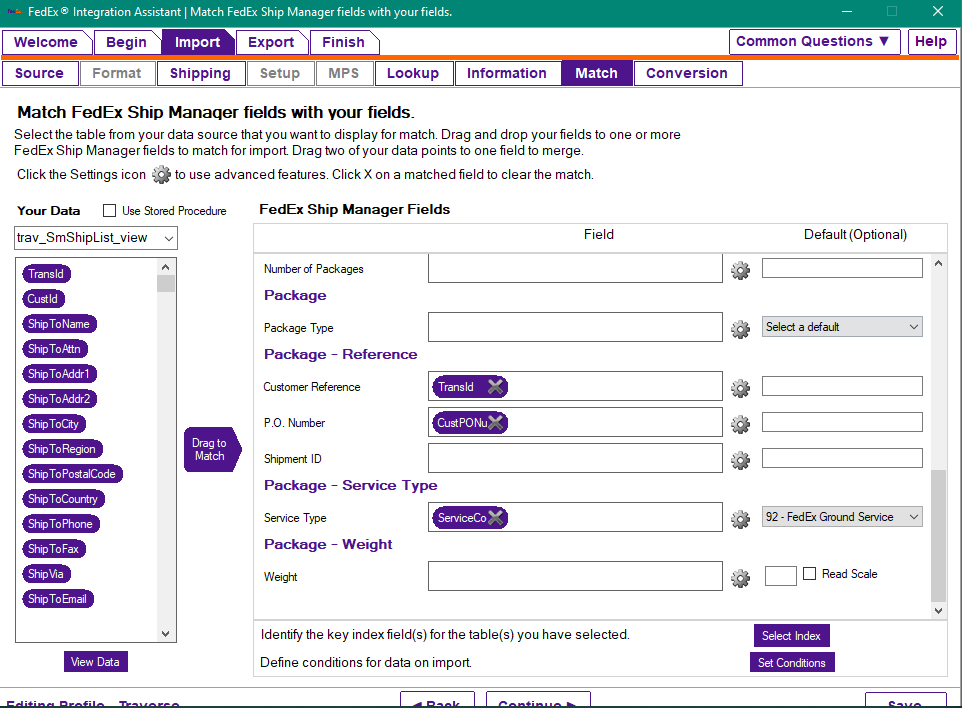
TransId also needs to be selected and defined as the primary key. When TransId is highlighted, there is a button to click beneath the fields called Select Index where you can select the Customer Reference as the key.Customer Reference ShipToAddr1 Address 1 ShipToAddr2 Address 2 ShipToCity City ShipToName Company ShipToAttn Contact Name CountryISO2 Country. Default "US" ShipToPhone Phone ShipToPostalCode Postal Code ShipToRegion State/Province. Default "State" Bill FreightAcctNum Payor Account Number CustPoNum P.O. Number ResidentialYn Residential Delivery Flag. Default "F" ServiceCode Service Type ShipToEmail Email Address Weight Check the box to read the scale if the scale is connected and configured. - Save and click Continue at the bottom of the screen.
Below are some screenshots of what these screens look like:
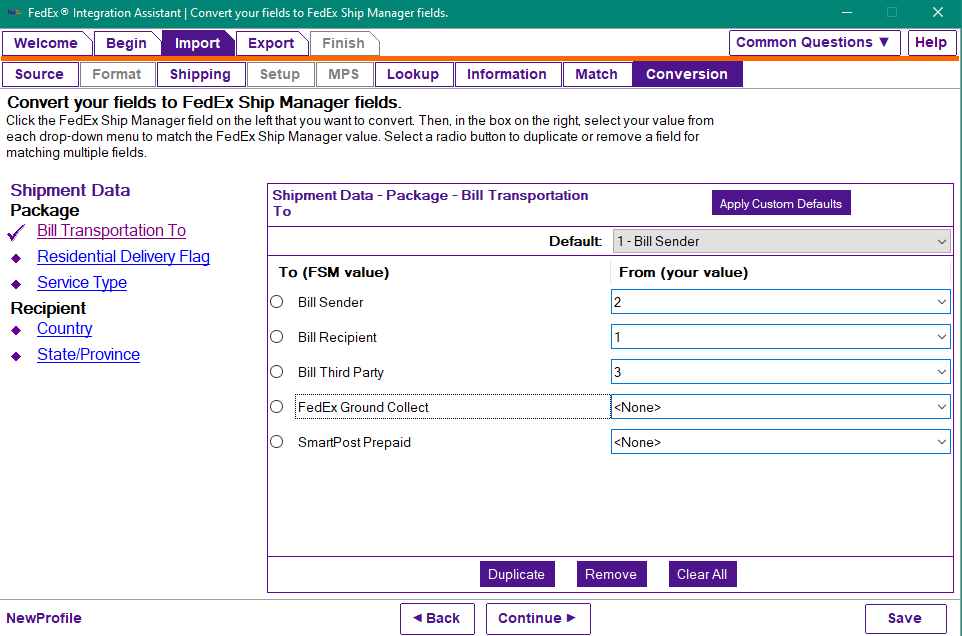
- On the Convert your fields to FedEx Ship Manager fields screen, you will convert any values that may be different between Traverse and FedEx, and pick defaults for others. Select the following shipment data fields, and within the "To (FSM value) section:
- Bill Transportation To
- Bill Recipient = 2
- Bill Sender = 1
- Bill Third Party = 3
Click Continue.
- Residential Delivery Flag
- No/False = N
- Yes/True = Y
Click Continue.
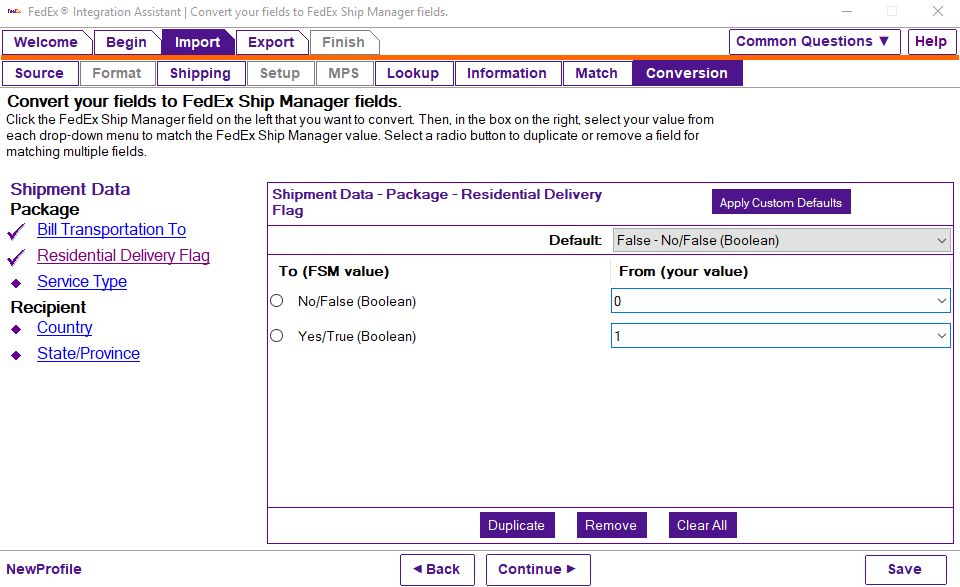
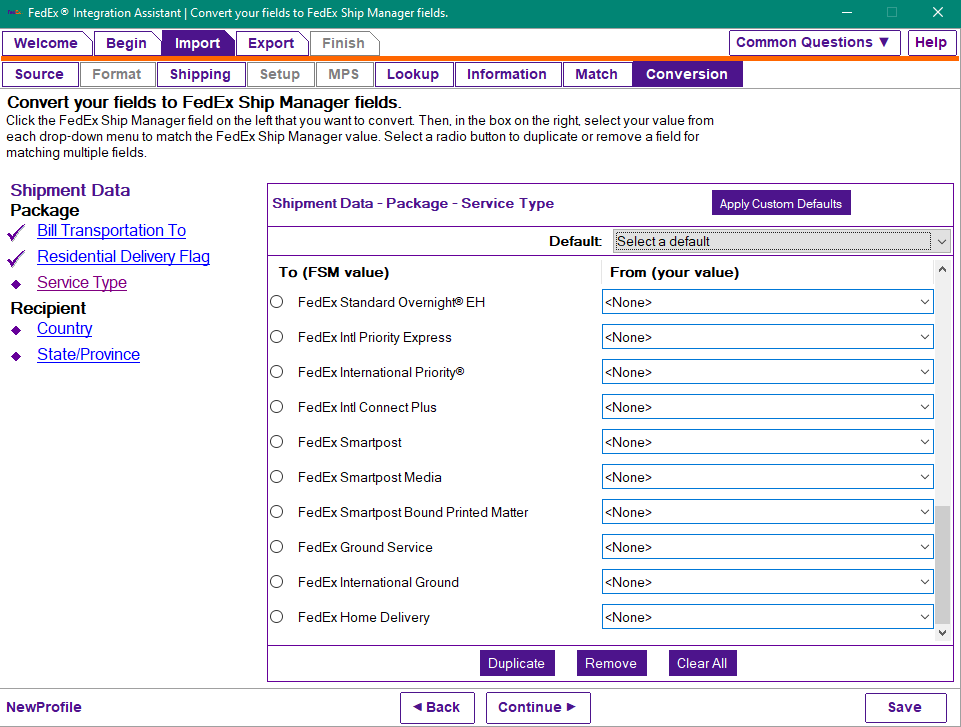
- Service Type: Not required but recommended to select 'Ground Service' and enter "92".
Click Continue.
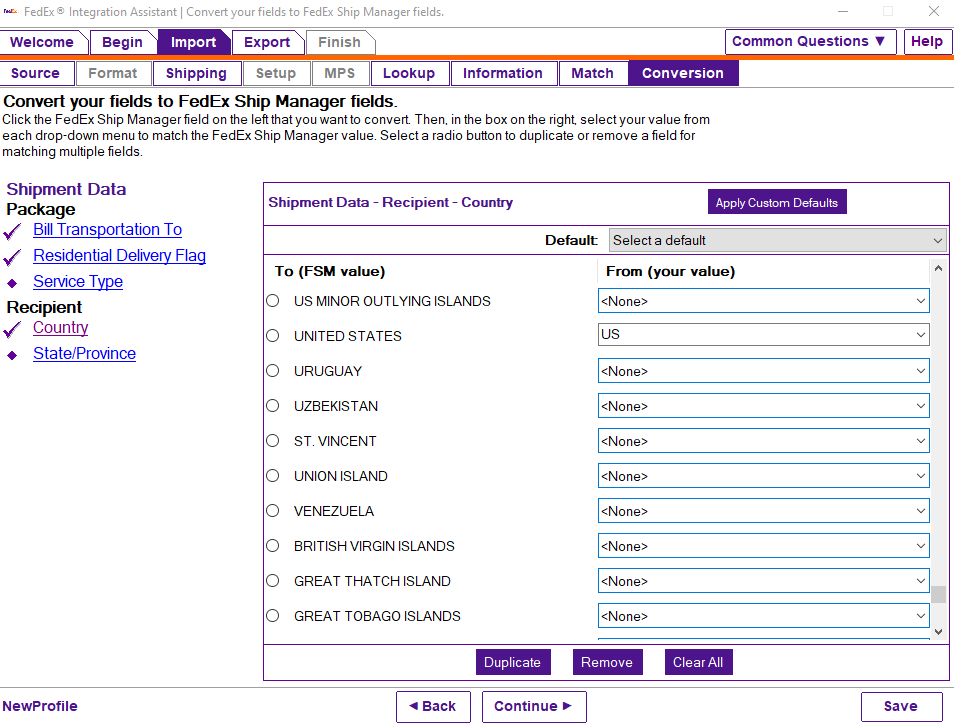
- Country: Select 'United States' and enter "US".
Click Continue.
Save your options and click Continue at the bottom of the screen.
- Bill Transportation To
- Click OK when finished.
The wizard will continue with mapping data from FedEx fields back into Traverse fields.
- On the Where do you want to send shipping information? screen, mark the ODBC option, and under Data Source Name select 'Fedex2Traverse'. Click Continue at the bottom of the screen.
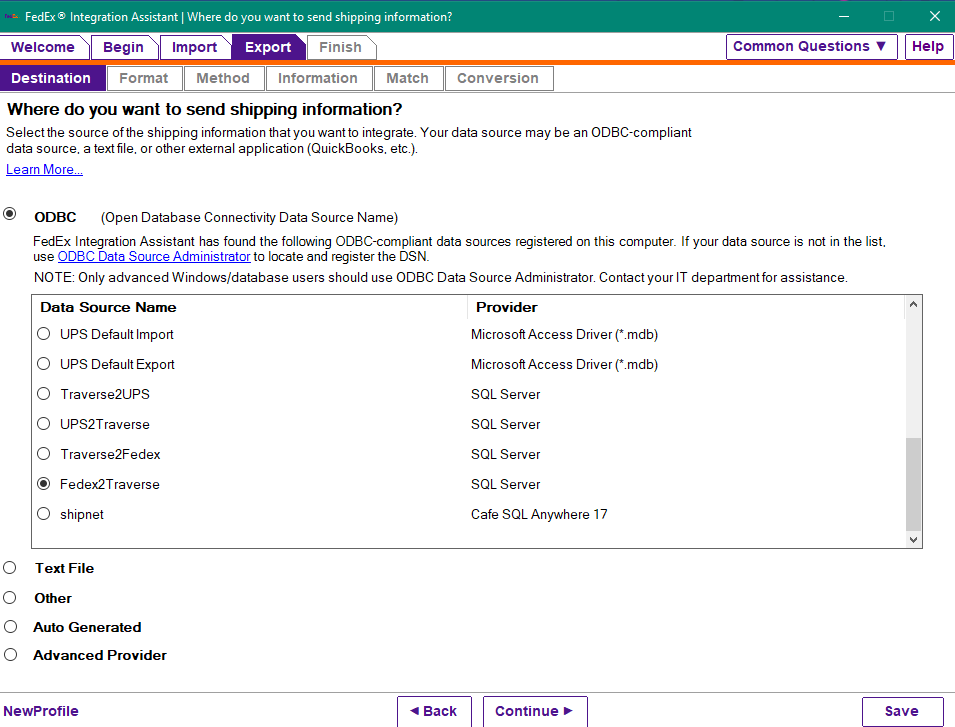
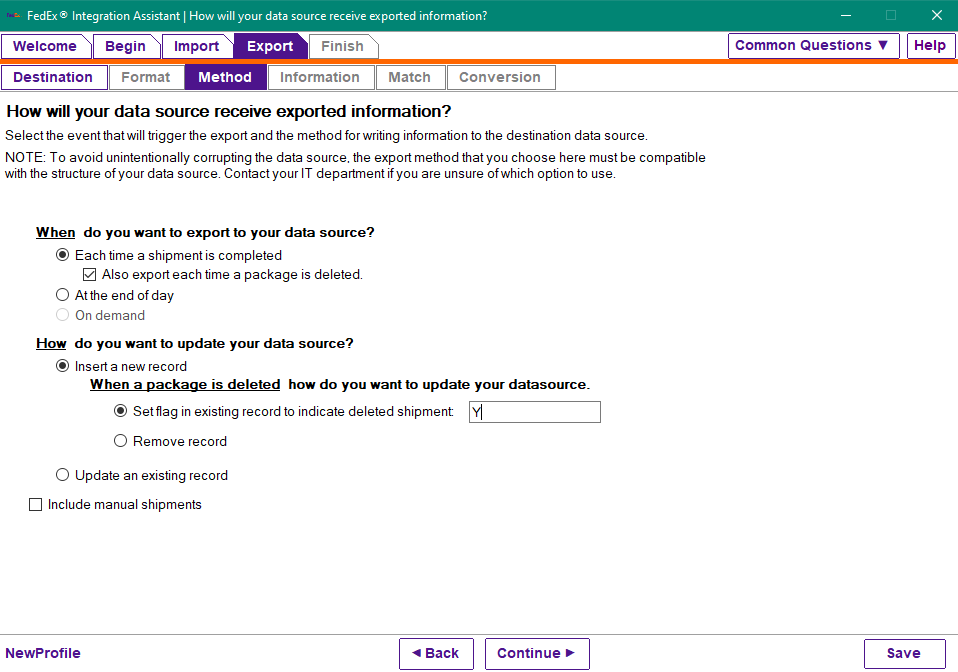
- On the How will your data source receive exported information? screen, select the following options:
- For 'When do you want to export to your data source?', select Each time a shipment is completed and Also export each time a package is deleted.
- For 'How do you want to update your data source?', select Insert a new record.
- For 'When a package is deleted how do you want to update your data source?', select Set flag in existing record to indicate deleted shipment, and enter Y.
- Click Continue at the bottom of the screen.
- On the What types of information do you want to export? screen, as you select each type of information, you will see a dialog box with a number of fields related to that information type. Select the following information types, and within the dialog boxes, the fields listed below:
- Tracking Numbers:
- Tracking Number
- Master Tracking Number
- Charges: Total Customer Charge
- Package:
- Customer Reference
- Weight
- Service Type Description
- Number of Packages
- Recipient: Postal Code
Save your options and click Continue at the bottom of the screen.
- Tracking Numbers:
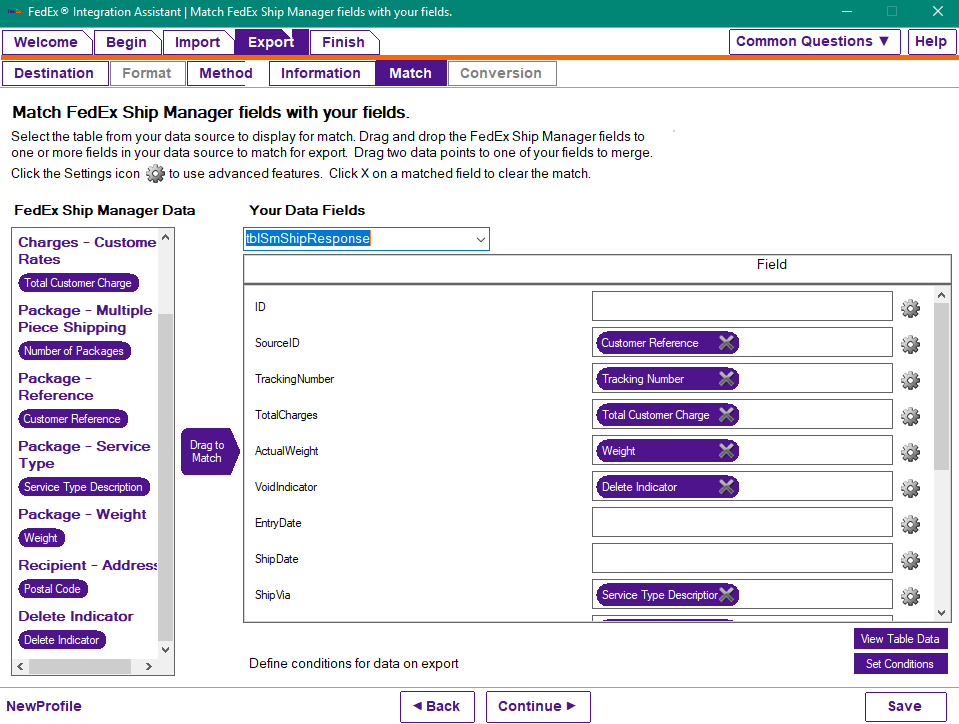
- On the Match FedEx Ship manager fields with your fields screen, you will map data from FedEx fields into Traverse fields. The FedEx Ship Manager fields section at the top left shows the fields you just selected, and the Traverse table columns on the right.
To show the Traverse fields, select the tblSmShipResponse in the Your Data Fields section.
- The fields are mapped together by dragging the fields from the left column to the matching fields on the right:
FedEx Field Traverse table: tblSmShipResponse Tracking Number TrackingNumber Master Tracking Number Shipment ID Total Customer Charge TotalCharges Customer Reference SourceID Weight ActualWeight Delete Indicator VoidIndicator Service Type Description ShipVia Postal Code ShipZip Number of Packages NumberOfPackage Save and click Continue at the bottom of the screen.
- On the Congratulations, your integration profile is complete. screen, you will see a summary and have the option to print the mappings for future reference. Click Continue to proceed.
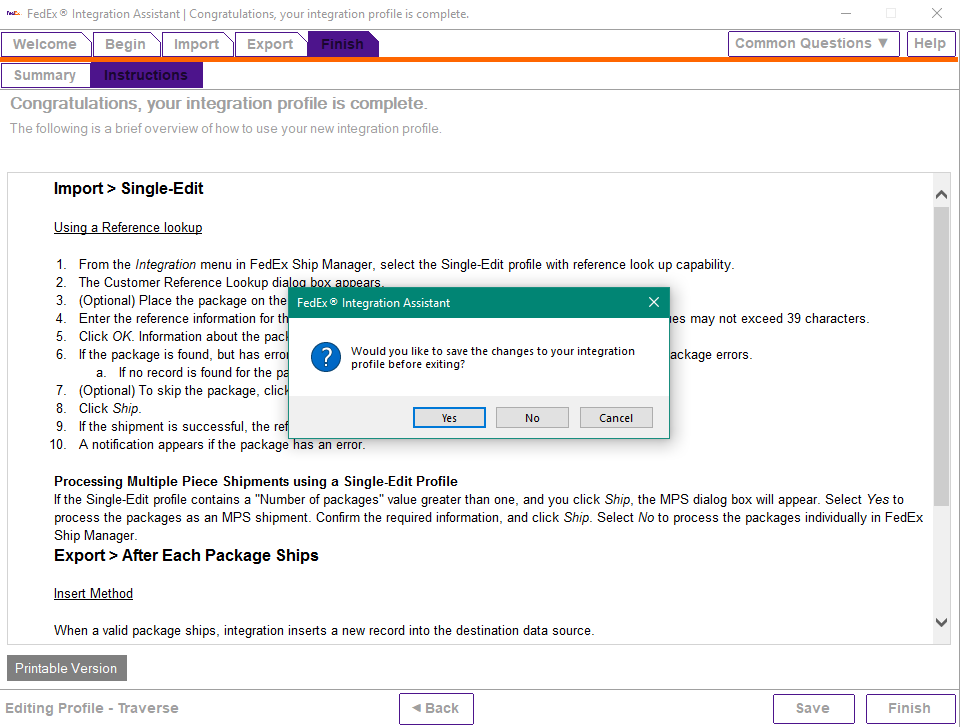
- Next, you will be given the opportunity to Finish the integration wizard after it has been successfully configured. A dialog will prompt you to save the integration profile. Click Yes and name the profile 'Traverse'.
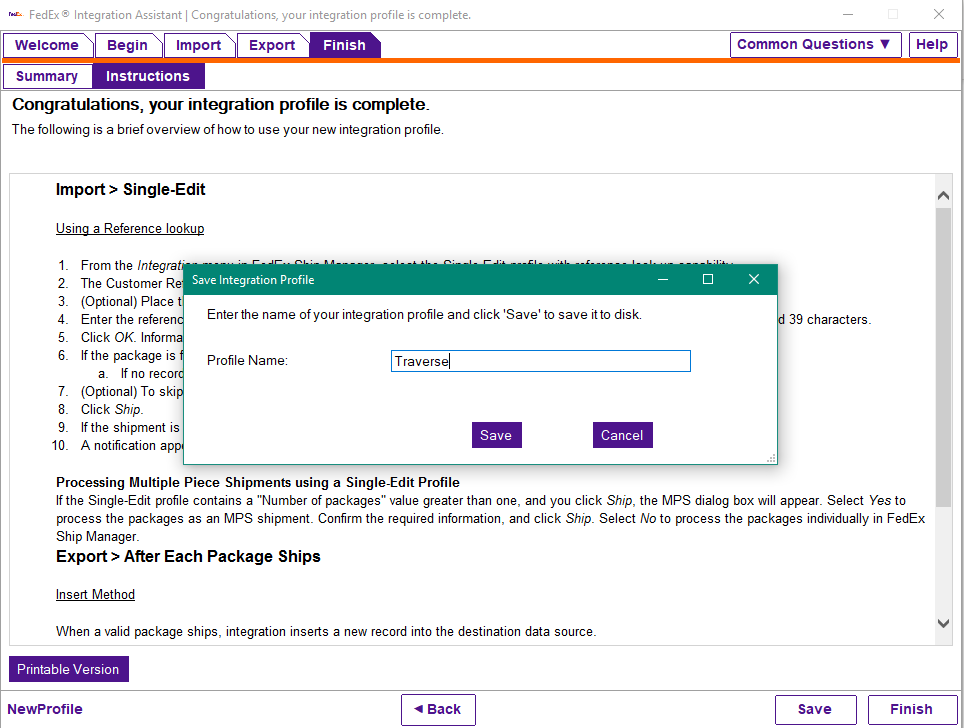
Click Save.
- Once finished, the main form will appear with a Lookup Value dialog box. This is where you will enter the sales order number when you ship the order.
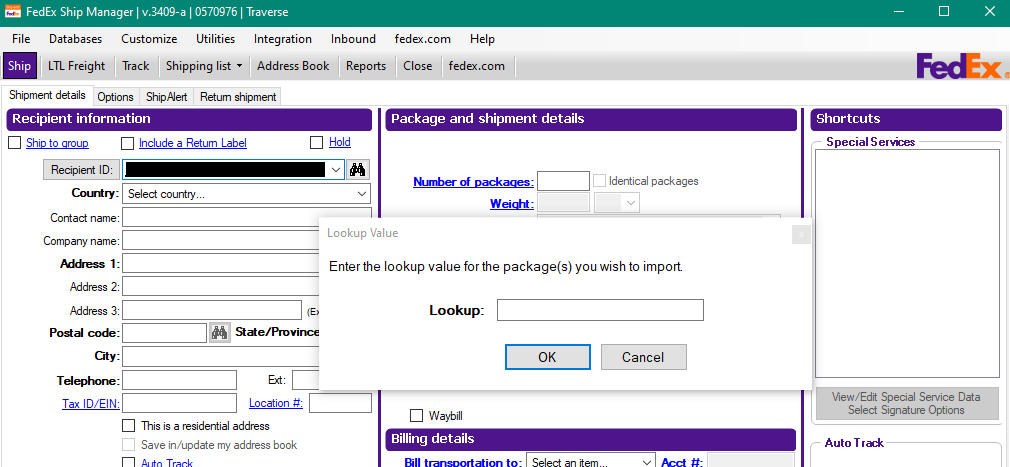
NOTE: If the Lookup box is no longer visible, try clicking Clear Fields at the bottom of the screen. This should re-initialize the lookup field. If that doesn’t work, go to the menu at the top of FedEx Ship Manager, click Integration and make sure that the 'Traverse' profile is selected.