Traverse Global v11.2 - Service Repair
Print Inventory Tags
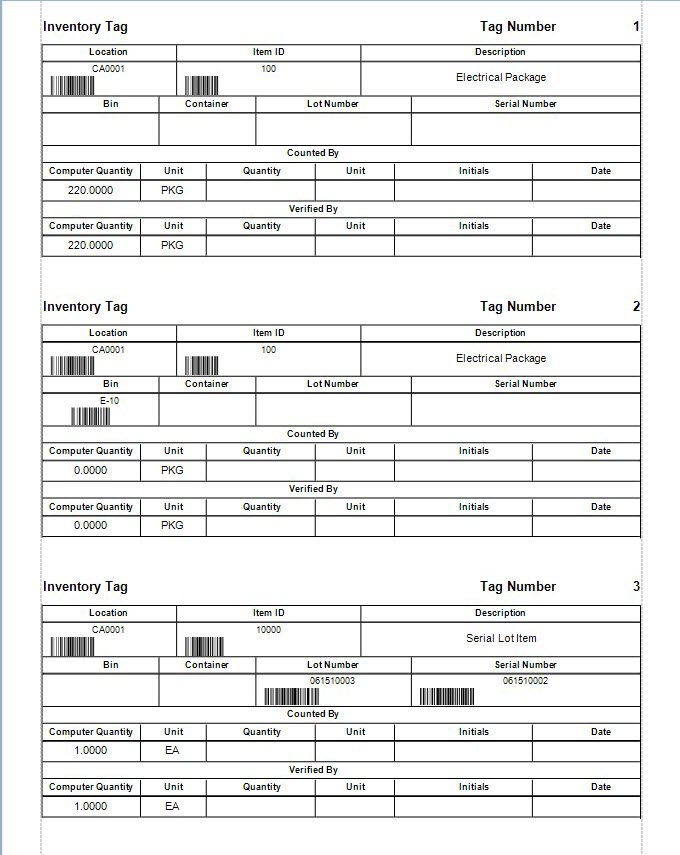
Use the Print Inventory Tags function to print tags you can use in the physical count process. On this screen you can elect to print tag numbers for any prepared batch.
- Select the frozen batch code for which to print tags from the Code field. Note: The description you enter for the batch in Freeze Quantities appears; however, you can edit the description in the Description field as necessary.
- Select the types of items to include from the Selected Items section.
- Check the box to Print Zero Frozen Quantities; otherwise, clear the box. Most businesses elect not to print items with a frozen quantity of zero.
- Check the box to Print Nonserialized Items; otherwise, clear the box. Mark the box to include items that are not serialized.
- Check the box to Print Serialized Items; otherwise, clear the box. Mark the box to include items that are serialized.
- Manage the sorting order for the inventory tags from the Sort By section.
- Enter the number of the first tag to print in the Tag Number Starting field.
If you are reprinting tags, specify the last good tag number in the Last Good field. If you have a print problem, you must restart the Print Inventory Tags function. When you restart, enter the next good tag number in the Starting Tag Number field and the last good tag to print in the Last Good Tag Number field. The restart will reprint the tags after the last good tagk number and renumber the tags that are printing. - Click a command button to
| Select | To |
| Print the inventory tags. | |
| Output | Output the tags as PDFs. |
| Send | Save the tags as a PDF and attach it to an email using your default mail program. |
| Preview | Preview the inventory tags. |
| Reset | Reset all fields and lists to their default selections. |