Traverse Global v11.2 - Service Repair
Sales Order End User Processes
Sales Order>Transactions>Orders
- New record

- Select Transaction Type

- New: Commits inventory and requires verification prior to invoicing
- Quote: Commits NO inventory and converts to 'New' order with 'LIVE' command
- Invoice: Removes inventory immediately and invoice available immediately (same as AR transaction)

- Note: Transaction Date, PO Date, and Req Ship Date will default to today's date, which can be changed

- Select Sold To customer ID
Use the 'Copy' feature to copy an existing sales order transaction from history
- Select Batch Code which is defaulted from batch code setup and maintenance

- Select Location ID – Line item location always overrides header
- Enter Req Ship Date on the header or use the line item Req Ship Date
NOTE: Line item ship date always overwrites the header date
- If applicable, enter PO number and date
- LINE ITEM: Select inventory items, enter quantity and pricing
Note: Unit cost can be entered when using a service or non-stock item where in most cases a PO will be generated
Note: Use the task pane to monitor inventory quantity, details, and pricing

- Use the
 to enter additional item details
 - BILL-TO: If applicable, enter bill-to information, sales rep information, and any changes to terms or distribution codes
Note: Bill-To information will default from the customer setup and, when selected, be replaced by ship-to information

- SHIP-TO: Enter the ship-to information of leave blank for default customer shipping information
- Select Ship Method/Via
With shipping, select Freight Terms and/or enter Freight Acct Num

- Tax: Review Tax Information and make any adjustments
- SAVE CHANGES

- PRINT ORDER ACKNOWLEDGMENT & PICKING SLIP
- *Print Picking Slip activates UPS/FedEx Shipping Interface

Note: Printing Picking Slip will change the transaction type to 'Picked' and generate a Pick Slip Number

Sales Order>Transactions>Orders
- Use '...' to locate sales order record -- Use filter for 'Picked' orders
- Note: Picked orders are triggered by printing of a packing slip, updating an SO with linked PO receipts, or WM processing
- Select Update
- VERIFY ORDER
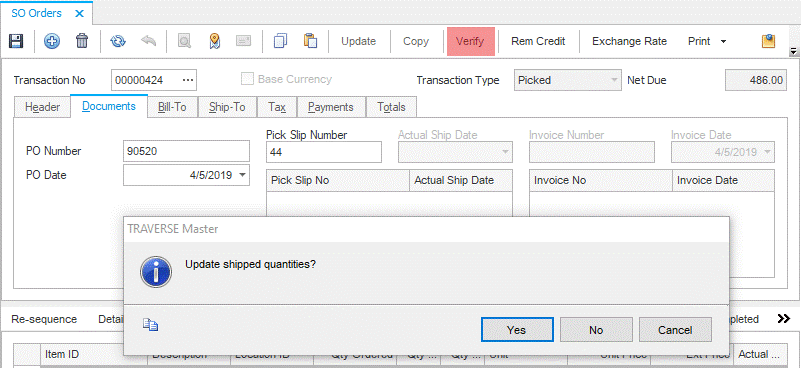
Note: User will be asked if shipping all items - if no, manual entry is required for quantity shipped per line
- Totals: Review totals, including freight and miscellaneous charges
- With shipping installed, use import shipping to import 'Freight Cost' and 'Freight' (Freight Cost is informational only)
- Note: If using shipping interface 'Freight' is added to the invoice (“A” freight terms) and 'Freight Cost' is informational (“P” freight terms)

- Print the SO Packing List or Bill of Lading

Note: This is often where the batch code is changed for one ready for invoicing batch.
Sales Order>Transactions>Orders
- Use '…' to locate sales order record – Use filter for 'Verified' orders or filter to invoicing batch

- If applicable, enter payment information (Payments Tab
 )
)Note: Payments entered on the payments tab create cash receipts and must be processed in AR Cash Receipts
- PRINT INVOICE (printing invoice assigns invoice number)
Note: Print will also activate document delivery - use SM form printers were multiple invoices are required with document delivery
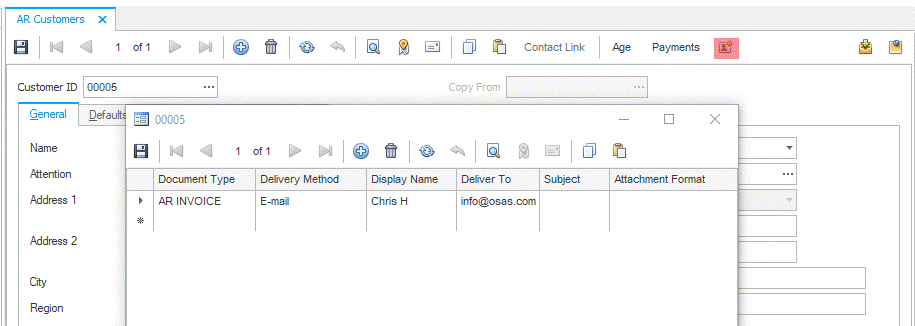


- With document delivery, the invoice will queue for sending and print to any form printers created
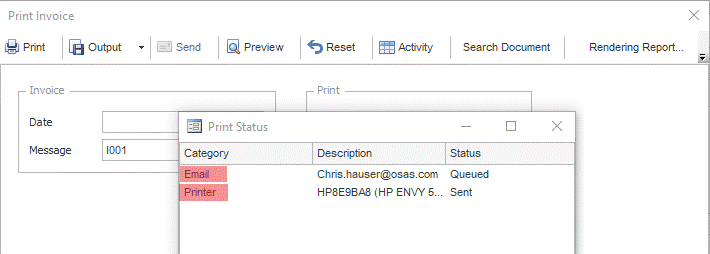
- Open the queue to review/send invoices or edit the email prior to sending

- Verify Sales Journal & Sales Tax Journal
- Post Transactions
Sales Orders>Transactions>Orders>Transaction Type>RMA
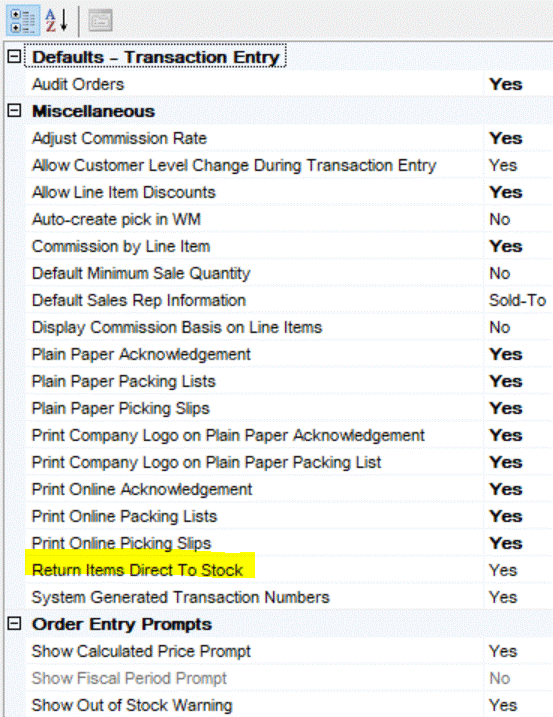
- Note: The business rule regarding items going directly back to stock is critical to return processing. If returning items directly to stock, a credit memo will return items to stock. If not returning items to stock, returned items must be approved/ posted and credit memos have no impact on stock levels.
- New Record
- Select Transaction Type 'RMA'
- Select Batch Code
- Select Sold To customer
- Enter original invoice number and line item returns OR select 'Copy' to find original transaction
When using 'Copy' select the orders or line items you wish to copy into your RMA

- Enter quantity returned on the line item
- SAVE CHANGES

- SO>Transactions>Returned Items: Change status on returned item to 'Approved', enter quantity returned to inventory, and select reason code for return or not returned


- Review returned items journal (SO>Transaction Journals>Returned Items Journal)
- Post returned items
(SO>Transaction Journals>Post Returned Items)
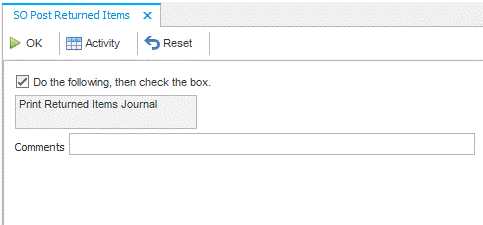
- Note: Use the Returned Items Views to manage pending and historical returns

- Return to sales order RMA and click Update and Live

- FOLLOW CREDIT MEMO INSTRUCTIONS
Sales Order>Transactions>Orders>Transaction Type>Credit Memo
- **If creating from RMA, skip transaction entry and select 'LIVE' to convert the RMA to a credit memo
Note: If the 'Return Items Directly to Stock' business rule is set to 'Yes' - a credit memo will have impact on stock levels
- New record

- Select Transaction Type 'Credit Memo'
- Select Batch Code
- Select Sold To customer
- Enter original invoice number and line item returns OR
- Click Copy to find original transaction
- SAVE CHANGES

- Click Print and print credit memo
- Review Miscellaneous Credits Journal
- Post Transactions
Sales Orders>Transactions>Copy Recurring Entries
AR>Setup and Maintenance>Recurring Entries
- Select Run Code 'From' and 'Thru'
- Select Batch Code
- Click OK to generate Sales Order
Note: Recurring entries can be created in either AR or SO
Creating Recurring Entry - Additional Data
- Enter a Recur ID and run code
Hint: Use a Run Code that is a day of the month for copying new transaction - multiple recurring entries can have the same run code.

- Enter recurring billing intervals

- Track history using the History tab of the recurring entry

Sales Order>Transactions>Orders>PO Req
- Follow instructions to create a new sales order
- Select the line item desired to generate a PO for or drop ship
- Click PO Req
- Select Drop Ship and select vendor ID
Note: Customer ship-to information will be used on the PO ship to information
Note: Use the Linked column to track/drill down the PO


- Receive items on the purchase order (transaction number of SO will appear in the Notes field)
Note: Use the PO Fulfillment Report to know when source transaction require updating after PO receipt
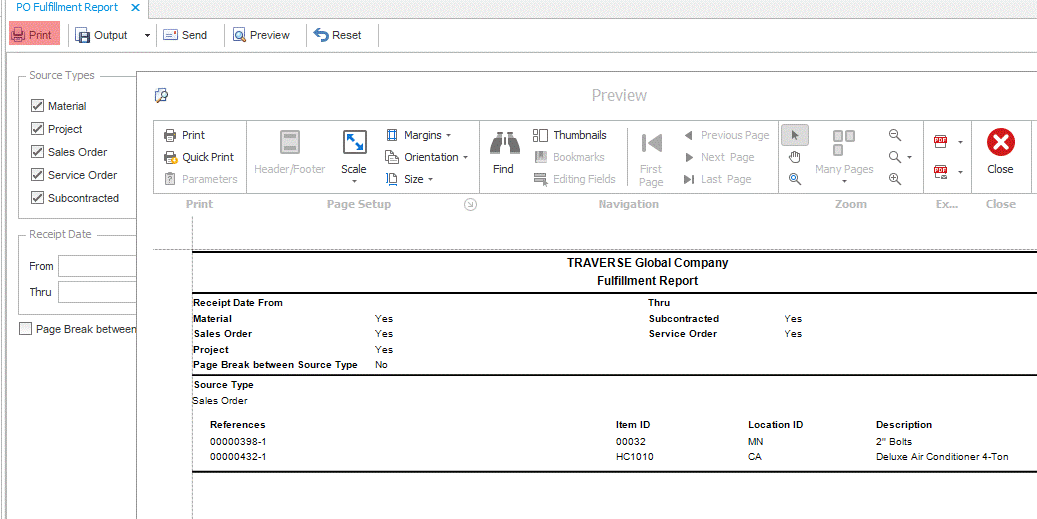
- Open SO and system will automatically update linked quantities as 'Picked' and fill in quantity as shipped

- Verify sales order
- Print invoice
- Review sales journal
- Post transaction
- Enter the Sales Order as you normally would (See Creating a Sales Order above)
- Enter the shipment information on the Ship-To tab
- Save the sales order
- Print the Picking Slip for the sales order (This is the trigger to UPS WorldShip® or FedEx Ship Manager® that the order can be imported.)
- Copy the Transaction Number from the sales order.
- Go to UPS WorldShip® or FedEx Ship Manager®, select Import/Export, Keyed Import and Traverse2UPS.
- Paste the transaction number into the Enter Import Key dialog box that comes up and press Enter on your keyboard.
- The information from your sales order will be brought into the UPS WorldShip® or FedEx Ship Manager® screen.
- Enter your normal package information and process the shipment.
- Go to Traverse>Sales Orders>Transactions>Orders and select the order you just processed through UPS WorldShip® or FedEx Ship Manager® and click 'Update'.
- Click 'Import Shipping' to bring the shipping process information into the sales order.
- Go to the Ship-To tab to verify the tracking number has been brought into the 'Ship Number' field.
- Go to the Totals tab and verify the freight charges have been brought into the sales order.
- Use the Shipping Details tab on the orders screen or the Shipping Details View to see shipment information and track the package for the order.
Sales Order>Pricing
- Hierarchy of Pricing
- Inventory (base price, price breaks, penalty) = Calculated Price
- Price ID (Price Structure)
Note: Putting a price ID on a customer will use the default for all pricing for that customer

- Customer Pricing
- Promotional Pricing -- When 'Promo' flag is checked
SO Price Structures (Price ID)

- Note: First set up customer levels – place customer levels on customers
- New Record
- Create a Price ID & description
- Create a 'Default Price Structure' to be used when the item is sold to a customer without a customer level in the structure
- Select how you want to base your price adjustment and select whether you would adjust by an amount or percent – add 'Adj Amount' for either the percent or amount. Note: use a “-“ for a reduced price or percent.
- Select your customer levels and set their price structure
- Select Price ID on each inventory item included in the structure
- NOTE: Put a price ID on a customer (with no level) if they receive the default price structure on all items.
- NOTE: Calculated price is the final price out of inventory (base price/price breaks/penalty)
SO Customer Pricing

- Select either to setup your customer pricing by item or by customer level (drop-down 'view')
- Select the location ID
- Enter either your customer level or item ID and your adjustment
- Check the flag to allow a promotional price to supersede this pricing or not
- NOTE: This will supersede inventory and SO price structures
- NOTE: You can copy/paste an Excel price sheet into this SO price sheet
Promotional Pricing
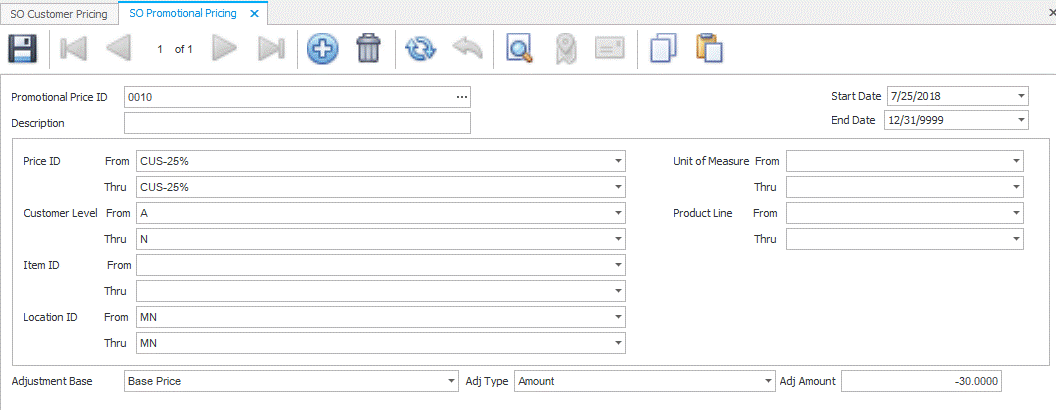
- New Record
- Create a promotional price ID
- Set the date parameters of the promotion
- Set the other parameters of the promotional price (item, price ID, location ID, customer level, product line, unit of measure)
- Create your Adjustment Base, Adj Type, and Adj Amount
