Traverse Global v11.2
Export Layout Definition
Use the Export Layout Definition function to define, in detail, the layout of the export definition file. These files can be exported from within Traverse to a local folder or a shared network folder. The export files are used for things like electronic fund transfer, direct deposit, positive pay files sent to your bank for check verification, magnetic media for income tax purposes, labels, and released orders.
Export Layout Definitions can be set up for multiple file types. The types of files available from Traverse to be exported are: ACH, Positive Pay, 1099 Magnetic Media, W2 Magnetic Media, Warehouse Management Labels, and Warehouse Management Released Orders.
The export files can also be output in various formats: Block, Delimited, Fixed Width, and XML.
To create a new export layout definition:
- Use the New Record button on the toolbar to open a blank Export Layout Definition record.
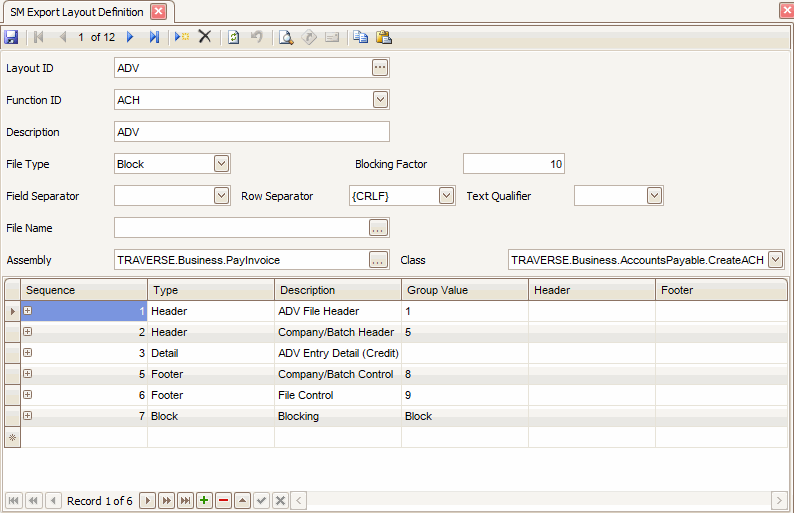
- Enter a new Layout ID for the export layout definition.
- Select the Function ID for the type of export file to generate. The function ID will be used with the assembly and class to associate it with the screen used to generate the export file: ACH, POSPAY, TEN99, W2MAGMED, W2MAGMED_C, WMLABEL, WMRELORDER.
- If you are creating a new export layout, you can copy information from an existing layout ID by selecting a Layout ID in the Copy From drop-down list.
- Enter a Description for the export layout definition.
- Select the structure of the export file from the File Type drop-down list:
- Delimited - Use this format when the fields in the file from which you are exporting data will be separated by commas, tabs or spaces. This is the format used when saving an Excel spreadsheet as a .csv format file.
- Fixed Width: Use this format when all records in the file are the same width and the fields within records are varying widths. The record length will be an accumulation of the total of all the field widths.
- XML: Short for Extensible Markup Language, designed especially for web documents. It allows designers to create their own customized tags, enabling the definition, transmission, validation, and interpretation of data between applications and between organizations. You would typically use this file format if you were transmitting the file using the internet.
- Block: Use this format if you want to have your file set up similar to the standard ACH file. Each record consists of blocks of data that are 94 characters long. Each block of data will consist of a specified number of records in a block. Typically a record will consist of 940 characters, or 10 blocks of 94 characters. You will enter a Fill Character to fill in the blank spaces that are not used for each field in the records. A block typically consists of 10 records. For example, if you have a file with 6 records, you will get an additional 4 records that consists completely of 9s to fill the block of 10 records.
- If you selected 'Block' as your File Type, enter your Blocking Factor. This will be the number of records you want to have in each block of data when you output your file. If you have fewer records than the amount that will fill the blocking factor, record lines made up of the fill character you enter when setting up your block fields will be added to complete the block. Typically this fill character is a 9.
- Select, if applicable, a character to separate fields from the Field Separator field:
- Comma - Use the Comma separator if you have your file saved as a .csv file or you have a text file with the fields separated by a comma.
- Tab - Use the Tab separator if you have designed your file with a tab as the separator between the fields within a record.
- Space - Use the Space separator if you have your file designed with a space between your records. Be careful using the space separator if you have addresses, names, and so forth that naturally have a space between words or names.
- None - Use the None separator if you are designing a fixed-width file. The fields are separated by the width entered into the column detail area.
- Select, if applicable, a character to separate rows from the Row Separator field:
- CR - Use the CR (carriage return) row separator when you have used your enter key to go to the next record in a text file, or you have gone to the next row in an excel spreadsheet and saved the file as a .csv type.
- CRLF - Use the CRLF (carriage return + line feed) row separator with a combination of a carriage return and line feed. Most DOS/Windows based text files use a CR+LF combination to identify the end of a line of text within a file. Similar to the old style typewriter that required the line feed to advance the paper to the next line and the carriage return to move the page back to the left edge.
- LF - Use the LF (line feed) row separator if you have put a line feed at the end of your record. A line feed is a non-printable character that is generally associated with text output.
- None - Use the None row separator when you have a continuous text file. You may have a delimited or fixed-width file that has no row separators, so when the export reaches the last field or character in the record it will go to the next record automatically.
- Select, if applicable, a special character to enclose text from the Text Qualifier field. This may include the field delimiter.
- None - Use the None text qualifier if you have no values in the records that might have a field separator value within a field, or if you are designing a fixed-width file.
Example: If you have a delimited file with a comma as your field separator and you have numbers with the comma (,) as the thousands separator, the import would see the comma as a field separator and go to the next field for the value after the comma. As a result of this your data would come in one field off because your number would be divided into 2 fields.
- Quote - Use the Quote (“ “) text qualifier if you have values in your records that contain your field separator.
Example: If you have a delimited file with a comma as your field separator and you have numbers with the comma (,) as the thousands separator (10,245.62), the import would see the comma as a field separator and go to the next field for the value after the comma. As a result of this your data would come in one field off, because your number would be divided into 2 fields. You would use the quotes around the values that have your field separator within the record (“10,245.62”), to tell the import that the value within the quotes is one record and ignore the field separator within the quotes.
- Apostrophe - Use the Apostrophe, also sometimes called “single quotes”, (‘ ‘) text qualifier if you have values in your records that contain your field separator.
Example: If you have a delimited file with a comma as your field separator and you have numbers with the comma (,) as the thousands separator (10,245.62), the import would see the comma as a field separator and go to the next field for the value after the comma. As a result of this your data would come in one field off because your number would be divided into 2 fields. You would use the apostrophe around the values that have your field separator within the record (‘10,245.62’), to tell the import that the value within the apostrophes is one record and ignore the field separator within the apostrophes.
- None - Use the None text qualifier if you have no values in the records that might have a field separator value within a field, or if you are designing a fixed-width file.
- In the File Name field, enter the file path and file name or browse to the file you will use as your export file.
- From the Assembly field, select an assembly containing an integration engine-enabled class. Assembles contains class and schema information. For example, an assembly used to export AP Pay Invoices my contain two classes: one used to export information to an ACH file and a different class to export positive pay information. Within each class, the schema will provide information about the fields that are available in Traverse for that type of record.
- Select an export Class within the assembly.
- Enter a number for the order of the value within the export data in the Sequence field. This will be your field or column number exported to your file.
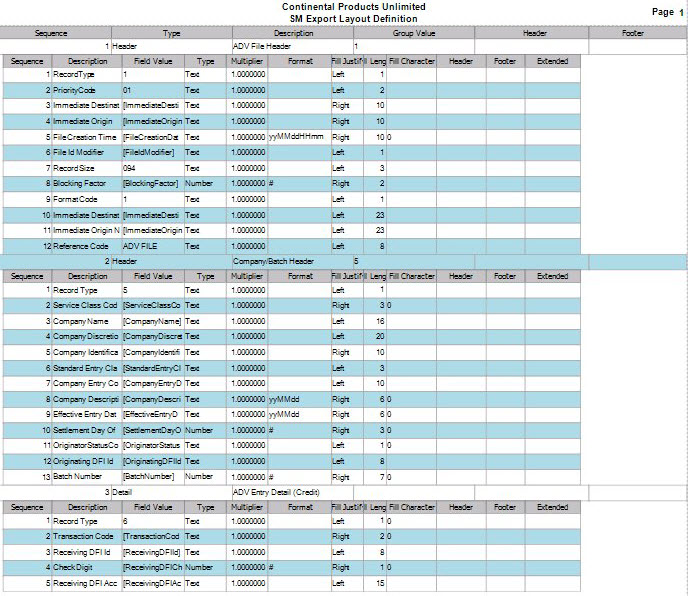
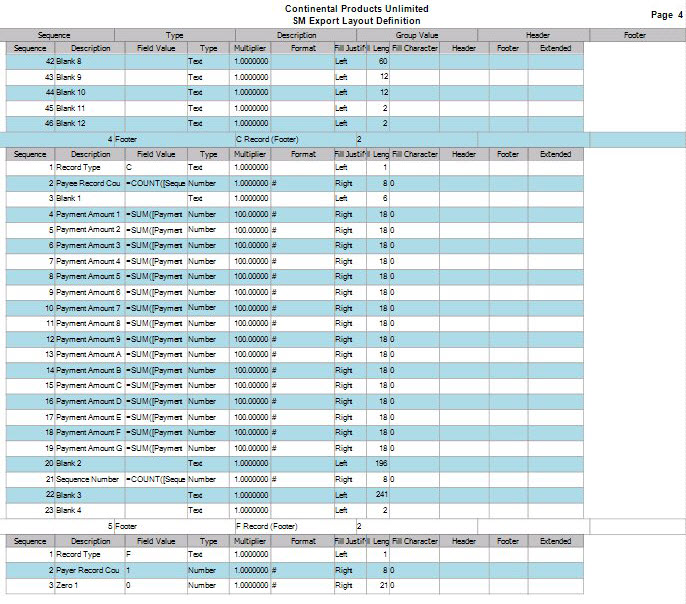
- Select the record Type you want to use for each field in the output file:
- Block: You must set up one Block record when you are setting up a block file. This record is used to fill the remainder of the records in the Blocking Factor number of records. When setting up the block record fields you will leave the field values blank and just fill in the Fill Length and Fill Character. Typically the fill length will be 94 and the fill character will be 9. This will add records of 94 characters of 9s for the remaining number of records to fill the blocking factor.
- Detail: Use the Detail record type selection for the detail section of your file. This is usually where you will have the majority of the information. You typically will have all the columns you are going to have in your output file in the detail record type.
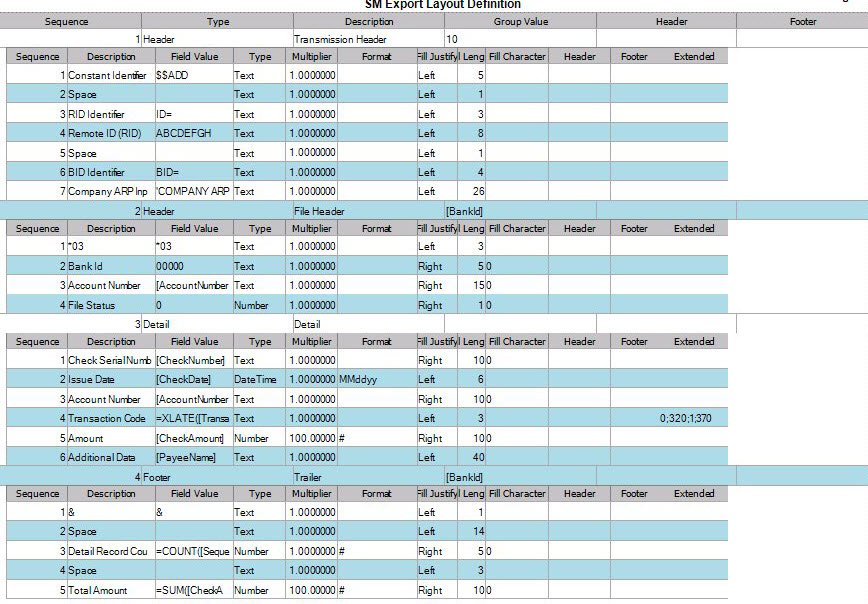
- Footer: Use the footer record type when you want to group your footer total records by a specific field from your detail section. For example; if you want to have a check total by Bank ID you would select Footer as the record type and then Bank ID as your Group Value. Then when you are setting up the fields for your Footer record, you would select the field value you want totaled, in this example, Check Amount.
- Header: Use the Header record type when you want to group your records into specific groups and have sorting by columns in these groups. For example; if you want to have your file grouped by Bank ID and then Account number you would select Header for the record type and for the field value you would need to have Bank ID in the field value for that Header record. To then sort by Account Number you would add a second Header record and select Account Number for your field value for that Account Number Header record.
- Enter or edit the Description for the record Type field. This will usually be what you will have in each detail section of your file. Examples of the record type descriptions would be Data Detail and Totals.
- Select the Group Value for the header and footer record types from the drop-down list. The value you select will be the field in the output file you want your records grouped by when it is exported and you are going to be generating totals. A typical group value might be Bank ID, so you can get check totals and a check count by Bank ID.
When you select 'Header' as your record type, you will select the group value for the field you want to sort and group your records by using a header.
- Edit or enter the Header Tag. Used for the XML file output type, this is entered into the output file to indicate the header of your record. A typical header tag would look like this: <BankID>. This starts the header section of the file.
- Enter or edit the Footer Tag. This is used for the XML file output type to have a Footer Tag entered into the output file for the Footer of your record. A typical footer tag would look like this: <CheckTotal>. This will start the Footer section of the file.
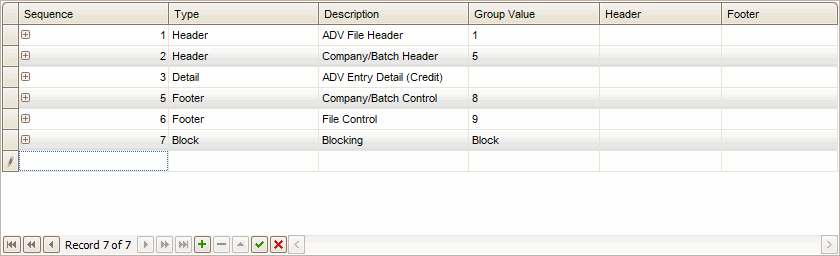
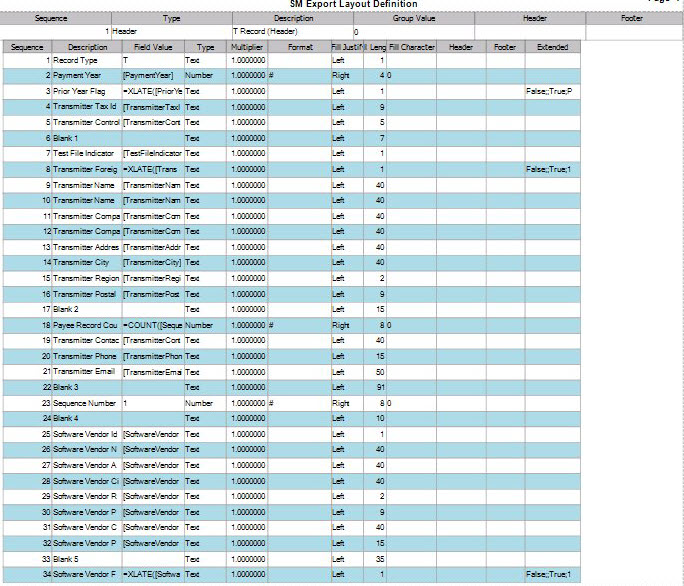
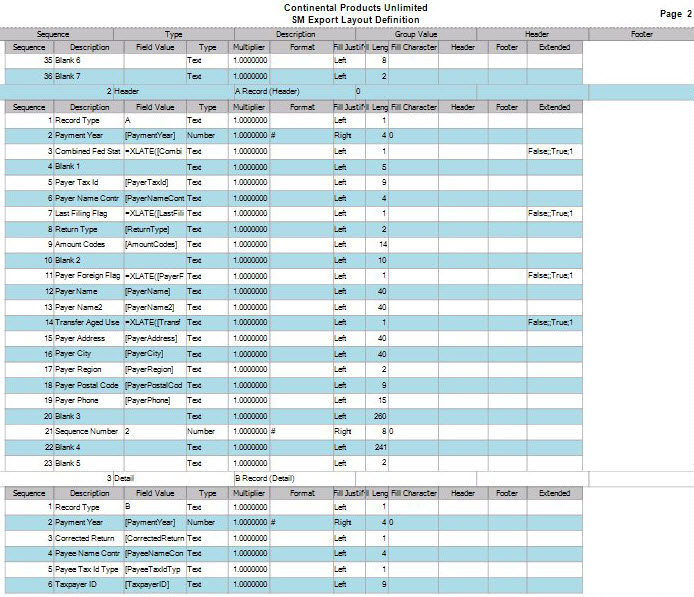
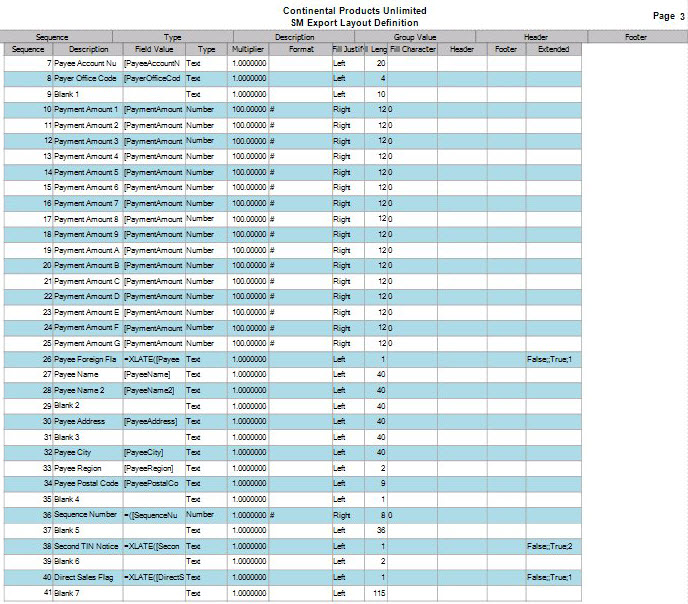
Once you have your records set up, you will need to set up your fields. Typically you will have a Header, Detail, and Footer records, and multiple fields within the records. Each field you set up will be a column in your output file. Enter the fields in the order in which you want your output file to be set up.
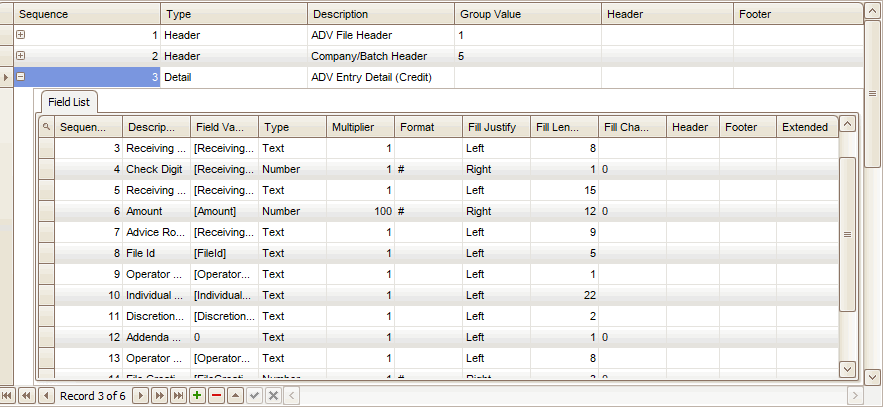
To enter the detail of each field, click the plus (+) next to a record Sequence to expand the Field List, and follow these steps:
- Enter a number for the order of the value within the export data in the Sequence field. This will be the field or column number within your export file.
- Enter the Description of the field being added.
- Select the Field Value you want put into the field you have selected. The field value selections will depend on the assembly and class you select when setting up the export file.
- Select the Type of field you are adding: Text, Number, or DateTime.
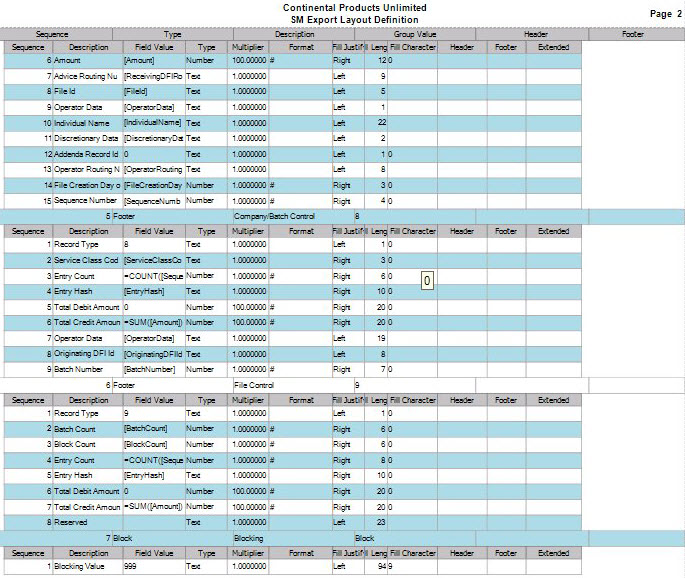
- Enter the Multiplier value you want the value to be multiplied by to give you the correct formatting. A block type file will, by default, assume that you have multiplied all values by 100. In other words, there are no decimal places in a block file. It is assumed when you are using this type of file that you have two decimal places in all your numbers.
- Enter the Format in which you want the field value to be displayed. This field is only available for the Number and DateTime type fields.
- Select how you want to Fill Justify the records in this field: Left or Right.
- Enter the number of characters you want as a Fill Length for a block type file. This will be the number of characters this field will use when filling the record. For the Block record you will need to enter 94 into this field.
- Enter the Fill Character to use to fill in any blank characters in a block type file. This typically will be 9. If you have a record that does not use all the characters in the field, the rest of the field will be filled in with 9s, as well as the remaining blocking factor records until the fill length is reached.
- Edit or enter the Header Tag. Used for the XML file output type, this is entered into the output file to indicate the header of your record. A typical header tag would look like this: <BankID>. This starts the header section of the file.
- Enter or edit the Footer Tag. Used for the XML file output type, this is entered into the output file to indicate the footer of your record. A typical footer tag would look like this: <CheckTotal>. This will start the footer section of the file.
- If the data from the file needs to be translated into a value that the recipient of the file will understand (for example, Trans Type), enter the values to translate into the Extended field.
Example: In the Wells Fargo positive pay file output, the Transaction Code field is translated as 0;320;1;370. This means that Traverse uses 0 and 1 for transactiontypes, and Wells Fargo translates those values as 320 and 370.
- Click the Save button on the toolbar to save your changes.
NOTE: The values in the Field Separator, Row Separator, and Text Qualifier fields are only default, and the most common, values for each of the fields. You may use any character for each of these values by typing that character into the field and saving the record. The value must be a visible character.
Here is a list of functions supported by the export process:
| Function | Syntax | Description |
|---|---|---|
| XLATE | =XLATE(value1) | Translate |
| SUM | =SUM(value1) | Sum |
| AVG | =AVG(value1) | Average |
| MIN | =MIN(value1) | Minimum |
| MAX | =MAX(value1) | Maximum |
| COUNT | =COUNT(value1) | Count |
| STDEV | =STDEV(value1) | Statistical standard deviation |
| VAR | =VAR(value1) | Statistical variance |
| LEN | =LEN(value1) | Length |
| TRIM | =TRIM(value1) | Trim leading/trailing spaces |
| ISNULL | =ISNULL(value1, value2) | Substitute value2 when value1 is null |
| value1 {+-/%*} value2 | =value1 {+-/%*} value2 | General
Arithmetic operators:
String |
| ROWNUMBER | =ROWNUMBER() | Sequential row number |
Editing an Export Layout Definition
- Select an export layout definition to edit from the Layout ID field.
- Edit the fields as necessary.
- Click the Save button, on the toolbar, to save any changes made to the export layout definition.
Deleting an Export Layout Definition
- Select an export layout definition to delete from the Layout ID field.
- Click the Delete button, on the toolbar, to delete the selected export layout definition.
- Click Yes at the "Are you sure you want to delete selected record(s)?" prompt.
Page 1
Page 2
Page 1
Page 2
Page 3
Page 4
Page 5