Traverse Global v11.2
Activating the Dashboard
If the dashboard functionality is not available, the function may not be active.
To activate the Dashboard, follow these steps:
- Open TRAVERSE Server Manager, logging into your SQL server instance using an administrator or system admin login.
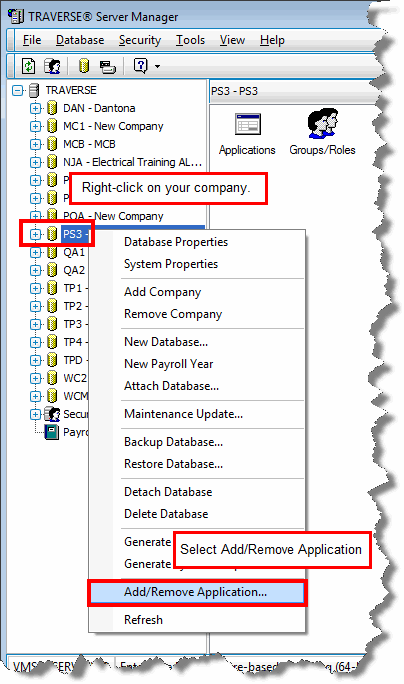
- Expand the Traverse menu by clicking on the plus (+) next to TRAVERSE.
-
Right-click on your company database and select Add/Remove Applications from the context menu.

Alternately, you can select your company, then click on Database from the menu bar and select Add/Remove Applications.
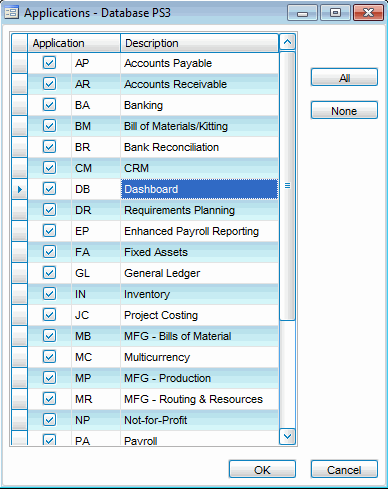
- The Applications dialog box appears showing the applications currently selected for the database.

- Add or remove applications by selecting or clearing the application check boxes, or click All to select all applications, or click None to clear any applications already selected. Mark the Dashboard check box to activate it.
- Click OK to save your changes and return to the main window, or click Cancel to exit the dialog box without saving your changes.
- In the left column of the main window, expand the database, select the Applications icon, or an individual application icon and select Refresh from the right-click menu to view your changes.
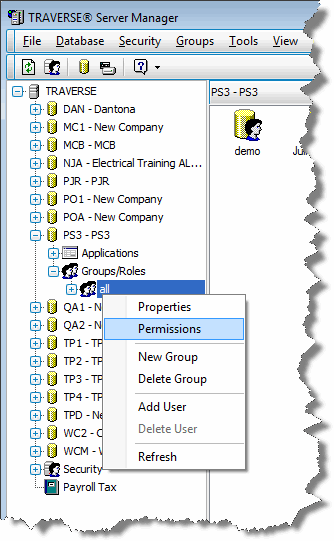
- You now need to set up Permissions to allow users to access the Dashboards. Expand the company database and expand the Groups and Roles selection.
- Right-click on the group you want to give access to the dashboards and select Permissions.

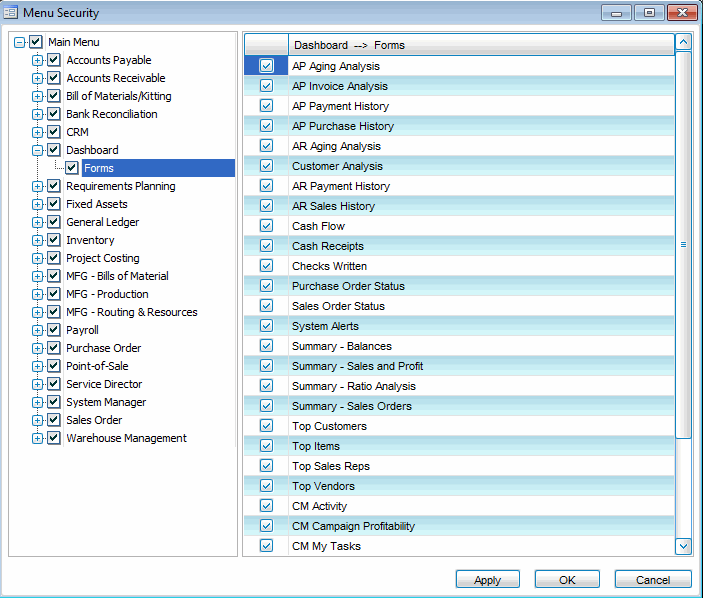
- The Menu Security screen appears.
Expand the Main Menu (+) and Dashboard (+) and select Forms. You will now see a list of Dashboard Forms.

- Select the Dashboard Forms you want this group to have permissions to see and function.
- Click Apply and OK to save the changes and exit the Menu Security screen.
- Repeat steps 9 through 13 for the remaining groups.