Traverse Global v11.2
Payments button (SO Transactions)
Entering Payments
After you have set up the payment service integration, you always use the Payments button on the toolbar to set up a new credit card for a customer, to enter an external payment or prepayment, or to set up a credit card payment for a recurring entry. Regular cash, check, and other offline options still function as usual via the regular transaction screens.
When you are not using an EMV (credit card swiper), you will enter the credit card info on the form that displays (below). When you are using an EMV, you will be directed to the EMV device to swipe, tap, or insert (if chip) the card.
See the TPS Overview for more information, as well as some examples.
Sample payment entry
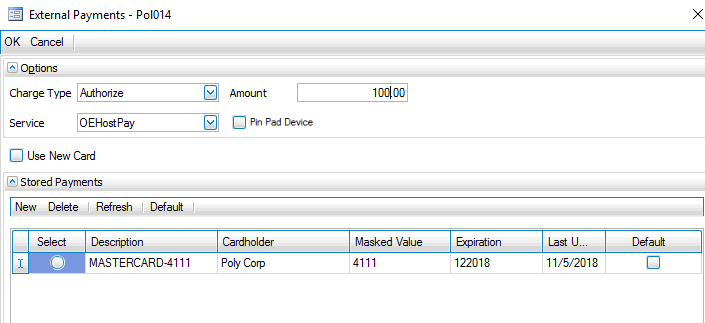
When you use the Payments button on the toolbar, the External Payments screen opens.

The stored external payment information will appear in the Stored Payments detail section of the screen. If there is no external payment method on file, click the New button to open a credit card information entry form. When you are using an EMV/pin pad and you check the Pin Pad Device box, you will be directed to the EMV/pin pad device to swipe, tap, or insert (if chip) the card. If you want to manually enter a new credit card, select the New button with the Use New Card box marked to open a credit card information entry form.
- In the Options section (header) of the screen, select a Charge Type from the drop-down list:
- Authorize will store the payment as an On Account payment when processed. The 'Authorize' charge type is used more commonly at the beginning of a sales order transaction to verify the card has funds available for the transaction. Posting a sales order with an Authorization will update the invoice number and amount due when advancing the Authorization to a Captured payment. The payment will be applied to the invoice once processing is complete, presuming the invoice still exists within the open invoice system.
- Sale will apply the payment to the invoice when processed. The 'Sale' charge type is used more commonly toward the end of a processing a sales order when you have finalized the exact amount of the payment. The sale (all non-Authorizations) transactions will be available prior to advancing a sales order to the 'Shipped' status.
- Accept or enter the Amount to be charged.
- Select the external payment service to use for the payment from the Service drop-down list.
- If you are using an external card reader, mark the EMV Device check box. Make sure the service configuration is set to use a device. See the SM Payment Service Integration topic for more information.
- Mark the Use New Card check box to allow the credit card information to be entered rather than select a stored payment. When you mark the check box, the Stored Payments detail grid will collapse. Click OK on the top toolbar to open a credit card information entry form.
- If there are no external payments stored, click on the New button on the toolbar to open a credit card information entry form. Once you submit the credit card information on the entry form, the payment will appear in the Stored Payments detail section of the External Payments screen.
- If there are external payments stored, mark the Select radio button to select the payment to use.
- If the payment is designated to be used by default, the Default check box will be marked. To designate a payment as the default payment, select the payment, then use the Default button on the toolbar. If you want to remove the default designation from a payment, select the record, then use the Default button on the toolbar to toggle the check box.
- Click OK to process the payment and return to the SO External Payments screen, or Cancel to cancel the payment.
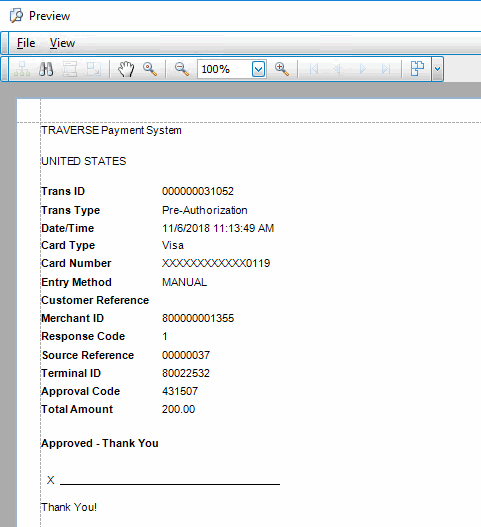
Click To New Open the credit card information entry form to enter a new credit card. Delete Delete the selected payment service. Refresh Reset all fields to the most recent values entered. Default Set the selected payment as the default payment. - Once the payment has been processed, a receipt for the payment will print. NOTE: If you have changed the default behavior from automatically printing the receipt to showing a print preview, the print preview of the receipt will not allow you to save or print the receipt. If you have archiving turned on in the SM business rules, a PDF of the receipt is saved as an archived document, which will allow you to retrieve the receipt if needed.

NOTE: If the payment does not go through, an error message will appear.