Traverse Global v11.2
Shipping Set Up - ODBC Connections
Communication with shipping integration packages such as UPS WorldShip or FedEx Ship Manager is via an ODBC connection. Before Traverse can exchange information with the carrier, you must set up ODBC connections to the Traverse database.
Once you finish setting up the ODBC connections, you must set up the import and export maps for the integration.
- Open SQL Server Management Studio. Make note of the server instance name (i.e. MACHINENAME\TRAVERSE). This will be used when creating ODBC DSNs below.
- Create a SQL user login and password for each of the workstations you will be installing. (i.e. ups1, ups2, fedex1, fedex2 etc.)
To set up users and grant permissions to the sales order tables follow these steps:
- Open SQL Server Management Studio by going to Start ‐ Programs ‐ Microsoft SQL Server ‐ SQL Server Management Studio.
- Log into the server that holds your Traverse data using the sa user and password.
- Expand the server and company database. Right-click on Security and select New ‐ Login.
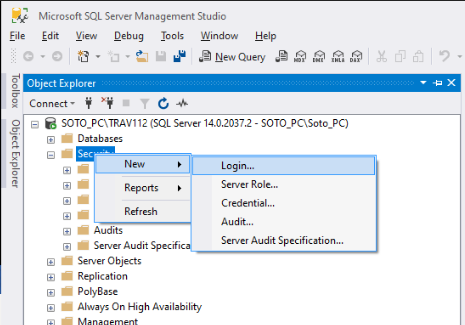
- The Login ‐ New screen appears.
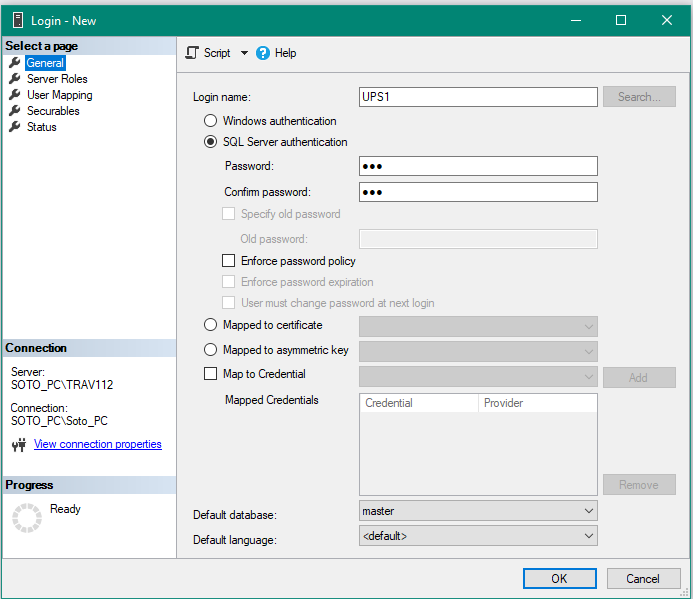
- If you are setting up the user as a SQL Server authentication user, select SQL Server authentication and enter the user name to be used when updating the shipping information.
If you are setting the user up as a Windows authentication user, click the Search button, find the user in your domain group, and select the user.
- If you set the user up as a SQL Server authentication user, enter a Password to use when setting up the ODBC connection and re‐enter it into the Confirm password field. Clear the Enforce password policy box.
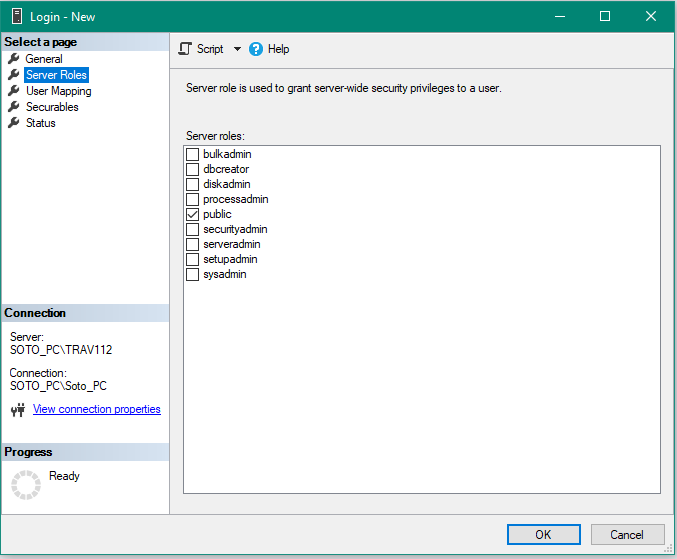
- Go to the Server Roles selection.
The user only needs to be a member of the 'Public' role. Make sure the box is checked next to Public.
- Next, go to the User Mapping selection.

- Check the databases you want to grant access to for this user and click OK. You do not have to change any information in Securables or Status.
- Repeat steps 3 to 9 for each user that will be updating shipping information.
- Once you are finished adding users, return to the main SQL Server Management Studio screen and expand Databases. Expand the company database. Expand Security and Users. You should now see the user(s) you have added.
- Right-click on a user you just added and select Properties. The Database User screen appears. Go to the Securables selection.
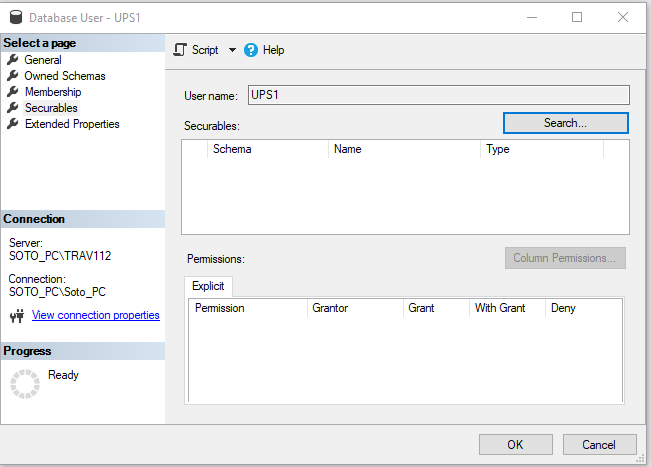
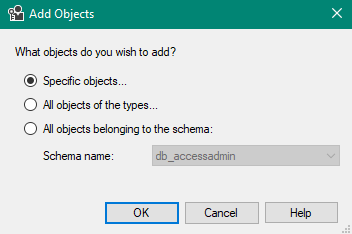
- Click the Search button. The Add Objects screen appears.
Select Specific objects ... and click OK.
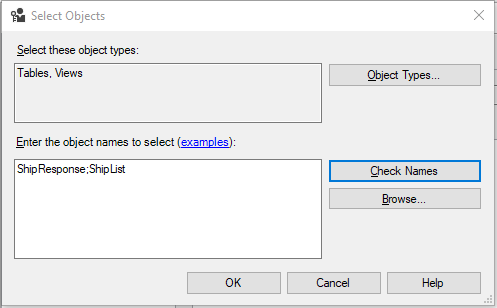
- The Select Objects Types screen appears. Select Tables & Views and click OK.
- Type ShipResponse;ShipList and click Check Names (2 options will appear).
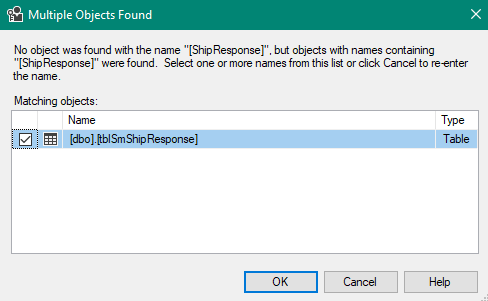
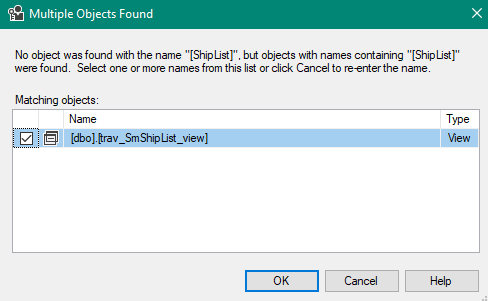
You are returned to the Database Users screen with the Securables area now filled in.
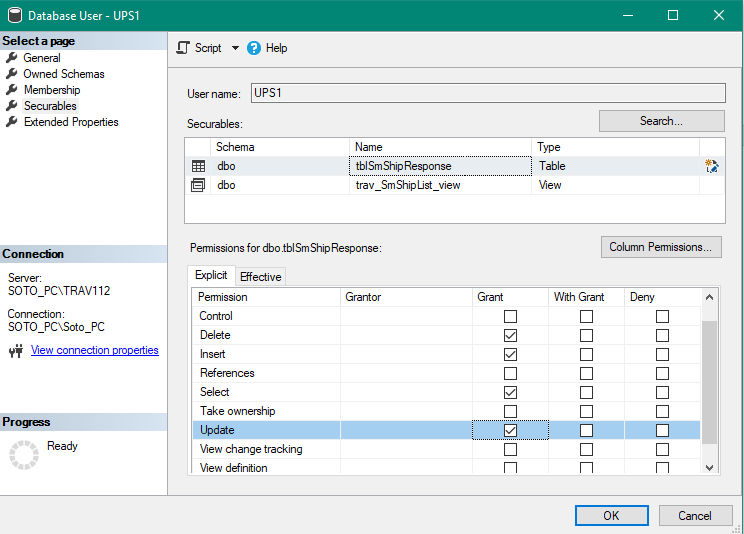
- Select the table tblSmShipResponse and in the Grant column mark the following:
- Delete
- Update
- Insert
- Select
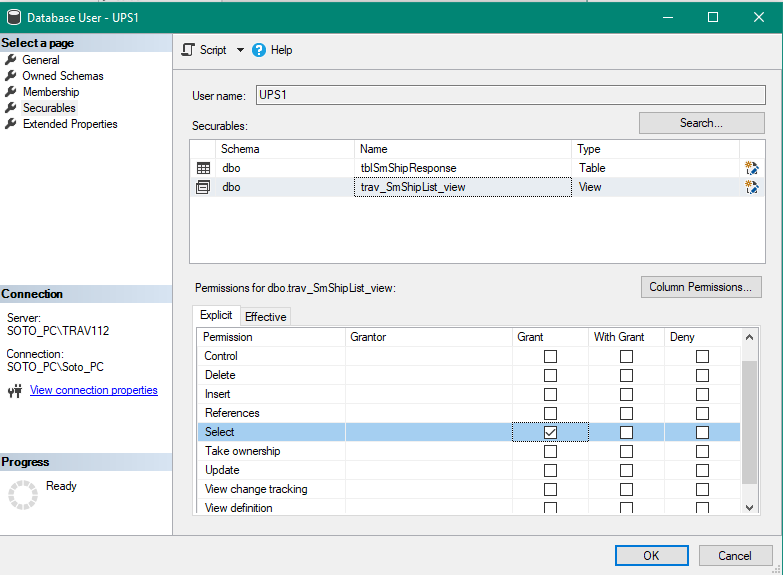
- Select the view trav_SmShipList_view and in the Grant column mark 'Select'.
- Repeat steps 13 to 18 for each user.
An ODBC connection must be set up on each workstation that will be interfacing UPS WorldShip® or FedEx Ship Manager® to Traverse.
NOTE: You must be logged in to the workstation as an Administrator.
Determine whether the workstation is a 32-bit workstation or a 64-bit workstation. This can be determined by opening Control Panel, All Control Panel Items, System. In this window, there should be a System Type section that shows whether this workstation is 32-bit or 64-bit.
If you are using a 64-bit workstation, setting up the ODBC DSN is not always a straightforward process. That is because UPS WorldShip must use a 32-bit ODBC DSN. Sometimes, the process is easy because Windows will show both program shortcut options under 'Administrative Tools' and sometimes it will not.
- If you only see one entry for 'ODBC Data Sources' on a 64-bit machine, you must manually run the ODBC program for 32-bit connections using Windows Explorer.
- This program is separate from the 64-bit program and is located at the following path on most Windows 64-bit operating systems: “%windir%\syswow64\odbcad32.exe”.
- You must setup the ODBC DSNs in this program or they will not show up as available inside of UPS WorldShip. The rest of the setup is the same.
NOTE: A 64-bit system will require you to set up both a User DSN and a System DSN to show in UPS WorldShip® or FedEx Ship Manager®.
The first DSN will be used by UPS WorldShip® or FedEx Ship Manager® to bring Traverse data into the shipping screen, namely the ship-to address information for the order being shipped.
ODBC Connection: Traverse Data to UPS/FedEx
- Under Control Panel > All Control Panel Items > Administrative Tools, open ODBC Data Sources.
See note for 64-bit systems if necessary.
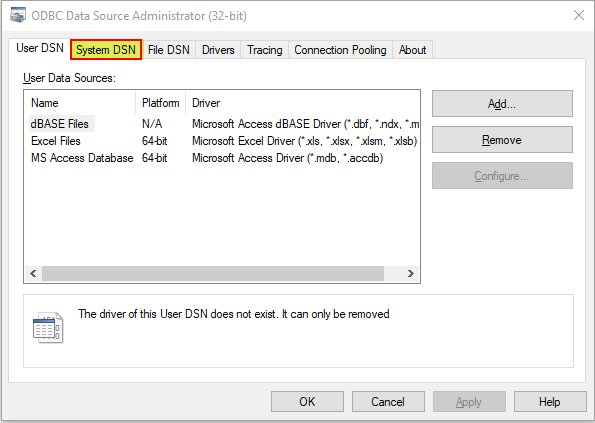
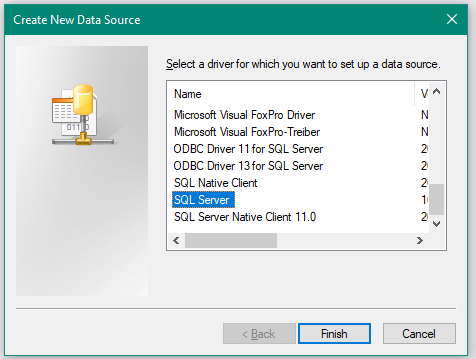
- Switch to the System DSN tab. Click the Add button. Select SQL Server and click Finish, as in the following:
- Complete the wizard, using the following steps and information:
- Name: Traverse2UPS or Traverse2Fedex.
- Description: Traverse to UPS or Traverse to FedEx
- Server: SQL Server Instance name noted above at the server: (MACHINENAME\TRAVERSE).
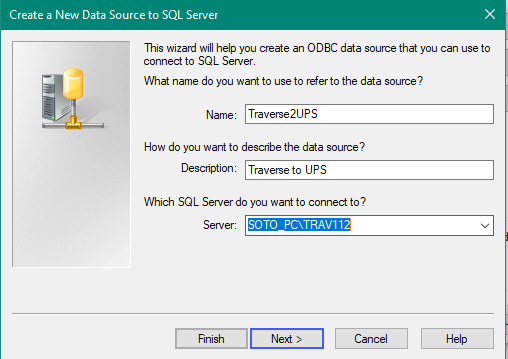
- Click Next.
- Authentication Mode: With SQL Server Authentication.
- Fill in the Login ID and Password of the login created in SQL Server Management Studio. For example, UPS1 for a user name.
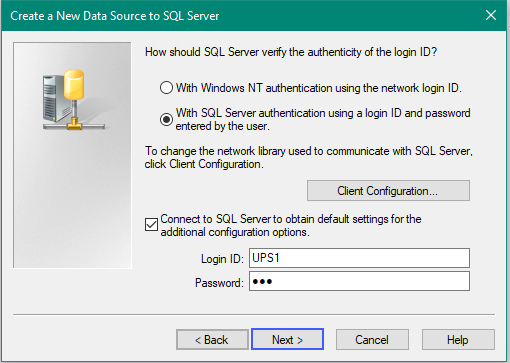
- Click Next.
- Check the box for Change the default database to: Traverse Company Id (CPU is sample).
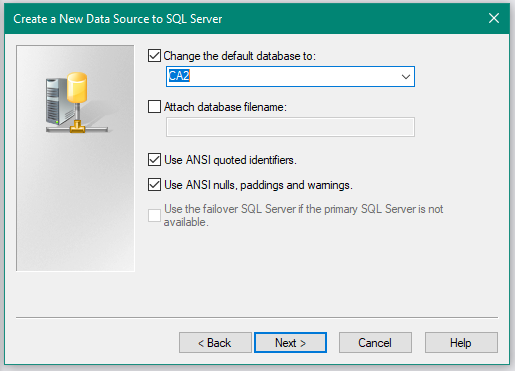
- Click Next.
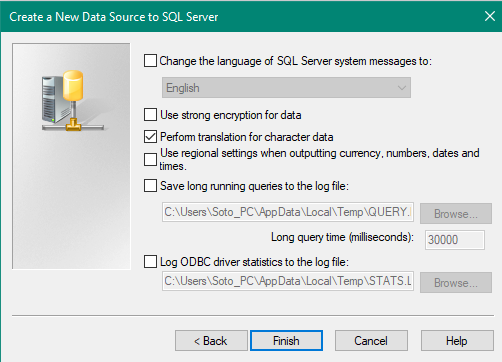
- Click Finish.
- A system setup verification screen is displayed. Click the Test Data Source button to make sure your SQL connection works properly.
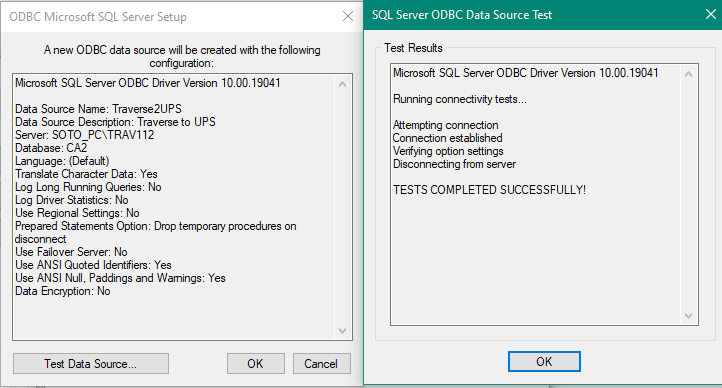
- Click OK to save the connection. It will now be listed under System DSN.
UPS/FedEx Data to Traverse
Click Add a second time to create a second System DSN. This will be used by UPS WorldShip® or FedEx Ship Manager® to write the data back to Traverse as you ship packages.

- Once again, pick SQL Server and click Finish. This will launch the New Data Source Wizard as in the previous steps above.

- Complete the wizard, using the following steps and information:
- Name: UPS2Traverse or Fedex2Traverse.
- Description: UPS to Traverse or FedEx to Traverse
- Server: SQL Server Instance name noted above at the server: (MACHINENAME\TRAVERSE).
- Click Next.
- Authentication Mode: With SQL Server Authentication.
- Fill in the Login ID and Password of the login created in SQL Server Management Studio. For example: UPS1.
- Click Next.
- Check the box for Change the default database to: Traverse Company Id (CPU is sample).
- Click Next.
- Click Finish.
- Click the Test Data Source button to make sure your SQL connection works properly.
- Click OK to save the connection. It will now be listed under System DSN.
NOTE: If you are using a 64-bit system, repeat the above steps to create User DSNs for the two ODBC connections.