Traverse Global v11.2
User Defaults
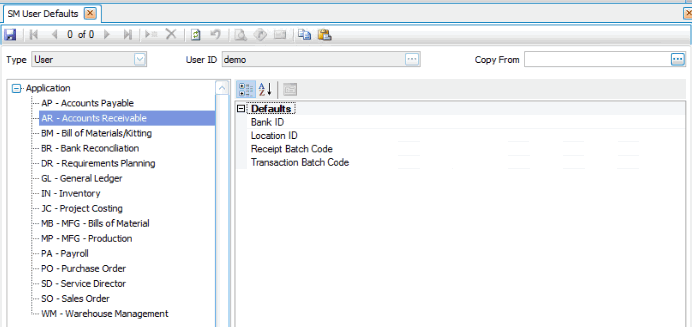
The User Defaults maintenance screen allows each Traverse User ID to have set defaults upon login. For example, users can assign their default batch code(s), location ID, and bank ID.

The logged-in user can select defaults for their user ID, or copy defaults from another user via the Copy From drop-down list.
The default values available depend on the application selected.
Once you are finished setting user defaults, Save your settings.
AP - Accounts Payable
- Select a default Bank ID.
- Enter a default Batch Code.
- Select a default Location ID.
AR - Accounts Receivable
- Select a default Bank ID.
- Select a default Distribution Code to use when creating new customers.
- Select a default External Payments Batch Code.
- Select a default Location ID.
- Select a default Payment Method to use when creating new customers.
- Enter a default Receipt Batch Code.
- Select a default Tax Group ID to use when creating new customers.
- Select a default Terms Code to use when creating new customers.
- Enter a default Transaction Batch Code.
BM - Bill of Material/Kitting
Select a default Location ID.
BR - Bank Reconciliation
Select a default Bank ID.
DR - Requirements Planning
Select a default Location ID.
GL - General Ledger
Enter a default Batch Code.
IN - Inventory
- Select a default Location ID.
- Enter a default Transaction Batch Code.
- Enter a default Transfer Batch Code.
JC - Project Costing
- Enter a default Billing Batch Code.
- Select a default Location ID.
- Enter a default Transaction Batch Code.
MB - MFG - Bills of Material
Select a default Location ID.
MP - MFG - Production
Select a default Location ID.
PA - Payroll
Select a default Bank ID.
PO - Purchase Order
- Select a default Bank ID.
- Enter a default Batch Code.
- Select a default Location ID.
SD - Service Director
- Enter a default Batch Code.
- Select a default Location ID.
- Select a default Order Category.
- Select a default Service Zone.
SM - System Manager
Aptean Cloud Printing
- Enter a Aptean Cloud Printing Account ID.
- Enter a Aptean Cloud Printing API key.
- Select a Default Printer.
- Select yes to Enable Cloud Print.
- Select a default Printing Mode.
- Enter a Workstation Name
Email Settings
- Enter your certificate file path and name.
- Select yes to Enable SSL.
- Enter your Login Name to your SMTP server.
- Enter your Login Password to your SMTP server.
- Select yes to enable Send Email as HTML.
- Enter a default sender's email in the Senders Email.
- Enter a default sender's name in the Senders Name.
- Enter a default SMTP port of the email server.
- Enter a default SMTP Server Name of the email server.
Form Printers
- Enter the Setup mode.
SO - Sales Order
- Enter a default Batch Code.
- Select a default Location ID.
WM - Warehouse Management
- Enter a default Adjustment Batch Code.
- Enter a Default Printer. This is the default label printer the Mobile WMS application will use.
- Select a default Location ID.
- Select a default Packing Bin.
- Select a default Receiving Bin.
- Enter a default Transfer Batch Code.
- Select a default Working Bin.