Traverse Global v11.2
Create ACH File
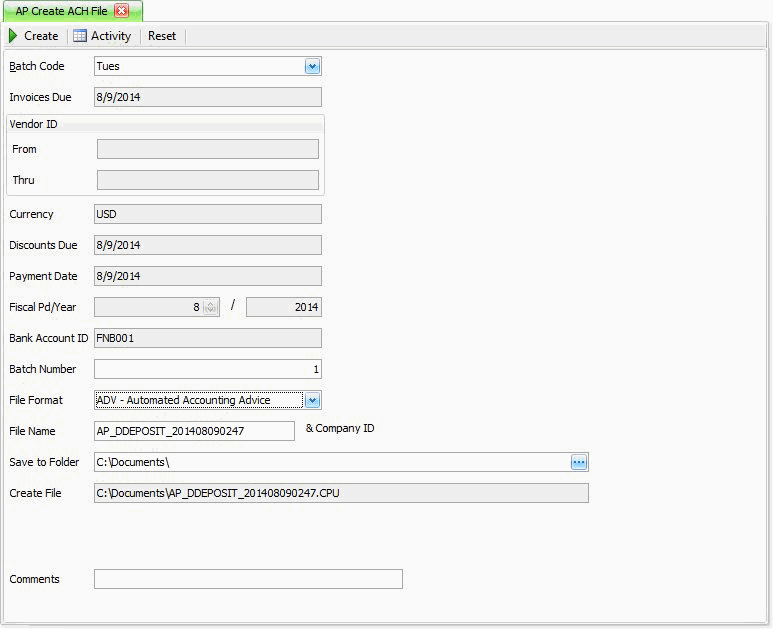
Use the Create ACH File function to create an ACH (Automated Clearing House) file. The ACH file contains all the payment transaction information for your vendors. After you create the ACH file, submit it to your company's bank.
The vendors you have set up to receive payments via Electronic payment will be the only payments that will be output in the ACH file.

- Use the Data Filter to select the range of filtering options or leave the filter blank to include all available data.
- Select the batch code for which you want to output the payment vouchers from the Batch Code field.
Note: The Invoices Due, Discounts Due, Payment Date, Fiscal Pd/Year, and Bank Account ID you selected when you prepared payments displays in the appropriate field. - Edit, if applicable, the batch number in the Batch Number field.
Note: This number automatically increments if you output more than one ACH file in a day. - Select the applicable format for the file from the File Format field. You can select one of the standard formats or make your own custom format using the Export Layout Definition function in System Manager.
Note: If the Exclude Batch Offset (Balancing) Record check box, in the System Manager Bank Accounts function, is selected, you must select ADV, CCD, or PPD for the file format. If the Exclude Batch Offset (Balancing) Record check box is not selected, you must select ADVO, CCDO, or PPDO for the file format. - Enter or edit the name for the ACH file you want to create in the File Name field.
Note: Traverse appends your company ID to the file name automatically.If you set up a default file name with wildcards in the bank account setup, the file name will be displayed with the wildcards filled in.
- Select the destination for the file from the Save to Folder field. Click the Browse button to build this path while you navigate to the desired folder. The file name and file path appear in the Create File field.
If you set up a Save To Folder in the bank account setup, the Save To Folder will be displayed.
- Enter comments as required in the Comments field.
- Click a command button to
| Click | To |
| Create | Create the ACH file. |
| Activity | Display the Activity Log to view ACH creation activity. |
| Reset | Set all fields to their default values. |