Traverse Global v11.2 - Service Repair
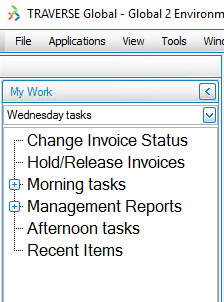
My Work
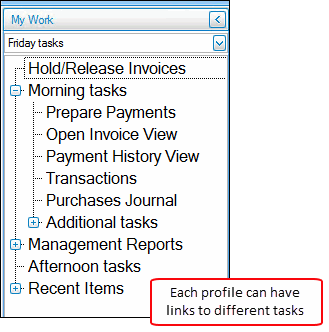
The My Work menu allows you to group the functions you use most often onto one menu for quick access instead of switching between applications and application menus. You can also use the My Work menu to set up workflow-based menus (profiles). When you open Traverse, the default My Work menu, if any, appears at the top of the application bar.
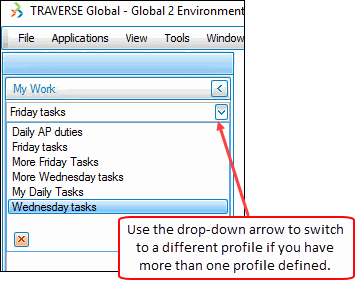
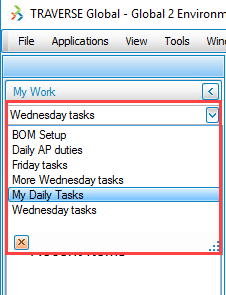
You can create multiple workflow-based menus, and switch between them as needed.
 MMM
MMM
The Recent Items entry at the bottom of the My Work menu lists the most recent functions you used during the session. Note: The Recent Items function also appears as 'Recent' on the File menu of the menu bar.
To create a My Work menu:
- On the File menu, select My Work.
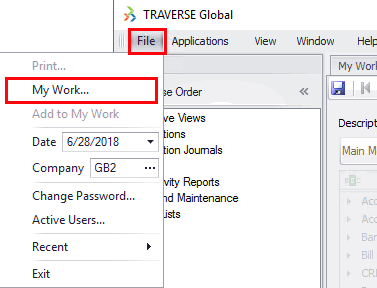
- The My Work screen opens. This allows you to create a custom menu.
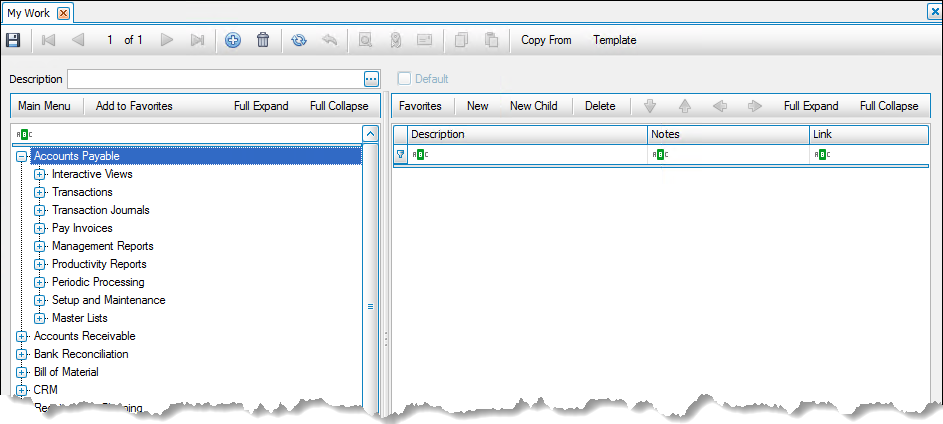
- Click the New button on the toolbar to create a new My Work menu.
- Enter a Description for the My Work menu.
- If you are creating or editing a My Work menu, you can copy from an existing My Work template by using the Copy From button on the toolbar.
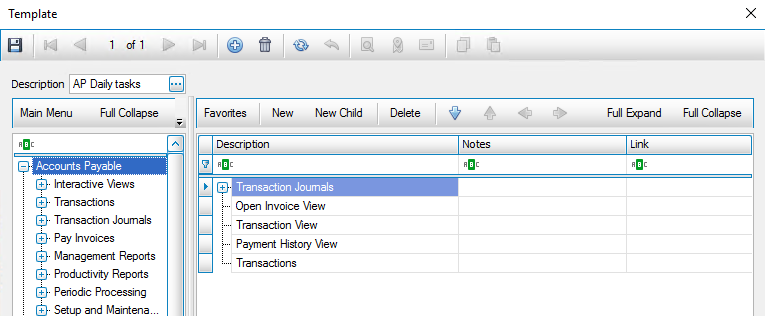
NOTE: To create a My Work template, click the Template button to open the Template screen, which looks and behaves like the My Work screen.
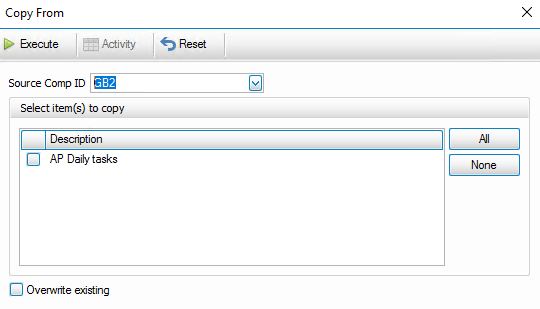
- Select a source company ID from the Source Comp ID drop-down list. A list of all the templates created in that company will appear.
- Mark the check box for each item (template) you want to copy. Use the All button to select all templates, or the None button to clear all the check boxes.
- If you want to overwrite a matching My Work menu, select the Overwrite existing check box.
- Click the Execute button to copy the selected templates to the current My Work menu. Use the Reset button to return the screen to its original state.
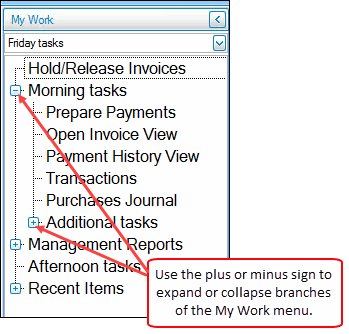
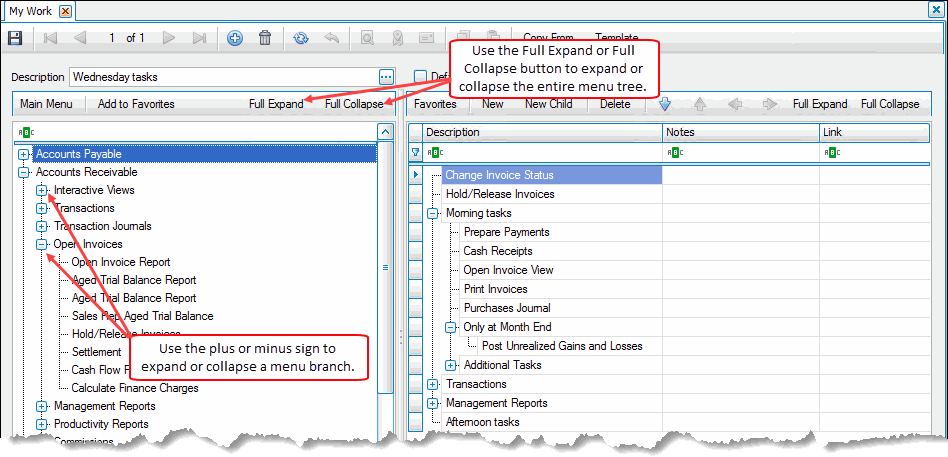
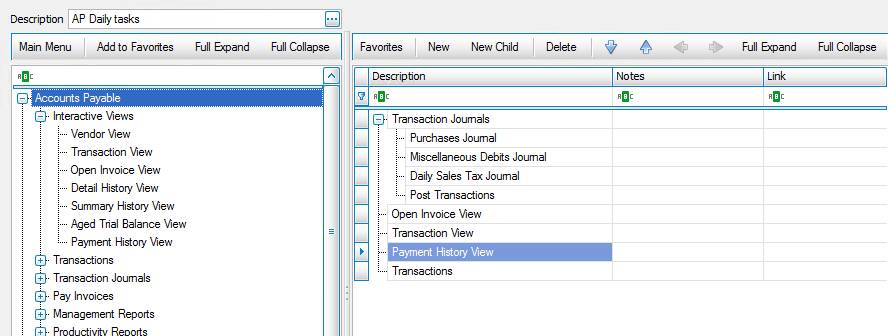
The left panel shows the Main Menu structure, including applications and functions. You can expand or collapse the branches of the menu tree by clicking on the plus or minus signs next to the application or function name, or use the Full Expand or Full Collapse button to expand or collapse the entire menu tree at once.
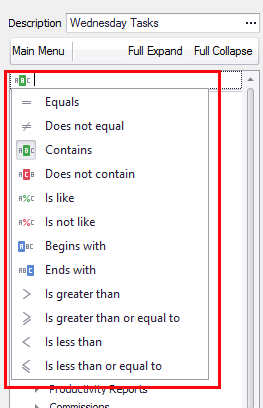
You can also use the data filter to filter the main menu so it shows only the applications or functions you want.
 MMMMMMM
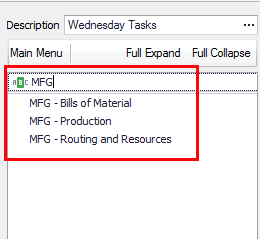
You can construct the My Work menu with a parent-child structure, or have all the functions on the My Work menu at the same (parent) level. You can name a level of the menu, then add functions below it, or you can add an entire branch of the Main Menu to your My Work menu. You add functions to your My Work menu by clicking and dragging the function(s) from the left panel to the right panel, or by selecting the function(s) in the left panel and using the Add to Favorites button to add the function(s) to the right panel.
Remember to use the plus or minus signs at each branch to expand or collapse the menu structure.
The right-click menu contains the same commands as the toolbar above the right panel. Click a command button OR select the option from the right-click menu:
| Click | To |
| New | Create a new parent entry on the My Work menu below the selected entry on the same menu level. |
| New Child | Create a new child entry on the My Work menu below the selected entry. If a child entry cannot be added at that location, you will see a notification window for the error. |
| Delete | Delete the selected entry (and all of its child entries) from the My Work menu. |
| Show in Main Menu | (right-click menu only) Highlight the selected function in the Main Menu. |
Building a My Work menu
To start a new My Work menu, you can create a new entry by clicking the New button ( ) on the toolbar.
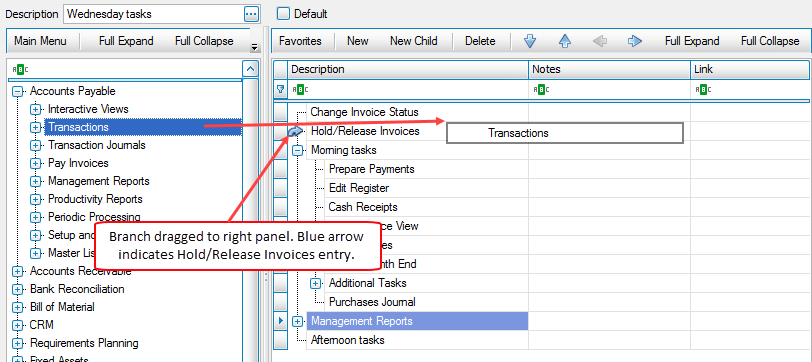
To add an entire parent branch or an individual function of the Main Menu to a new, blank My Work menu, click on the branch or function in the left panel, then drag the branch to the right panel and drop it.
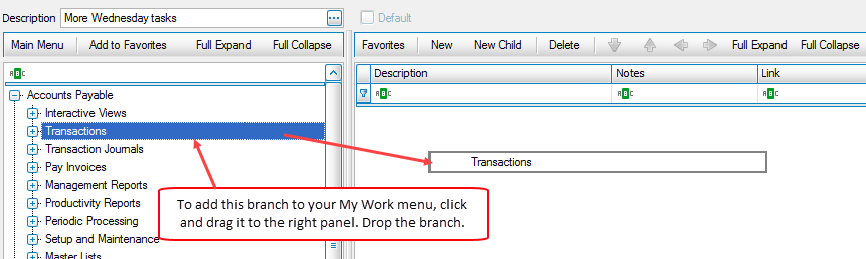
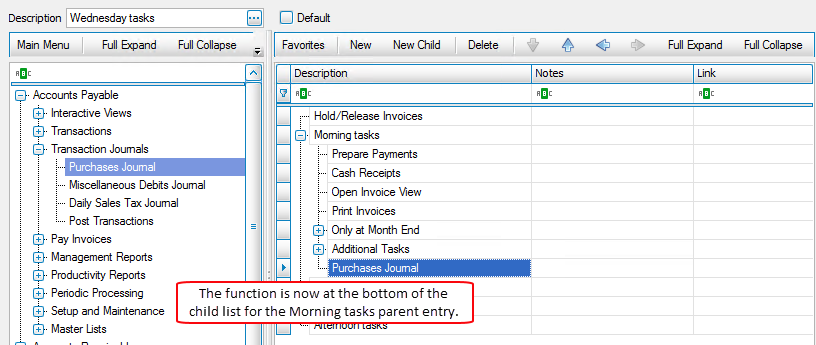
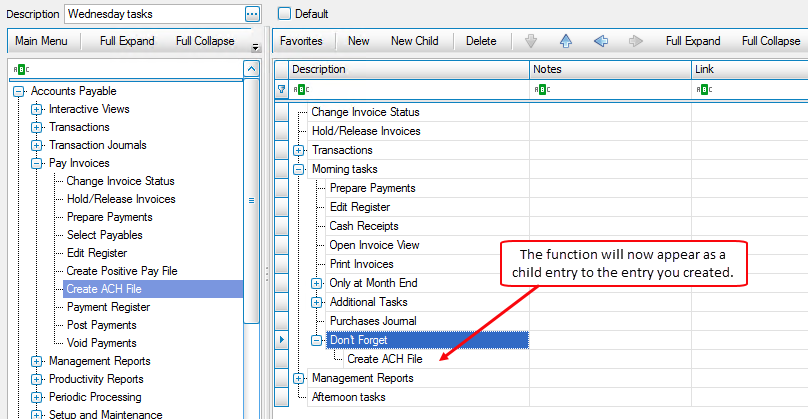
The branch, including the child branches, appear in the right panel.

OR
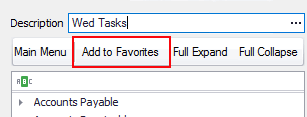
Resize the Main Menu panel on the left to view the Add to Favorites button, or use the drop-down indicator to access the Add to Favorites button.
 MMMMMMM
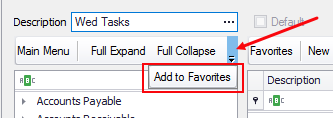
Select a Main Menu branch or function, and then click the Add to Favorites button. The selected entry will be added to the My Work menu in the right panel at the bottom of the existing menu items. Alternately, you can click the New button to add a blank parent entry. Enter a Description for the entry, add any Notes or a Link, if necessary, the press the Enter key on your keyboard.
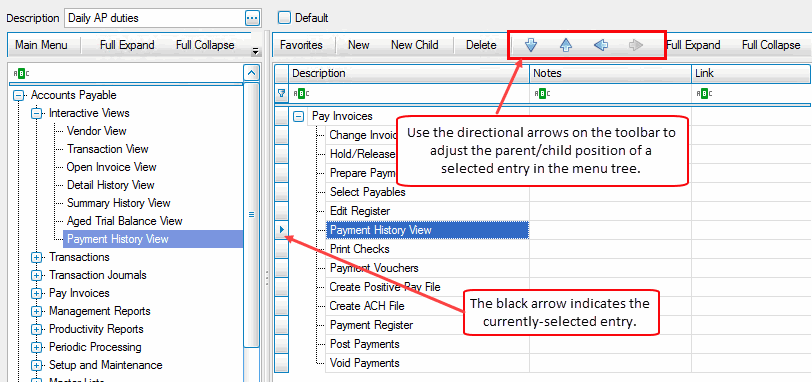
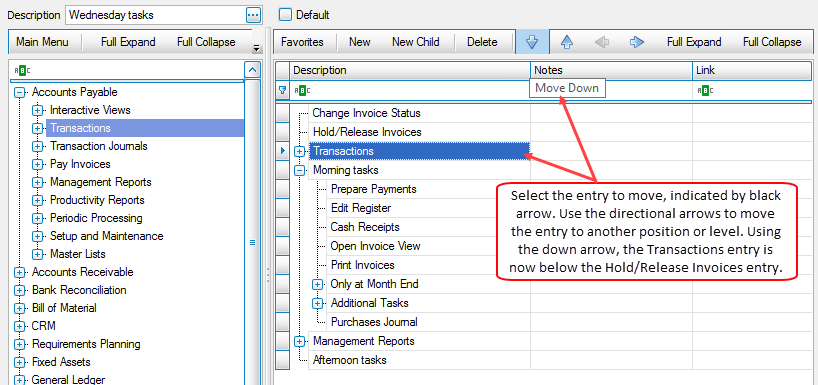
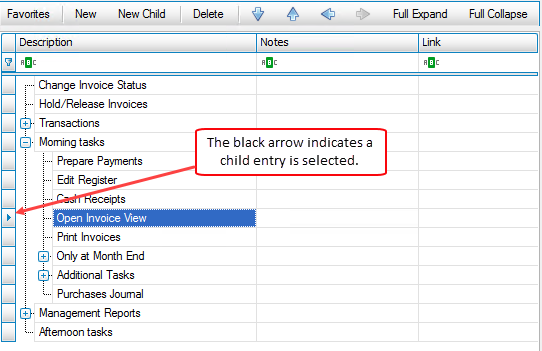
You can use the directional arrows on the toolbar to move an entry on the My Work menu to a parent or child level, or move it to a higher or lower position on the menu tree.
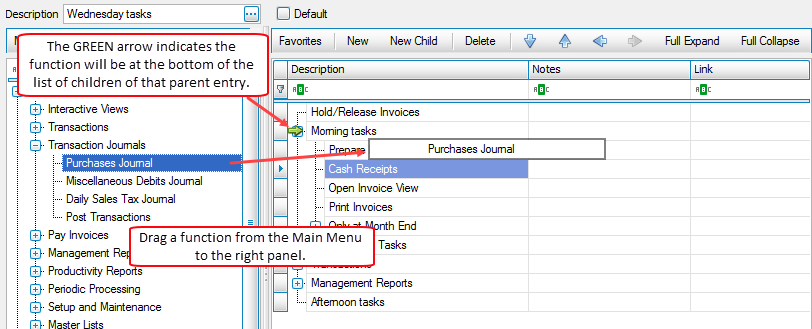
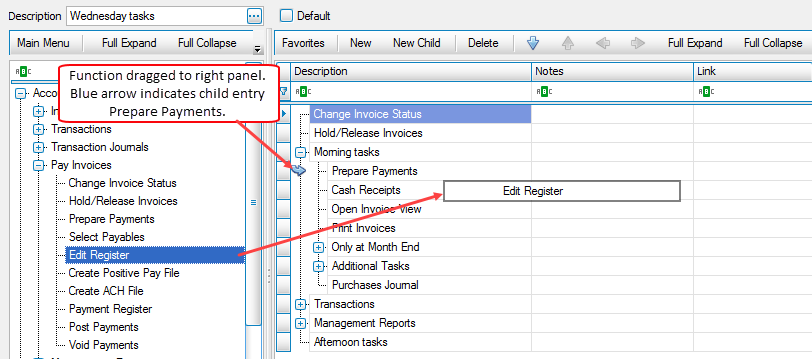
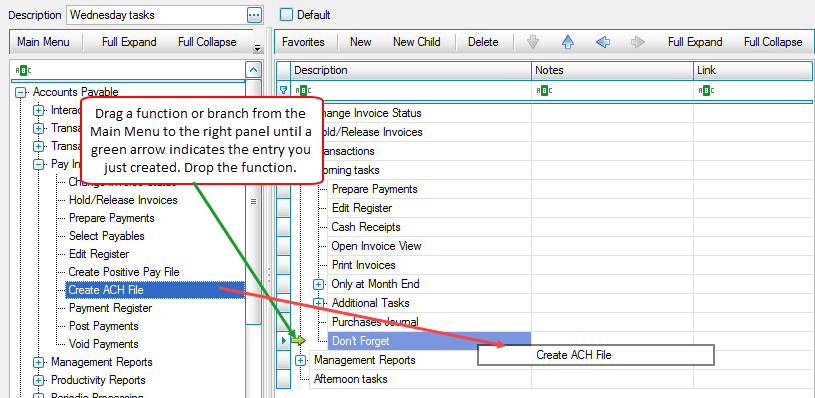
If you drag functions or branches from the Main Menu panel to the My Work panel, colored arrows indicate where you should drop the functions you add to the My Work menu:
A green arrow at a parent entry indicates the function being dragged will be dropped at the bottom of any child entries for that parent.
A blue arrow at a parent entry indicates the function being dragged will be dropped at a higher index than that parent.
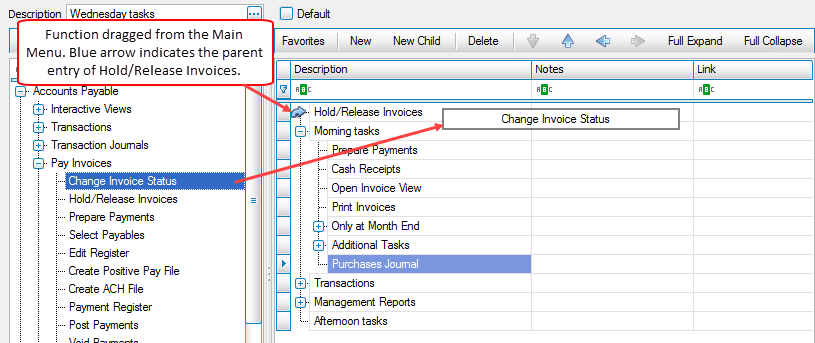
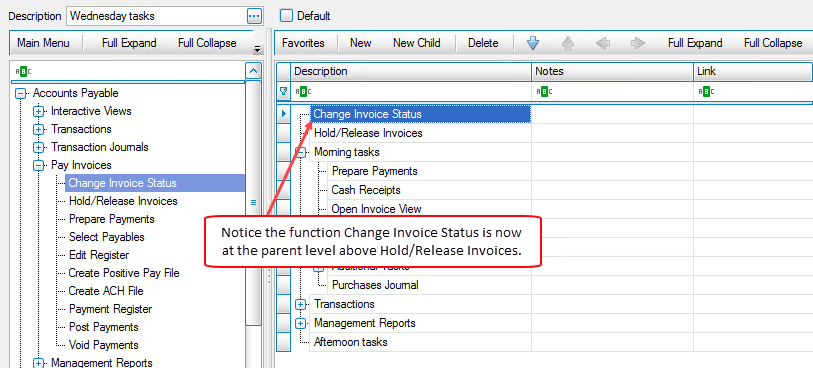
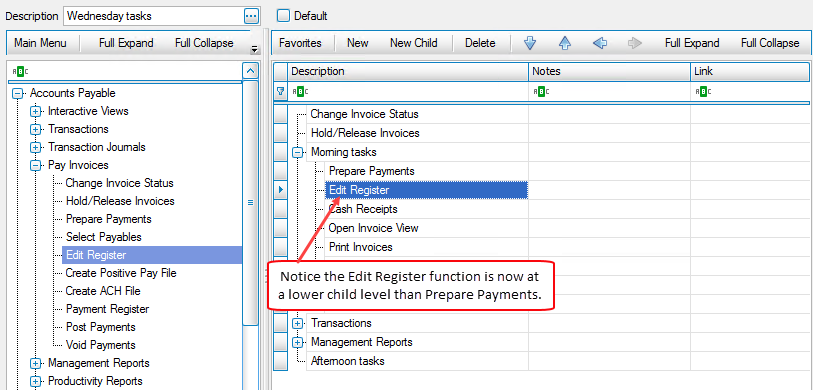
A blue arrow at a child entry indicates the function being dragged will be dropped at a lower index than that child.
To add a new parent level entry, you can drag a single function OR an entire branch from the Main Menu and drop it when a blue arrow indicates a parent level. The function or branch you drag will be dropped above the indicated parent.
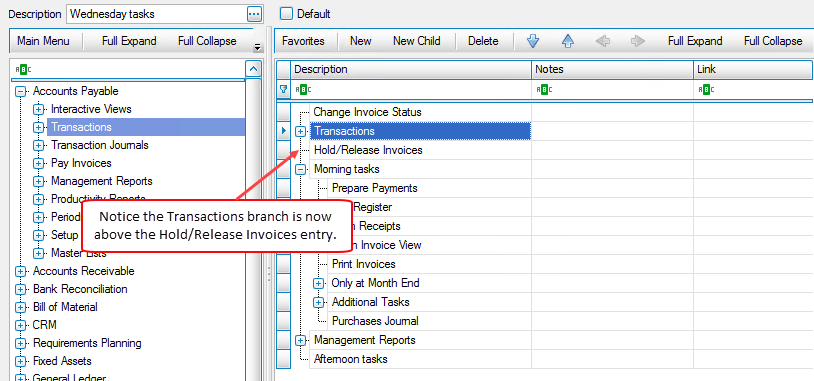
To adjust the position of an entry in the list, select the entry, then use the arrow keys to move the branch or function to the desired location or level.
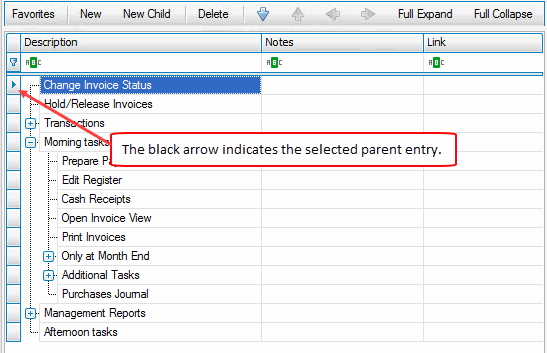
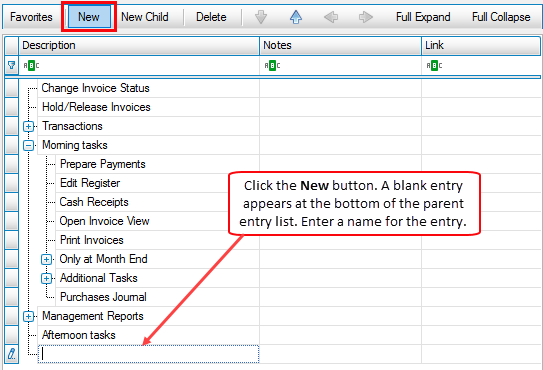
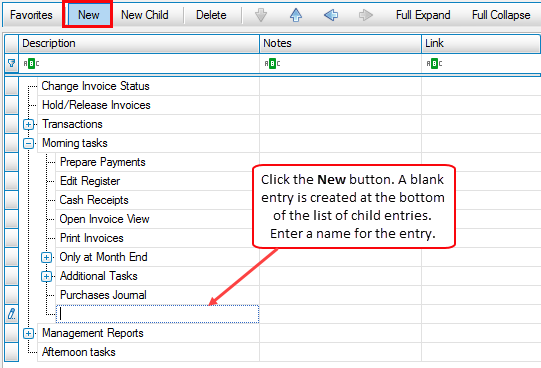
You can create a new entry at any level in the menu. Select an entry, then click the New button on the toolbar above the right panel to create a blank entry at the level matching the entry you selected. For example, if you select a child entry, then click the New button, an entry will be created at the bottom of the list of child entries. NOTE: The New Child button performs this same function.
If you select a parent entry, then click the New button, a blank parent entry will be created at the bottom of the parent entry list. NOTE: If you select a parent entry and click the New Child button, a blank child entry will be created under that parent.
To add functions or branches to the entry you just created, drag the function from the Main Menu and drop it into the right panel when a green arrow indicates the new entry OR select the function in the Main Menu panel and use the Add to Favorites button to add it to the bottom of the My Work menu in the right panel.
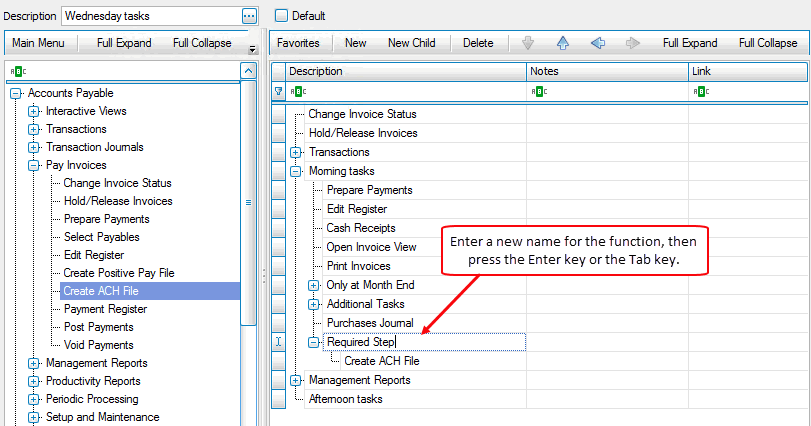
For any entry, if you want to change the name of the entry, which will be reflected only in the My Work menu, select the entry and highlight the name. An edit (pencil) icon will appear in the left gray column to indicate edit mode.

Edit the name of the function, then press the Enter key to continue.
Once you have created your My Work menu, use the Save button ( ) on the main toolbar to save your changes.
Add Notes and/or a Link to My Work entries
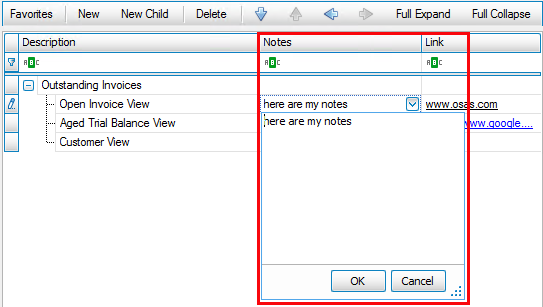
You can add helpful notes to entries in the My Work menu by adding them in the Notes column.
Select an entry in the My Work menu, and enter any notes in the Notes column. Click OK to save the note.
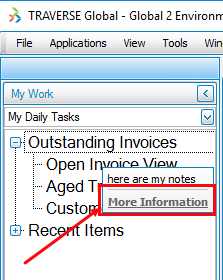
The notes will appear as a tooltip when you hover the mouse pointer over that entry in the My Work menu in the Traverse application bar.

You can direct a user to a website if you enter the Internet address of a webpage into the Link column. Click in the Link column for an entry and type a web address in the field. Save the My Work menu.
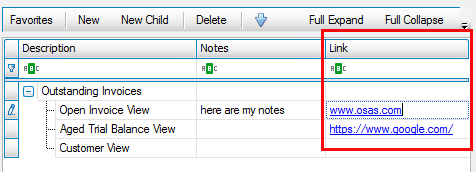
The link will appear as a 'More Information' link in the tooltip when you hover the mouse pointer over that entry in the My Work menu in the Traverse application bar. You can define a link for each entry in the menu.
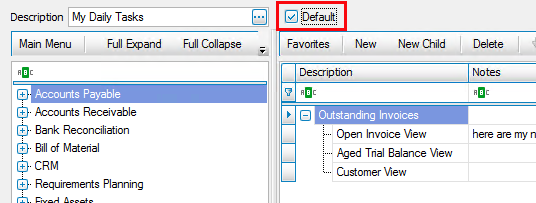
Default My Work menu
A default My Work menu allows that menu to appear in the My Work section of the navigation bar every time you log in. If you have no default My Work menu, the only option that will appear in the My Work section is the Recent Items option, and you will have to choose a My Work menu to use.
To select a menu as the default:
- If you currently have a default My Work menu, choose the current default My Work menu from the Description drop-down list. The Default check box will be marked.
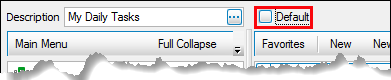
- Clear the Default check box.
Save your changes.
- Select the My Work menu you want to set as the default from the Description drop-down list.
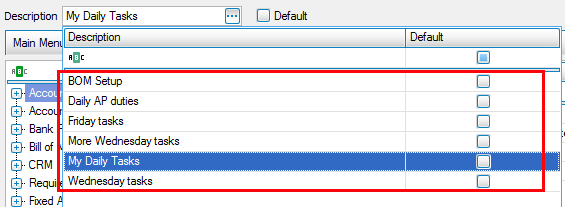
- Mark the Default check box for the new default My Work menu.
- Save your changes.
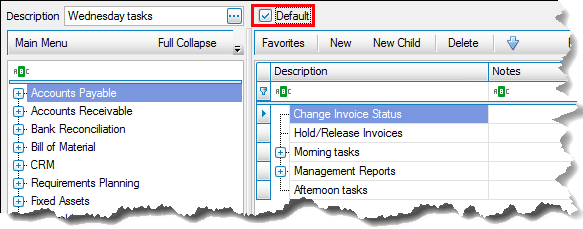
Your selected default My Work menu will appear in the My Work section of the navigation bar. The entries in your selected default My Work menu should appear in the My Work application bar above the Recent Items entry. If the default My Work menu does not appear, log out of Traverse and log back in.
You can change the available My Work menu by selecting another My Work menu from the drop-down list.
Tile Style
If you use a touchscreen interface, you can change the menu style to a more touchscreen-friendly tile version. See Menu Tiles for more information.
Build a My Work template
You create a My Work template in much the same way you create a My Work menu without a template. Use the Template button on the toolbar to open the Template screen.
Click the New button on the toolbar to create a blank template. Enter a Description for the template.
Use the Full Expand and/or Full Collapse buttons in the menu tree on the Main Menu in the left panel to expand or collapse branches of the menu. Use the Full Expand or the Full Collapse buttons for the left panel to expand or collapse all branches at once.
Use the instructions for creating a My Work menu to build a template menu you can use when creating new My Work menus.
Save your template. Close the Template screen when you are finished.