Traverse v11.2 Administrator Guide
Designers
Use the Traverse Design Studio Designers functions to edit the appearance of Traverse forms, reports, and create custom dashboards.
Use the Form Designer tool of Traverse Design Studio to edit the appearance of Traverse forms, such as function screens.
The Form Designer lists all of the available forms for which you can adjust the field layout.
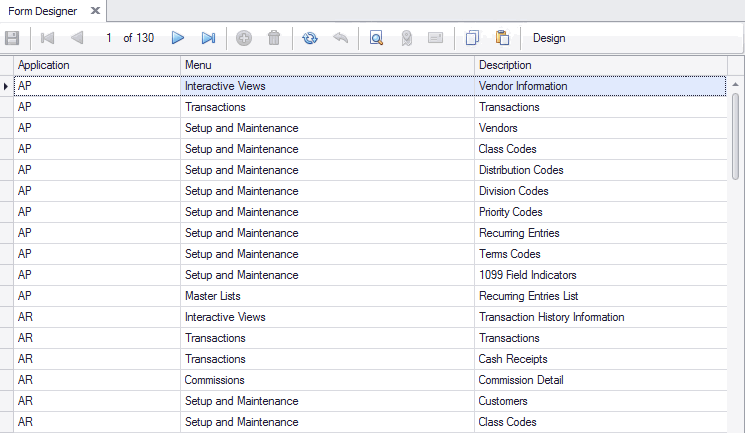
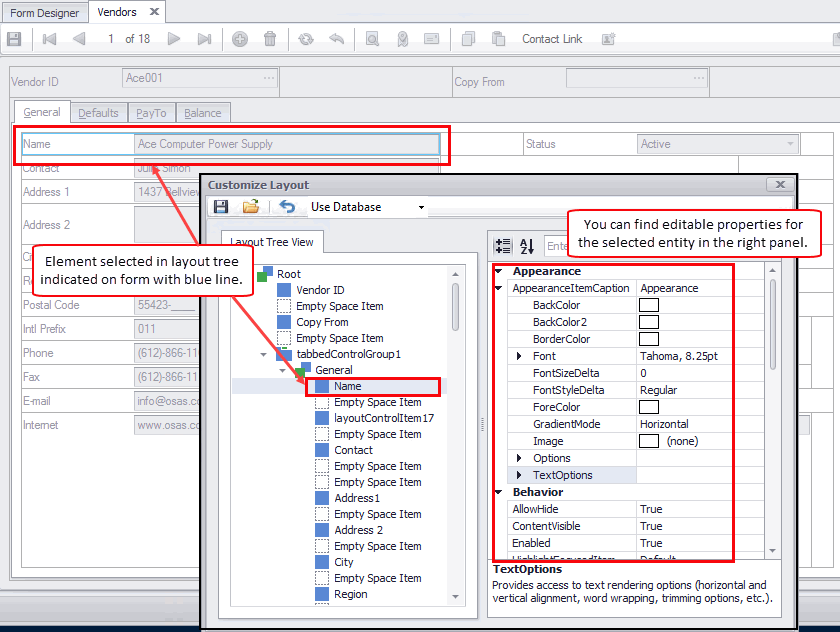
To edit the layout of a form, choose the form from the list and click the Design button on the toolbar. The Customize Layout window opens with the Layout Tree View--a hierarchical tree of all form elements--on the left side and a property window displayed on the right side of the Customize Layout window.
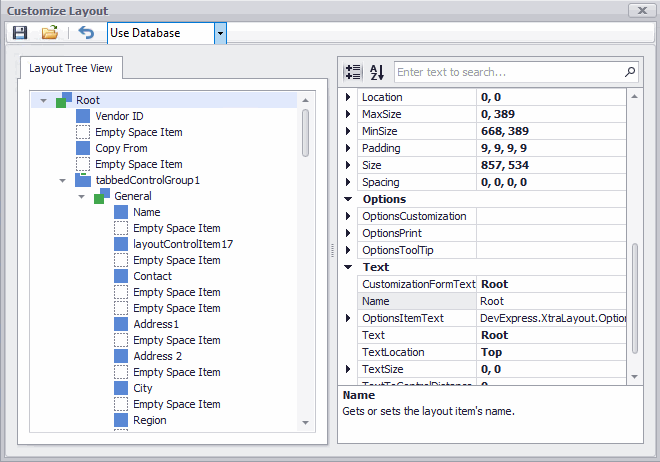
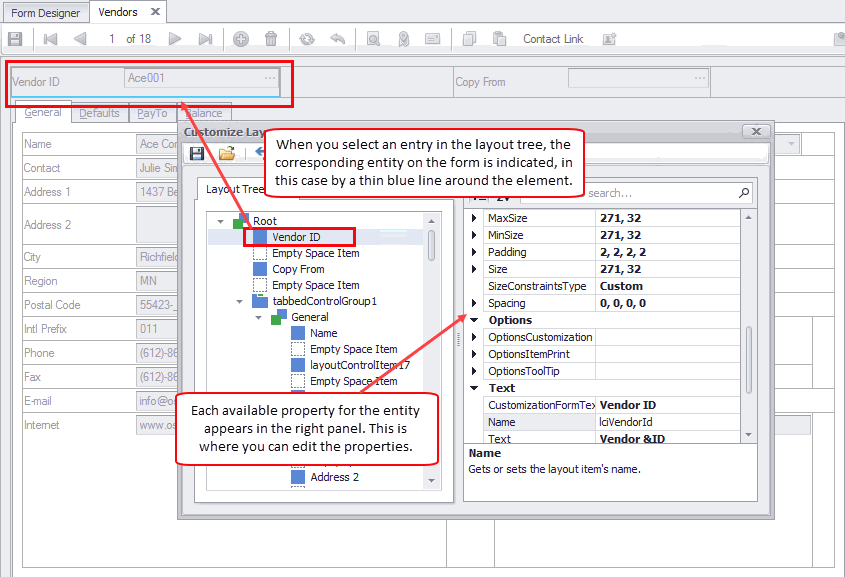
The Customize Layout form serves as a navigator for the form you are customizing/designing. Each entry on the Layout Tree View is an element on the form. When you select an entry on the layout tree, the corresponding entity on the form is indicated.
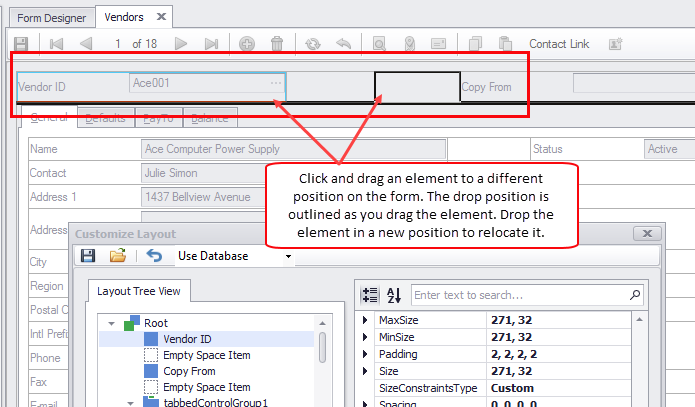
To change the layout of the forms, you can drag an element of the layout tree to a new position in the tree, or drag the element into a new position on the form itself. When you drop the element, the form adjusts to the element's new position.
To reset the layout, click Reset ( ) on the toolbar.
To change properties of the form fields, select the field in the layout tree, then find the property in the right panel.
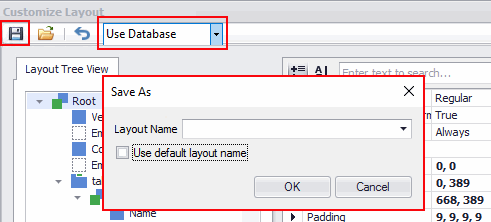
When you are finished with your changes, use the Save button to save your layout. By default, the layout is saved in the database. You can save the layout with the default layout name--which will save over the current layout--or you can clear the Use default layout name check box and enter a new layout name. Click the OK button to save your layout.
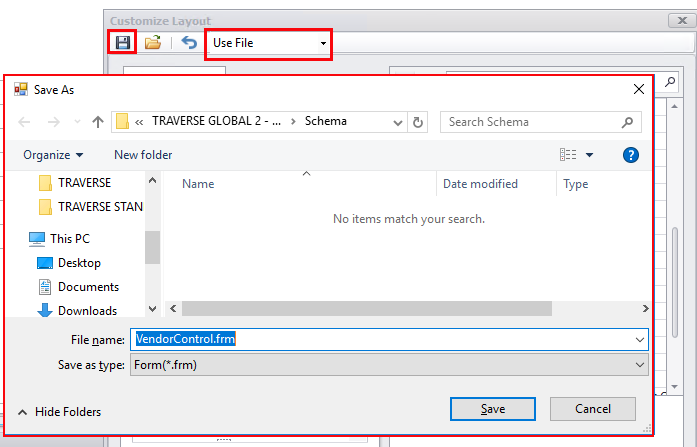
You can choose to save the layout as a file by selecting "Use File" and clicking the Save button. A file explorer window will appear, allowing you to browse to the folder in which you want to save the layout. Enter a file name, then click the Save button.
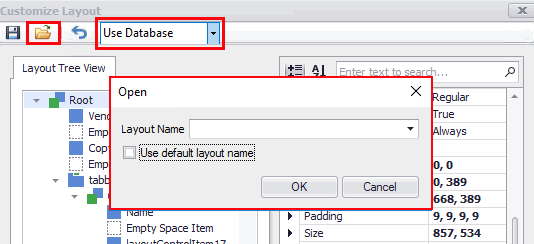
If you want to edit a saved form layout stored in the database, select "Use Database" from the drop-down list, then open the form layout using the Open Layout button. You can open a layout having the default layout name, or clear the Use default layout name check box and enter the name of the layout you want to open. Click the OK button.
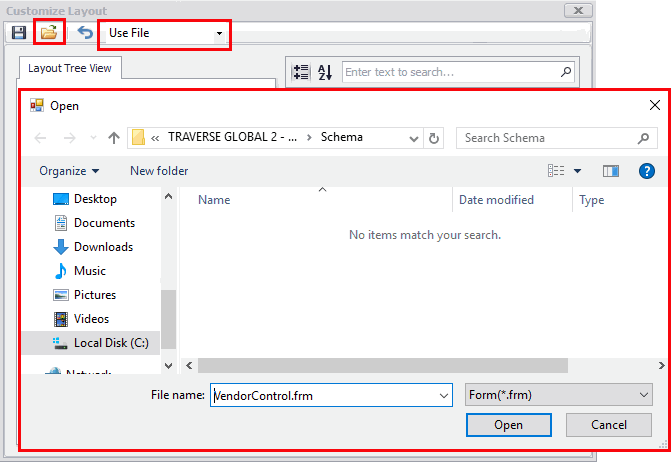
If you want to edit a saved form layout file, select "Use File" from the drop-down list, then open the form layout using the Open Layout button. A file explorer window will appear, allowing you to browse to the layout file. Select the file, then click the Open button.
The Report Designer lists all of the available functions associated with reports for which you can adjust the layout.
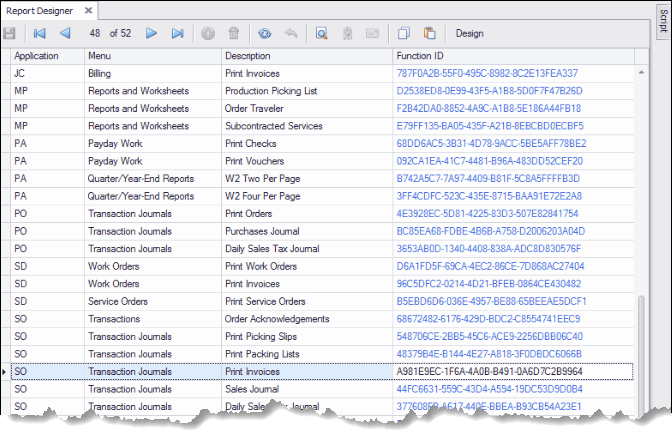
To edit the layout of a report, choose the report from the list and use the Design button on the toolbar. The Report Layout window opens with the report you've chosen to edit displayed in the window.
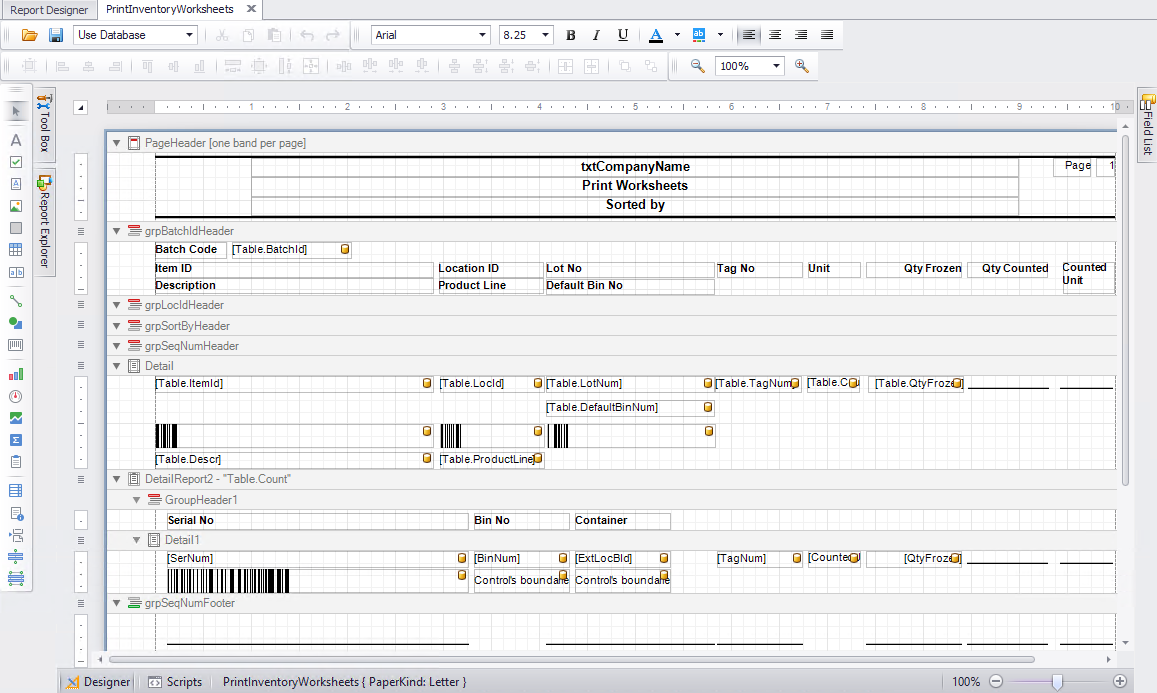
You can change the layout of the reports using the sections of the Layout window. You can drag, resize, or dock any section in or outside the main form at your discretion.
The designer section of the Layout function displays the elements, or controls, of the report and their location within the report.
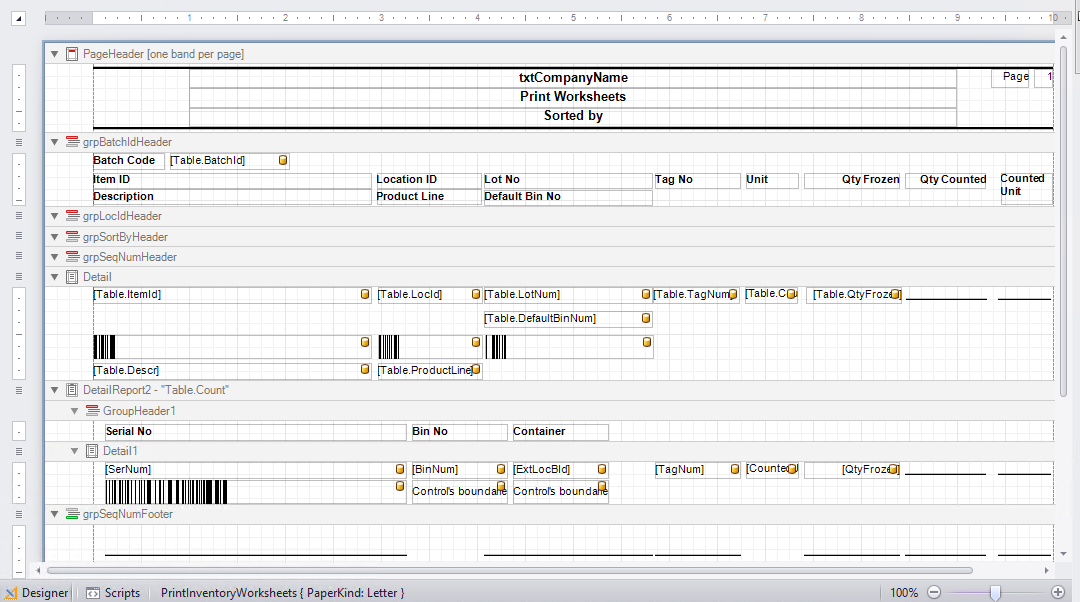
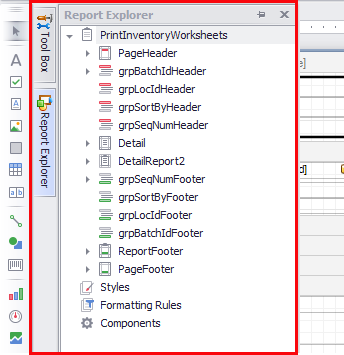
Report Explorer
The Report Explorer provides easy navigation through report controls. You can use the explorer when you build a report to quickly access all the controls of a report and their properties, and to see the whole form's structure.
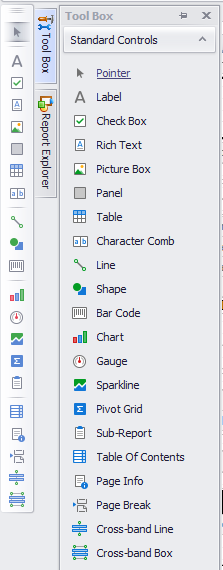
Tool Box
The Tool Box displays report controls that you may drop into the form. To do so, select a Tool Box item and drop it onto one of the report bands.
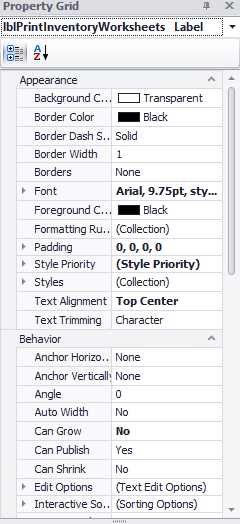
Property Grid
The Property Grid displays the property values of any control you highlight in the form. To view the property grid for a field, select a field in the Designer, then right-click and select 'Properties' from the menu.
Toolbar
Use the toolbar buttons to change the font properties of text controls within the form, or to zoom in or out on the form. You can also use any of a number of element alignment options when selecting one or more controls in the Designer section.

Scripts
If you want to add scripting to the report, use the Scripts window. Click on the Scripts button on the toolbar at the foot of the Designer. Click on the Designer button to return to the Designer window.

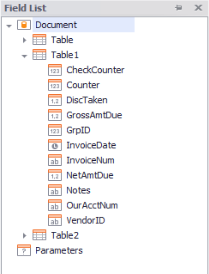
Field List
Use the Field List panel to add additional fields to the report. Tables and fields are arranged in tree format; expand the table branch of the tree and drag the desired field from the panel onto the report.
You can also include custom fields to reports (with limitations), but the custom fields will not render on the reports without performing a few extra steps. See the Custom Fields on Reports topic (advanced users only) for details.
Additional options you can use to format reports are available on the right-click menu for grouping headers, as well as for the entire report. Alternately, you can right-click on each section's bar to see the alternate menu.
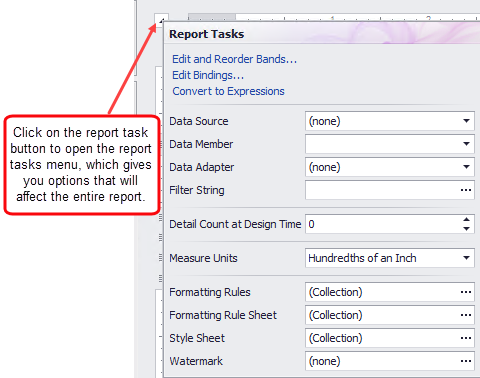
Report Tasks
Page Header Tasks

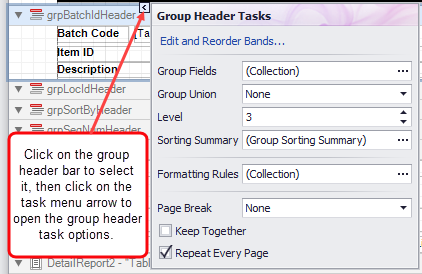
Group Header Tasks
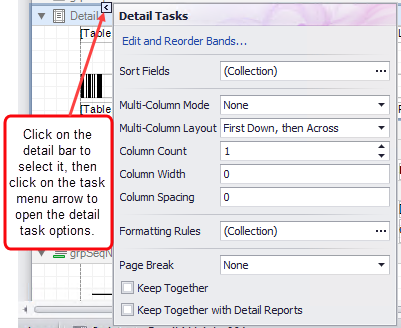
Detail Tasks
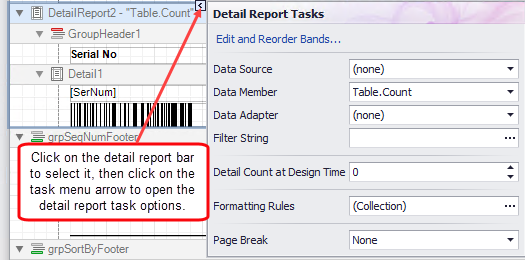
Detail Report Tasks
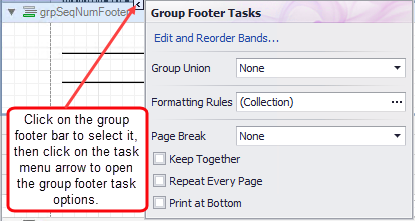
Group Footer Tasks
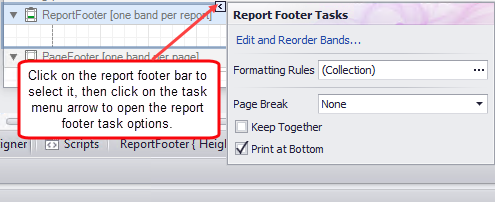
Report Footer Tasks
Page Footer Tasks

The additional tasks you can find on these menus varies depending on the section you select. Most options are self-explanatory. For instance, the selection to 'Print at Bottom' indicates the section will print at the bottom of the page of the report, and 'Repeat Every Page' means the section will print on every page of the report. A mark in the 'Watermark' check box will print a watermark on each page of the report.
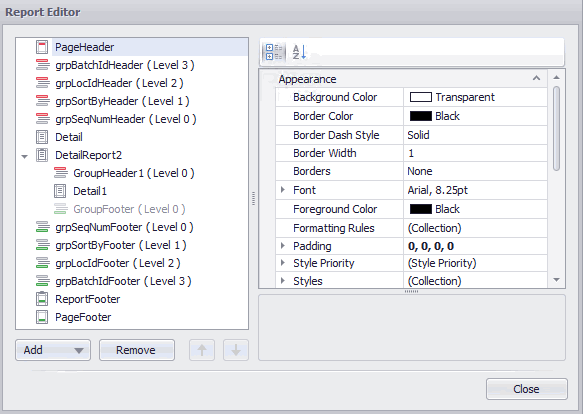
The Edit and Reorder Bands ... link opens the Report Editor. The Report Editor displays the sections of the report in a hierarchical tree, which allows you drag and drop sections into a different order. The editor also allows you to add or remove sections, as well as set the properties of the selected section.
The Print On function allows you to select when the section will print:
- All Pages -- The section will print on all pages of the report.
- Not with Report Header -- The section will print on any page without the report header.
- Not with Report Footer -- The section will print on any page that does not have the report footer.
- Not with Report Header and Report Footer --The section will print on any page that has neither the report header and the report footer.
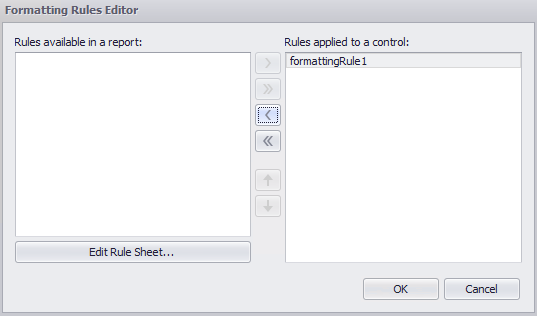
The Formatting Rules function allows you to create conditional formatting rules to apply to the report section. When you click on the ellipsis of the Formatting Rules field, you will open the Formatting Rules Editor screen.
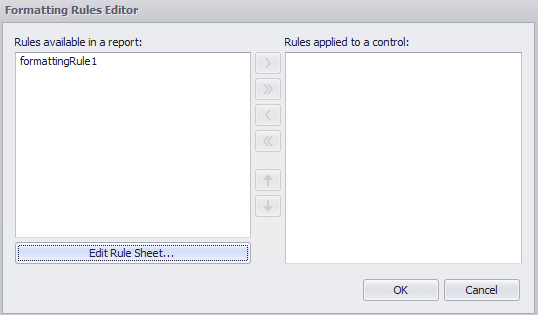
Existing rules in the report will appear in the left panel. To edit or add rules, click the Edit Rule Sheet ... button. The Formatting Rule Sheet Editor screen opens.
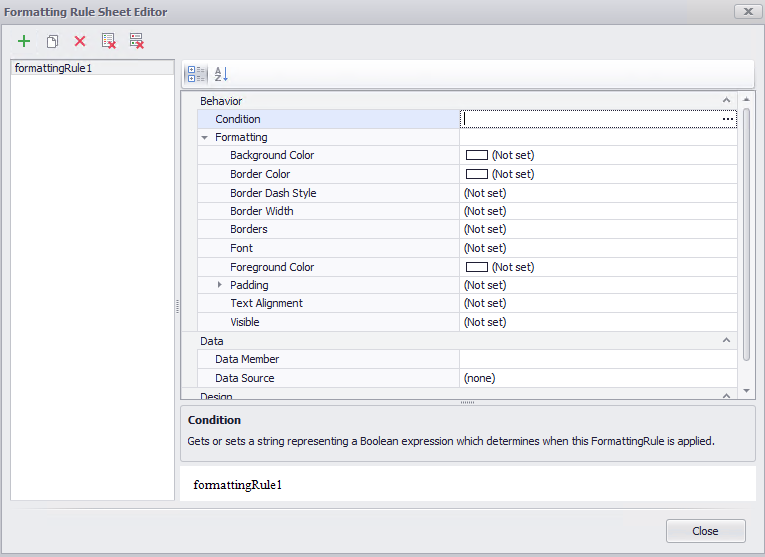
Click the plus icon to add a formatting rule. In the right panel, a properties section allows you to create a condition to determine formatting, as well as formatting options. Click on the ellipsis in the Condition field to open the Condition Editor.
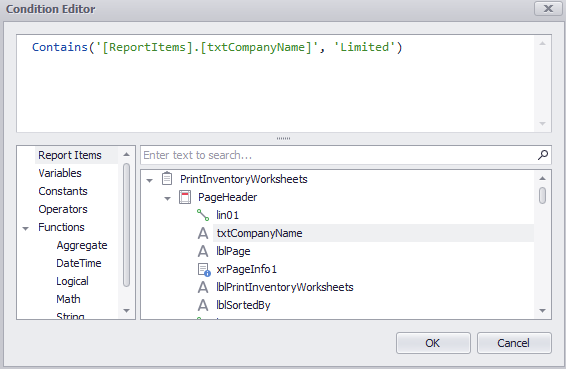
Create a condition that will determine formatting. When finished, click OK to return to the Formatting Rule Sheet Editor. The condition field will show the condition you created. Edit the formatting properties as desired.
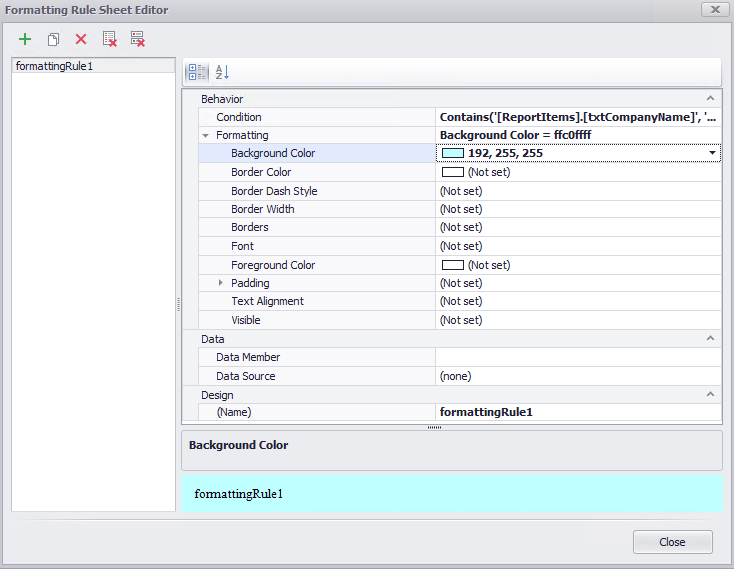
Once you are finished adjusting the formatting, click the Close button. The rule(s) appear in the Formatting Rules Editor. To apply a rule to the report, select a rule in the left panel. The directional arrows become active. Use the directional arrow to move the rule into the right panel, then click OK.
The formatting should appear in the selected report section when the condition you created is 'True', such as using red font if a value is greater than another value.
Saving Design Changes
To save your form or report changes, click Save in the Layout toolbar. By default, the layout is saved to the database. To save the layout in a file, select 'Use File' in the toolbar drop-down list. A file window will appear, which allows you to navigate to the location where you want to save the layout file.
The Dashboard Designer function allows you to create your own custom dashboards. This function will NOT allow you to customize or edit the dashboards supplied with Traverse directly, but you can create a new dashboard and copy an existing dashboard into the new one, essentially allowing you to edit an existing dashboard.
This function is best suited for implementers and those who know the Traverse data structure.
To create a new dashboard, click New. A Dashboard ID will be created.
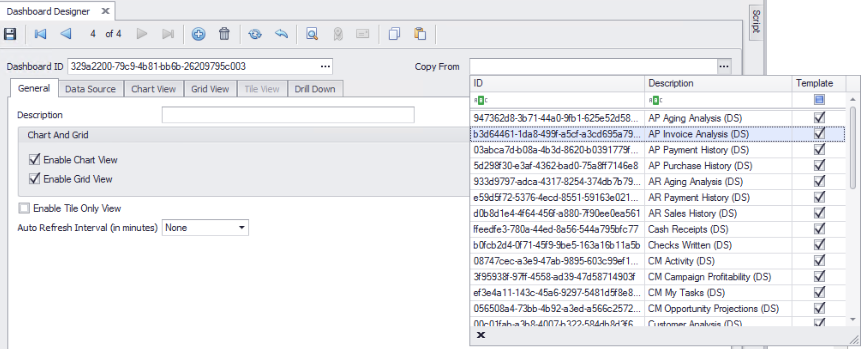
If you want to edit or customize an existing Traverse dashboard, copy the existing dashboard by selecting it in the Copy From drop-down list. This allows you to edit an existing Traverse dashboard while keeping the base dashboard untouched.
On the General tab
- Enter a Description for the dashboard. This description will appear in the list of available dashboards.
- Mark the Enable Chart View check box if you want the dashboard to be available as a chart.
- Mark the Enable Grid View if you want the dashboard to be available as a grid.
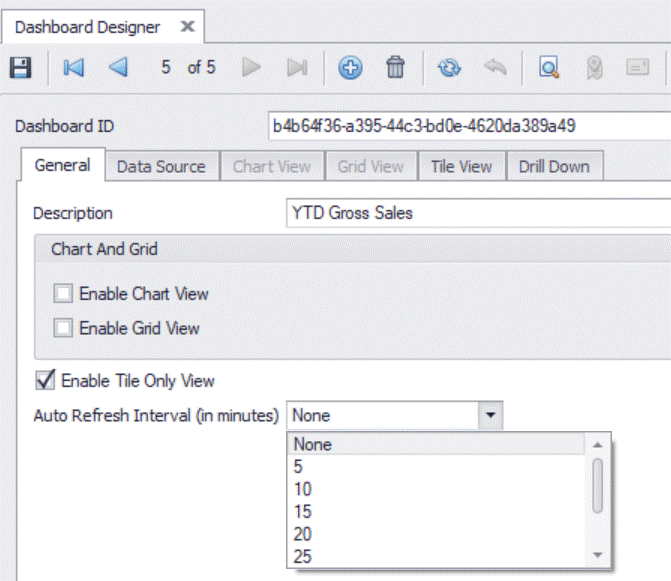
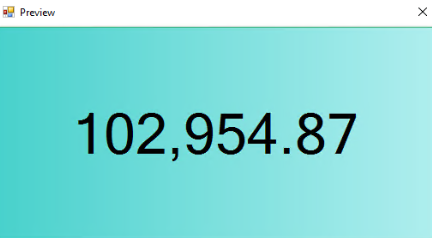
- The Tile View will display a single value only, such as a daily sales total. If you want to enable only the tile view (chart and grid view will be unavailable), mark the Enable Tile Only View check box.
- You can pre-define the auto-refresh interval in the Dashboard Designer when creating a new dashboard. Select an Auto Refresh Interval (in minutes) from the drop-down list. Note that using an auto-refresh interval that is too short may impact the performance of the system depending on the number of dashboard components, volume of data, and the complexity of the data transformation.
On the Data Source tab

The data source tab is where you create the query that will drive the dashboard. Click Query Builder to create a query. Note: If you are creating a Tile View dashboard, make sure your query has a single value as a result.
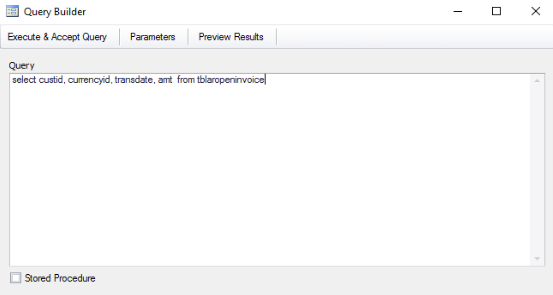
You can enter a query statement, or mark the Stored Procedure check box and enter the name of the stored procedure in the Query box.
If you want your query to have parameters a user can enter, click Parameters to open the Parameters screen.
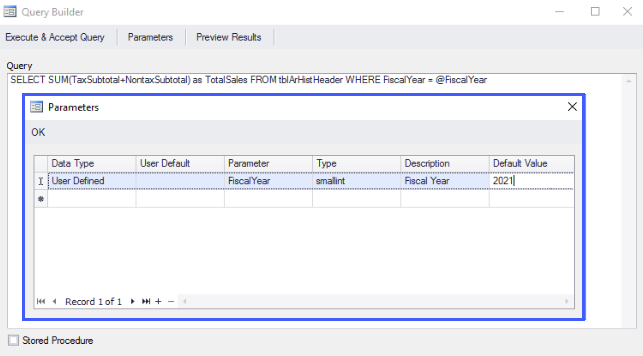
- Enter one or more parameters for your query. If your parameter is in the query statement itself, notice that the parameter is preceded with an '@' sign.
- Select a Data Type from the drop-down list. The options include:
- User Defined: You define the parameter
- Current User: Uses the current logged-on user
- Workstation Date: Uses the workstation date
- Current Date: Uses the current date
- User Default: Use a default that is assigned in the SM User Defaults - Admin function
- Click Preview Results to view the results of the query and ensure you will get the information you intend, as well as verify the query is valid.
- Click Execute & Accept Query to save the query statement.
On the Chart View tab
If you chose to enable Chart View on the General tab, the Chart View tab is where you establish how the data will be organized in the chart, as well as the default chart type.

- Select the Series Data Member from the drop-down list.
- Select the Argument Data Member from the drop-down list.
- Select the Value (numeric) Data Member from the drop-down list.
- Select a Default Chart Type from the drop-down list.
- Click Preview... to view the chart.
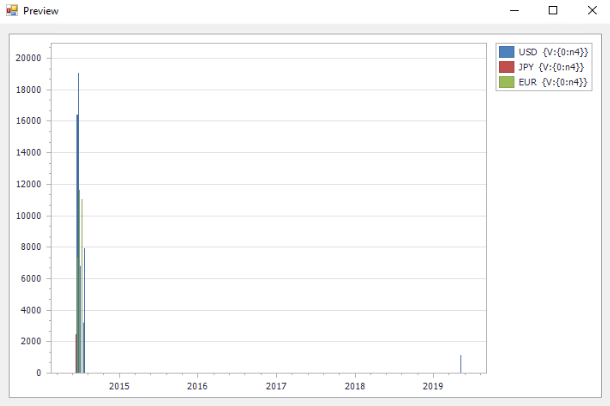
Tip: You can right-click on the chart to change the chart type and the palette.
On the Grid View tab
If you chose to enable Grid View on the General tab, the Grid View tab is where you establish how the data will be organized in the grid.
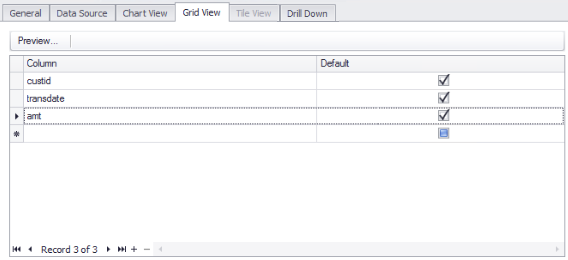
- Select each Column you want to appear in the grid.
- For each column, select whether you want the column to always be available by marking the Default check box. If you leave the Default check box clear, the column will be available to add to the grid via the column chooser.
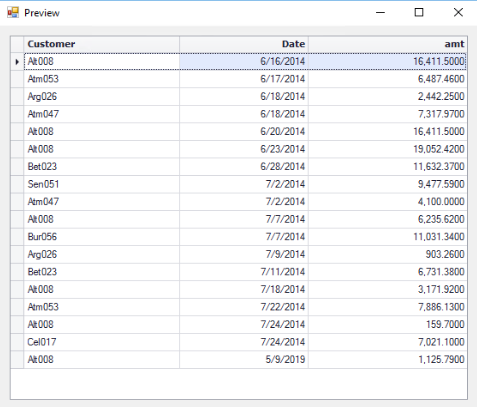
- Click Preview... to view the chart.
On the Tile View Tab
If you chose to enable Tile Only View on the General tab, the Tile View tab is where you establish how the data will be organized on the tile.
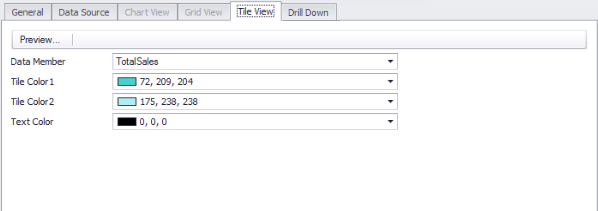
- Select the Data Member you want to appear on the tile.
- To make the tile background a gradient, select two different colors in the Tile Color 1 and Tile Color 2 fields. To make the tile background one solid color, select the same color in both the Tile Color fields.
- Select a Text Color for the tile.
- Click Preview... to view the tile.
On the Drill Down Tab
The Dashboard Designer provides the ability to drill down from dashboard grids to other functions in Traverse. This feature is primarily designed to work in conjunction with user-defined Views. Any function can be set up with a drilldown option, but context-sensitive parameters can be used only if the target function supports it.
Example: Using the drilldown feature with user-defined views
- Create a new view definition in Design Studio using the Views Table function on the System Data menu. My Customers in the image below is a custom view.

- Add this view to the Accounts Receivable Interactive Views menu using the System Menu function on the System Data menu. Set the Type as 'View', and use the view ID as the Document name.

- Use the Groups function on the SM Administration menu in Traverse to assign permissions to the new menu entry. See the Groups topic in the Traverse Help for more information.
- Use the Dashboard Designer in Design Studio to create a new dashboard definition. For example, create Customer Daily Sales, which includes data by customer ID for sales amount.
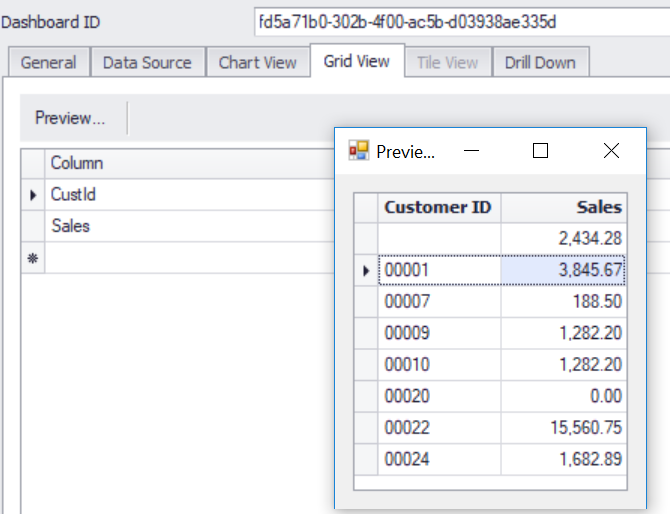
- Switch to the Drill Down tab to define the parameters. In this example, select CustId as the Column Name, “My Customer View” as the Menu ID, and specify the filter parameter as:
[CustId]=N’@CustId’. This setup means that when you double-click the Customer ID cell in the grid, “My Customer View” opens with filtered data for the selected customer ID.[CustId]is the field in My Customer View;@CustIdis the selected customer in the dashboard grid.
- Save your dashboard.
- Use the Groups function on the SM Administration menu in Traverse to assign permission to the new dashboard component.
- In order for your dashboard to appear in the Dashboards menu, you must first enable the dashboards in Traverse, then log out and log back into Traverse. Your dashboards will appear at the bottom of the Dashboard Options panel.
- Select the new dashboard from the Dashboard Options panel.
NOTE: In the example, instead of selecting a view, you could also select the customer setup function, and use @CustId as the Drilldown Filter. That instructs the customer setup function to open with the selected customer ID. It is important to note that not all functions support drilldown parameters. If linking to a specific data field is not necessary, you can leave the Drilldown Filter field empty. This is helpful when you just want to be able to open a function such as Order Entry to take action based on the dashboard data.
Use the Custom Layouts function to assign a screen with a customized layout to specific users. In order to assign a screen with this function, you first open the screen with the Screen Layout function and save the screen to the database.
Note: If a customized layout is saved to database and not assigned to specific users with the Custom Layout function, the customized screen will be available to all users with access to that screen.
Assign a custom layout to a user
- Open the Custom Layout function in the System Data menu of Traverse Design Studio.
- A list of screens that can be assigned opens, along with the users assigned those screens. If you want to add a screen that isn't listed, select a screen to edit from the Screen Layout function and save that customized screen to the database.

- Highlight the screen you want to assign and click Assign To. The Assign Custom Layout dialog box opens.
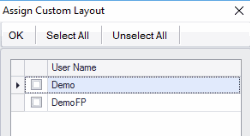
- Mark the check box(es) for the user IDs you want this custom screen to be assigned to. Use the Select All button to mark all the users, or the Unselect All button to clear all check boxes. When finished, click OK.
- The Custom Layout screen shows the users assigned to the screen layout. Those users see the customized screen when they use the assigned function.

Copy custom layout settings from another company
You can use the Copy From function on the Custom Layout screen to copy Custom Layout settings from another company.
- Click Copy From in the Custom Layout function. The Copy Custom Layout dialog box opens.
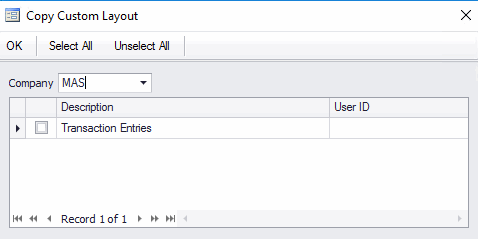
- Select the Company from which you want to copy the custom layout settings. The screen populates with the custom screen descriptions and the user IDs assigned to them.
- Check the boxes of the custom layout assignments that you want to import in the currently open company. Click Select All to check all of the assignments, and click Unselect All to clear all of the check boxes.
- Click OK to import the selected custom layout assignments into the currently open company. The newly imported information reflects in the Custom Layout screen, and you can use the screen to further add or delete custom field assignments.
Copy custom layout settings to another company
You can use the Copy To function on the Custom Layout screen to copy Custom Layout settings to another company.
- Click Copy To in the Custom Layout function. The Copy Custom Layout dialog box opens.
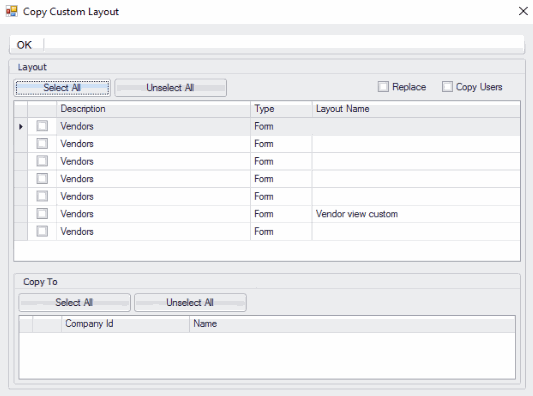
- Check the boxes of the custom layout assignments that you want to copy into another company. Click Select All to check all of the custom layouts, and click Unselect All to clear all of the check boxes.
- If you want to replace layouts in the destination company, mark the Replace check box. If you want to copy the assigned users as well, mark the Copy Users check box.
- Mark the check box for each Company to which you want to copy the custom layout settings. Click Select All to check all of the companies, and click Unselect All to clear all of the check boxes.
- Click OK to copy the selected custom layouts into the selected company(ies).
The Datasource Schema function allows you to see the datasource tables and fields for reports. You can add new schemas or customize schemas for reports. The report definitions are stored in the database, which will not distribute .xsd files, but you have the option to store schemas as .xsd files outside the database. The schema will also show custom fields you may have added.
You can use the command buttons on the toolbar to:
- To import a schema (.xsd) file, use the Import Schema button,
- To view the schema, use the View Schema button.
- To create a custom schema, use the Custom Schema button. The Custom Schema screen will appear. Enter a Description for the custom schema, then click OK.

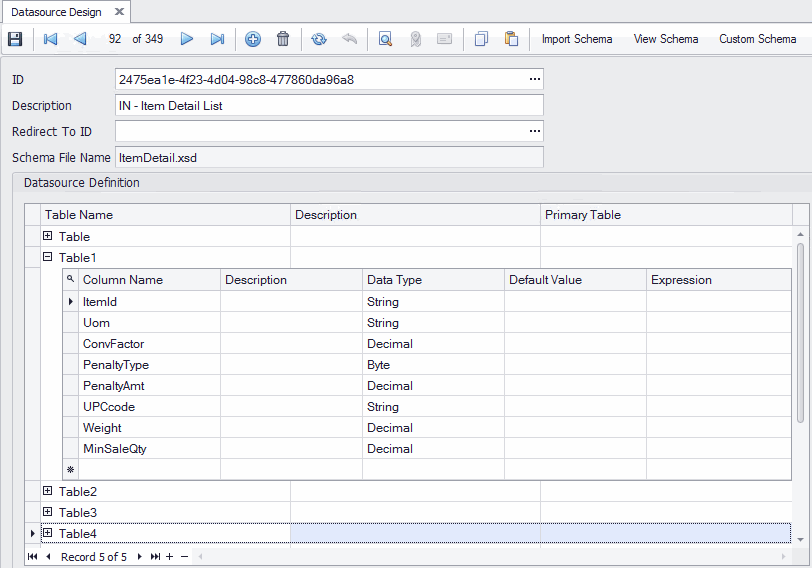
As with other Design Studio functions, save a named version of the datasource, then make your changes to the named version, not the original version.
- Select a datasource ID to customize from the drop-down list.
- Enter/edit the datasource Description.
- Select an ID to which you want to redirect the datasource.
- If you imported the schema or if the schema exists as an .xsd file, the Schema File Name will appear. This is a read-only field.
- The Datasource Definition grid will list the table(s) and associated fields used in the datasource. Click on the plus sign next to each table to expand the list of fields (columns).
- If you are creating a new table, enter a Table Name, Description (optional), and Primary Table (optional).
- When you tab to the next row, a plus sign will appear beside the table name you just entered. Click the plus sign to add columns to the table. Enter a Column Name and Description (optional) for the column. Select a Data Type for the field. If the field has a default value, enter it into the Default Value column. If the column is defined by an expression, enter the expression in the Expression column. Tab to the next row. Repeat as needed.
- Save your changes using the Save button on the toolbar.
The Alerts Designer function allows you to create your own custom alerts. This function will NOT allow you to customize or edit the alerts supplied with Traverse directly, but you can create a new alerts and copy an existing alerts into the new one, essentially allowing you to edit an existing alert.
Note:In order to use Traverse Alerts functionality, the Traverse Alert Service must be installed on your computer. See the Install Traverse Alert Service topic for installing Traverse Alerts Service.
To create a new alert, click New.
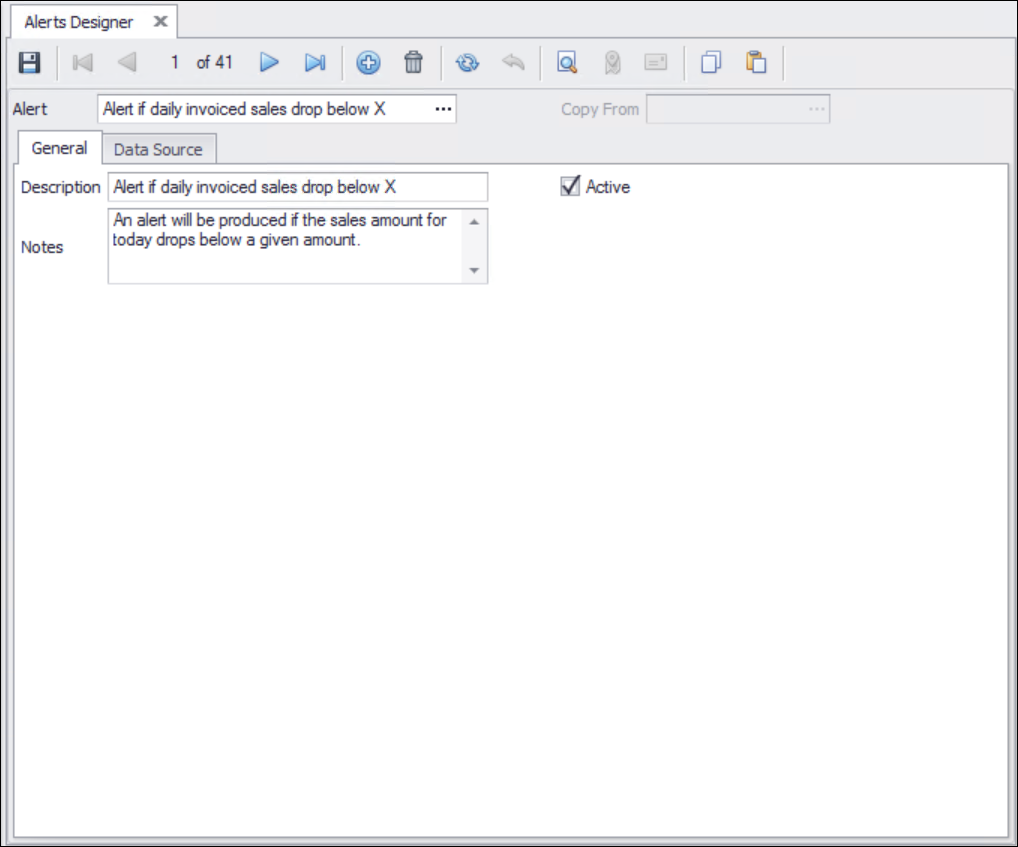
On the General tab
-
Enter a Description for the alert. This description will appear in the list of available alerts.
-
Mark the Active check box if you want the alert to be active.
- Enter the applicable notes for the alert in the Notes.
- Save your changes using the Save button on the toolbar.
On the Data Source tab
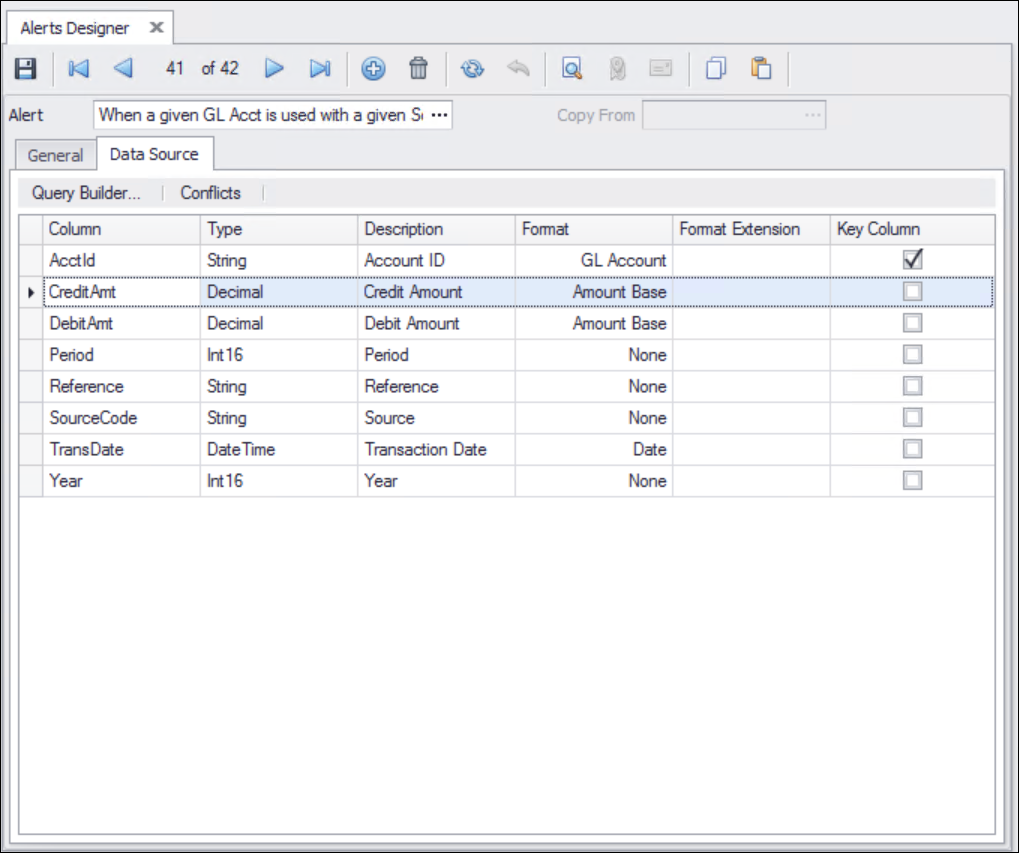
The data source tab is where you create the query that will drive the alert. Click Query Builder to create a query.
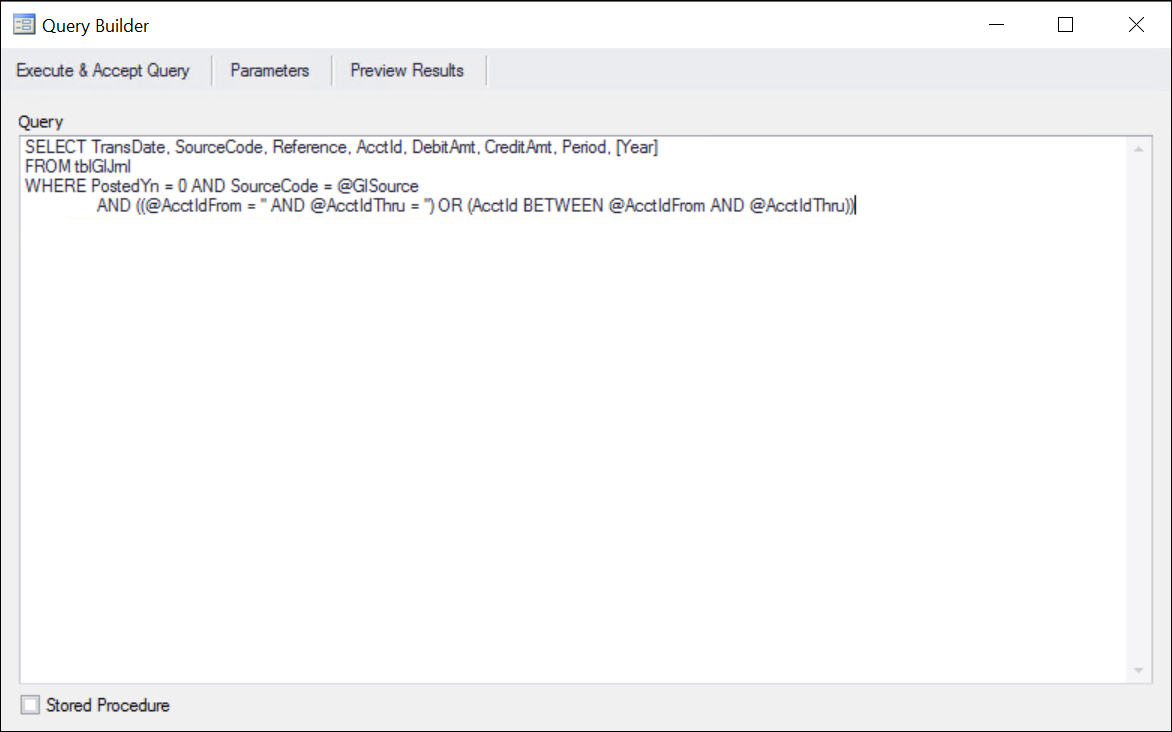
You can enter a query statement, or mark the Stored Procedure check box and enter the name of the stored procedure in the Query box.
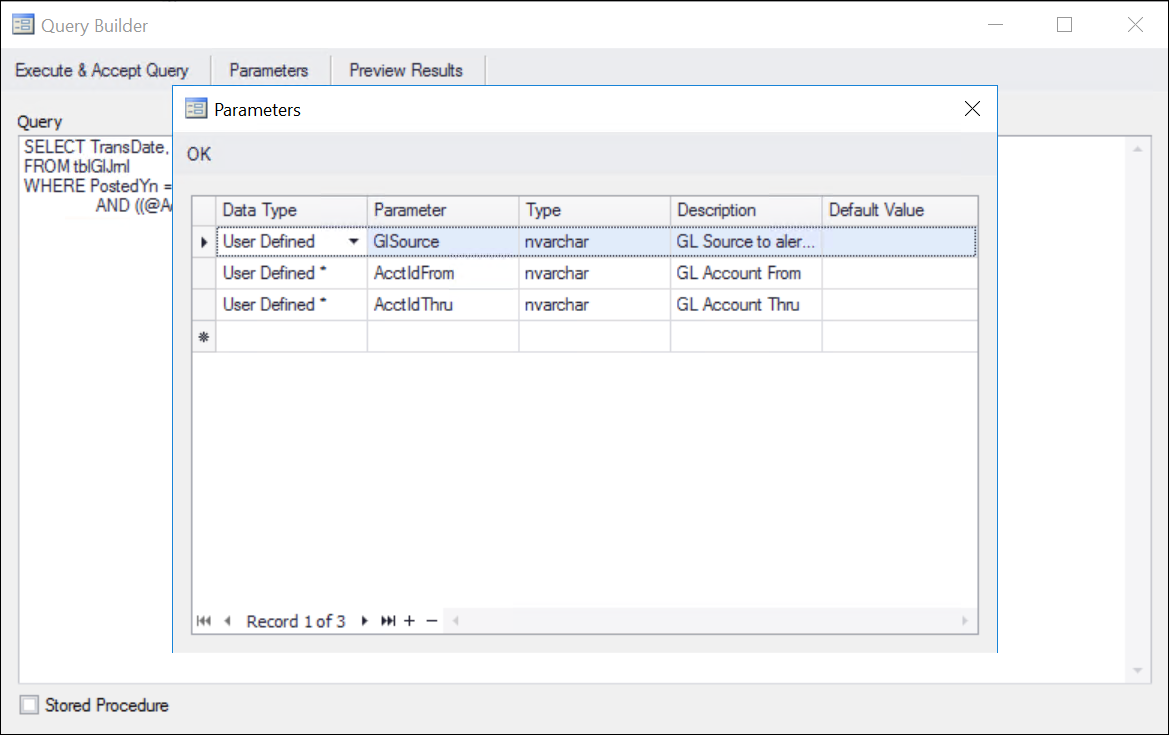
If you want your query to have parameters a user can enter, click Parameters to open the Parameters screen.
-
Enter one or more parameters for your query.
-
Click Preview Results to view the results of the query and ensure you will get the information you intend, as well as verify the query is valid.
-
Click Execute & Accept Query to save the query statement.
- Save your changes using the Save button on the toolbar.
Use the Save Layout button and Open Layout button to save and open the screens you customize. Use the Reset Layout button to return the screen to the original settings. Because you can return the screen to the original state at any time by clicking the Reset Layout button, you can experiment with the screen layout safely.
Move a Field Within a Screen
To move a field within a screen, simply point to the field, hold down the mouse button, and drag it to the desired location on the screen. When you release the mouse button, the field is placed in the selected position, and the other fields are adjusted accordingly.
Move a Field from One Tab to Another
To move a field from one screen tab to another, point to the field you want to move, hold down the mouse button, and drag it to the tab heading on the screen to which you want to move the field. The associated tab layout appears, on which you can then place the field.
Test a Screen Layout Within Traverse Design Studio
Once you have finished making field changes to the screen, you can test the functionality of the rearranged screen by closing the Customize Layout dialog box. The screen appears to function as it will within Traverse, displaying your company data.
Note: Changes made to your company data while testing screens within Traverse Design Studio are not written to the database, and therefore will not affect the company data.
To return to the Customize Layout dialog box, right-click anywhere within the testing screen and choose Customize Layout.
The Customize Layout dialog box reappears, and you can continue making changes to the screen.
You can also right-click anywhere in the screen and choose Reset Layout to return the form to its original state.
Save a Screen Layout
Once you are satisfied with the screen layout, you can save it for use within Traverse on one or more workstations. You can save the layout as an .FRM file that can be sent and imported into different databases, or save the layout in your current database which will over-write the previous layout in the system.
If you choose Save to File, a dialog box will open to allow you to choose the location for the file. If you choose Save to Database, the customizations will be saved into your database when you click the Save button.
NOTE: if you save the layout to the database, all users who use the database will use the same layout for that function.
To save the screen layout to the database:
- Select Save to Database in the Customize Layout dialog box.
- Click the Save button on the Customize Layout dialog box. The layout will replace the current layout in your database, and will be used for that screen by all users who use the database.
To save the screen layout to a file:
- Select Save to File in the Customize Layout dialog box.
- Click the Save button on the Customize Layout dialog box.
- Choose a location to save the .FRM file which contains the modified layout.
- After you have saved the file, copy the .FRM file to the Traverse root folder on each workstation you want to modify. When you subsequently open the function on the workstation, the modified screen will appear.
Custom Screen Layout Deployment
To deploy a customized screen layout for users of your system database, save the screen layout to the database as described above. All users of the database will view and use the customized screen.
You may want certain users to work with different screen layouts; perhaps hiding certain fields for some users or changing the layout to optimize it for a user’s role. You can achieve this by saving different layouts of a screen to files using unique filenames.
For example, the default file name for a customized Customer screen is CustomerControl.FRM. You could change the name of the file when you save it to CustomerControl_Acct.FRM for an accounting user, then make other changes to the form and save it again using the name CustomerControl_Sale.FRM for a user in sales.
After saving the files, simply copy the appropriate file to each user’s workstation, renaming it to the standard CustomerControl.FRM name on that user’s workstation.
