Traverse Global v11.2 - Service Repair
Post Billings
Use the Post Billings function to post billings to General Ledger, Accounts Receivable History, and Accounts Receivable Open Invoice tables.
When you post billings, open invoices are created for each billing and miscellaneous credit entry recorded as a billing. The due date for each billing is updated from the invoice date and the number of due days for the terms code. The discount date is updated from the invoice date and the number of discount days from the same terms code.
The system creates temporary tables to store job transaction material and labor line item entries and totals. As information is posted, job transaction material and labor information is posted first, then totals are updated. When all job transaction material and labor line items are posted, summary GL entries are calculated.
If Service Repair interfaces with General Ledger, debit and credit entries are created in the GL Journal. If detail information is posted, entries are made for each job transaction material and labor line item. If summary information is posted, one entry is made for each account. If the accounting period is closed, you can either Edit Billings or use the System Manager Period Conversion function to open the accounting period and then post the billings. See the Period Conversion function in the System Manager Training Manual for more information.
Posting Billings also updates balance and sales fields in the customers’ records. The taxable and nontaxable totals from the billings and the tax collected update the tax location records in System Manager.
When posting invoice billings for material and labor line items, cost entries reverse WIP entries made when material charges and time card entries were posted and move actual cost to COGS.
You cannot post job transactions that are on hold.
Cost entries reverse WIP entries made when material charges and time card entries were posted (see Post Transactions for more information) and move actual cost to COGS.

The Material WIP, Material Burden WIP, and Material Burden accounts will come from the distribution code assigned to the department selected for the job transaction. The Material COGS account will come from the account code assigned to the inventory item, or if the item is a System Manager description item, the account will come from the setup of the description item. If the item is neither an Inventory item or System Manager description item the Inventory account will come from the Accounts Receivable business rules Default Inventory Account.
When Service Repair interfaces with General Ledger, entries are made to the Journal for Invoiced Labor to the following accounts:

The accounts used to post the labor reported in the Transaction Billing entry will come from the distribution code assigned to the department selected for the job transaction.
Sales entries create entries for prices billed in Edit Billings. When you post invoices for billings for job transactions, entries are made to the these accounts:
When Service Repair interfaces with General Ledger, entries are made to the Journal for Credit Memo Material to the following accounts:

The Material WIP, Material Burden WIP, and Material Burden accounts will come from the distribution code assigned to the department selected for the job transaction. The Inventory account will come from the account code assigned to the inventory item, or if the item is a System Manager description item, the account will come from the setup of the description item. If the item is neither an Inventory item or System Manager description item the Inventory account will come from the Accounts Receivable business rules Default Inventory Account.
When Service Repair interfaces with General Ledger, entries are made to the Journal for Credit Memo Labor to the following accounts:

The accounts used to post the labor reported in the Transaction Billing entry will come from the distribution code assigned to the department selected for the job transaction.
Sales entries create entries for prices billed in Edit Billings. When you post invoices for billings for job transactions, entries are made to the these accounts:
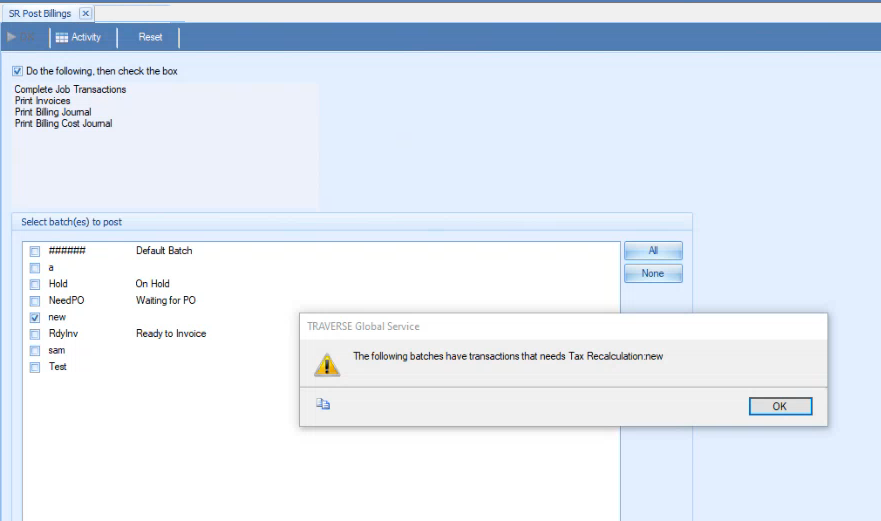
To post billing transactions, follow these steps:
- Complete Job Transactions.
- Print Invoices.
- Print the Billing Journal and the Billing Cost Journal. If the Post Without Printing Journals business rule is set to No, a warning will appear stating the journal must be printed before posting.
- Mark the Do the following, then check the box check box.
- Select the batches to post. This option only appears if you elected to use batch processing in the Business Rules function. You can use the All button to select all batches to post or you can use the None button to deselect all batches from posting.
- Enter comments for the post, if applicable, in the Comments field.
- Click a command button to
- If the transactions are not calculated, an error will display indicating Needs Tax Recalculation.
| Click | To |
| OK | Begin posting. |
| Activity | Display the Activity Log to view posting activity. |
| Reset | Set all fields to their default values. |